Category: Instant Pot Recipes

  • Instant Pot Chicken Tacos

    Instant Pot Chicken Tacos

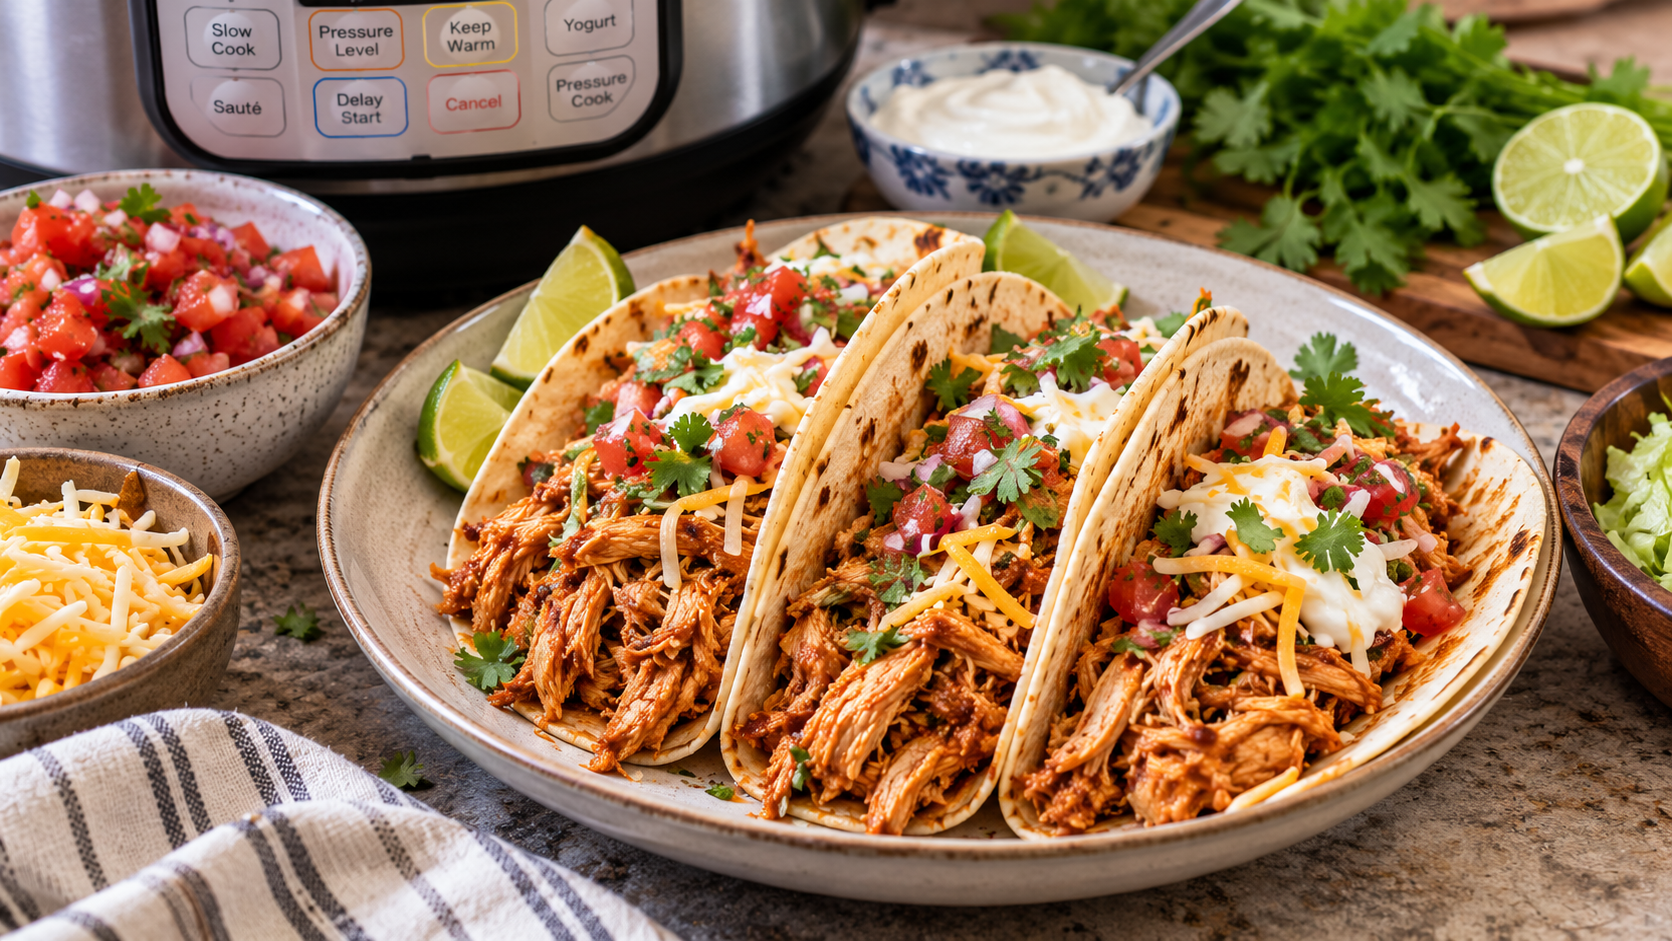
    Instant Pot Chicken Tacos are one of the most popular Mexican-inspired meals for busy families because they combine convenience, flavor, and versatility in a single recipe.

    Using the Instant Pot allows you to create tender, juicy shredded chicken in a fraction of the time required by traditional cooking methods. The pressure-cooking process locks in moisture while infusing the chicken with rich flavors from salsa, spices, garlic, and onions.

    This results in flavorful taco meat that tastes like it has been simmering for hours. Whether you are preparing a quick weeknight meal, feeding a large family, or planning a gathering with friends, this easy chicken taco recipe delivers consistent results every time.

    The best part is that the ingredients are simple and readily available, making it a practical option for home cooks looking for a reliable dinner solution that everyone can enjoy.

    What Makes Instant Pot Chicken Tacos So Popular

    The growing popularity of Instant Pot recipes is largely due to their ability to save time without sacrificing flavor. Chicken tacos made in a pressure cooker are a perfect example of this benefit.

    Traditional shredded chicken recipes often require slow cooking for several hours, but the Instant Pot dramatically reduces cooking time while still producing incredibly tender meat.

    The combination of salsa, cumin, oregano, garlic, and chipotle chili powder creates a bold and authentic flavor profile that pairs perfectly with tortillas and fresh toppings. Because the recipe is simple to prepare, even beginner cooks can achieve excellent results.

    It is also highly customizable, allowing each person to build tacos according to their own tastes. This flexibility makes it a favorite choice for family dinners, meal prep sessions, and casual entertaining.

    The Secret to Juicy and Flavorful Shredded Chicken

    One of the most important factors in creating exceptional chicken tacos is ensuring that the chicken remains moist and flavorful throughout the cooking process.

    The Instant Pot excels at this because the sealed environment traps steam and cooking liquids around the chicken. As the pressure builds, the chicken absorbs the flavors of the salsa, seasonings, onions, garlic, and beer.

    This creates layers of flavor that penetrate deep into the meat rather than remaining only on the surface. Once cooked, the chicken shreds easily and mixes with the flavorful sauce left in the pot.

    Every bite becomes rich, juicy, and packed with delicious taco flavor. This cooking method consistently produces superior results compared to boiling or baking chicken for shredding.

    Why Salsa Is Essential for Authentic Flavor

    Restaurant-style salsa plays a key role in the success of this recipe. Beyond adding moisture, salsa contributes a balance of tomatoes, peppers, onions, and seasonings that enhance the overall flavor of the chicken.

    During pressure cooking, the salsa combines with the natural juices released from the chicken, creating a rich and flavorful sauce. This sauce coats every strand of shredded chicken and helps maintain moisture even after storage.

    Choosing a quality salsa can significantly impact the final result. Mild, medium, or hot varieties can all be used depending on personal preference. The salsa acts as the flavor foundation for the recipe, helping create restaurant-quality chicken tacos with minimal effort.

    The Role of Seasonings in Building Flavor

    The seasoning blend used in these Instant Pot Chicken Tacos creates a balanced and authentic Mexican-inspired taste. Chipotle chili powder contributes a subtle smoky heat that enhances the chicken without overpowering it.

    Ground cumin provides earthy depth and warmth, while dried oregano adds herbal complexity. Garlic and onions bring savory richness that develops further during cooking.

    Together, these ingredients create a flavor profile that is both bold and approachable. Because the seasonings are combined with salsa and cooking liquid, they distribute evenly throughout the chicken. This ensures that every bite delivers consistent flavor and eliminates the need for excessive seasoning after cooking.

    Choosing Between Chicken Breasts and Chicken Thighs

    One of the great advantages of this recipe is its flexibility regarding the choice of chicken. Boneless, skinless chicken thighs are often preferred because they contain slightly more fat, which helps create exceptionally juicy shredded chicken.

    Their rich flavor makes them ideal for taco fillings. However, chicken breasts are equally effective and provide a leaner alternative. The cooking times differ slightly, but both cuts produce excellent results when prepared correctly in the Instant Pot.

    Home cooks can choose based on dietary preferences, availability, or personal taste. Regardless of the cut selected, the pressure-cooking process helps ensure tender, easy-to-shred chicken that works beautifully in tacos and other dishes.

    Why Browning the Chicken Improves Taste

    Although it may be tempting to skip the browning step, searing the chicken before pressure cooking contributes significantly to the final flavor. Browning creates a deeper, more complex taste through caramelization on the surface of the meat.

    This process also leaves flavorful bits on the bottom of the pot, which are later incorporated into the cooking liquid when the salsa and beer are added.

    These browned bits enhance the sauce and contribute to a richer overall flavor. Taking a few extra minutes to sear the chicken results in a noticeable improvement in both texture and taste, making the finished tacos even more satisfying.

    How Beer Enhances the Cooking Process

    Beer is often used in Mexican-inspired cooking because it adds depth and complexity to savory dishes. In this recipe, Mexican beer contributes subtle malt flavors that complement the spices and salsa.

    It also helps tenderize the chicken during cooking, resulting in an even juicier texture. As the chicken cooks under pressure, the beer blends with the salsa and seasonings to create a flavorful cooking liquid.

    For those who prefer not to use beer, chicken broth can be substituted without significantly affecting the cooking process. Both options provide enough liquid for pressure cooking while helping create a rich and flavorful sauce.

    Creating the Ultimate Taco Night Experience

    Taco night is popular because it encourages customization and participation. Once the shredded chicken is ready, everyone can assemble their own tacos using their preferred toppings and tortillas.

    This interactive dining experience makes meals more enjoyable for both children and adults. Soft flour tortillas, traditional corn tortillas, or crunchy taco shells all work well with the flavorful chicken filling.

    Offering a variety of toppings allows guests and family members to personalize their tacos according to their tastes. This flexibility makes Instant Pot Chicken Tacos suitable for everything from casual family dinners to festive celebrations.

    Best Toppings for Chicken Tacos

    Fresh toppings add texture, color, and flavor contrast to the warm shredded chicken. Pico de gallo contributes freshness and brightness, while sliced avocado adds creaminess and richness.

    Jalapeños provide a spicy kick for those who enjoy extra heat. Additional toppings such as shredded lettuce, cheese, cilantro, salsa verde, diced onions, sour cream, and lime wedges can elevate the overall experience.

    Combining different toppings allows each taco to feel unique while complementing the savory chicken filling. The contrast between warm chicken and cool, fresh toppings creates a balanced and satisfying meal that appeals to a wide range of tastes.

    More Ways to Enjoy Instant Pot Chicken Taco Meat

    Although tacos are the most obvious use for this shredded chicken, the possibilities extend far beyond traditional tortillas. The chicken can be used as a filling for burritos, quesadillas, enchiladas, taquitos, and nachos.

    It also works beautifully in rice bowls, salads, stuffed peppers, and sandwiches. Because the chicken is already seasoned and shredded, it serves as a convenient protein option for many different meals throughout the week.

    This versatility increases the value of the recipe and makes it an excellent choice for meal prep. A single batch can easily be transformed into several different meals, reducing kitchen workload while keeping menus interesting.

    Why This Recipe Is Ideal for Entertaining

    Large gatherings often require dishes that are easy to prepare, serve, and enjoy. Instant Pot Chicken Tacos meet all of these requirements. The shredded chicken can be kept warm in the Instant Pot while guests help themselves from a taco bar setup.

    This serving style encourages customization and minimizes stress for the host. Because the recipe can be scaled easily, it is suitable for birthday parties, family reunions, baby showers, sports events, and holiday gatherings. The familiar flavors and customizable presentation make it a reliable crowd-pleaser that appeals to guests of all ages.

    Storage and Meal Prep Benefits

    Meal prep becomes much easier when versatile proteins like shredded chicken are available. Leftover chicken can be stored in airtight containers in the refrigerator for several days without losing quality.

    Keeping some of the cooking liquid with the chicken helps preserve moisture during storage. Having prepared chicken ready to use allows for quick lunches and dinners throughout the week.

    Simply reheat and serve in tacos, bowls, wraps, or salads. This convenience makes the recipe especially valuable for busy households seeking nutritious and flavorful meals with minimal preparation time.

    Freezing and Reheating Instructions

    The shredded chicken freezes exceptionally well, making it ideal for long-term meal planning. After cooling completely, divide the chicken into meal-sized portions and place them in freezer-safe bags or containers.

    Removing excess air helps prevent freezer burn and maintains quality. Frozen chicken can be stored for up to three months. When ready to use, thaw overnight in the refrigerator and reheat gently with a small amount of water or chicken broth.

    This helps restore moisture and ensures that the chicken remains tender and flavorful. Freezing leftovers reduces food waste and provides a convenient ready-made meal for future use.

    Notes

    Using Chicken Breasts Instead of Thighs

    Chicken breasts work just as well as thighs but may require a slightly longer cooking time to achieve maximum tenderness.

    Non-Alcoholic Alternative

    Chicken broth can be substituted for the Mexican beer while still producing delicious results.

    Tortilla Options

    Both flour and corn tortillas are excellent choices. Select whichever best suits your preferences or dietary needs.

    Storage Recommendations

    Store leftover chicken in an airtight container in the refrigerator for up to 4 days.

    Freezer Storage

    Freeze cooled shredded chicken for up to 3 months in freezer-safe bags or containers.

    Serving Suggestions

    Serve with pico de gallo, avocado, jalapeños, salsa verde, shredded lettuce, cheese, cilantro, sour cream, or fresh lime juice for additional flavor and texture.

    Instant Pot Chicken Tacos Recipe

    Tender, juicy shredded chicken cooked in the Instant Pot with salsa, garlic, onions, and Mexican-inspired spices. Perfect for tacos, burrito bowls, nachos, enchiladas, and meal prep.

    Preparation & Cooking Duration

    • Preparation Time: 20 minutes
    • Cooking Time: 25 minutes
    • Total Time: 45 minutes

    Servings

    • 6 servings

    Ingredients

    Chicken Base

    • 2 pounds boneless, skinless chicken thighs or chicken breasts
    • Kosher salt and freshly ground black pepper, to taste
    • 1 tablespoon canola oil

    Aromatics & Seasonings

    • 1 small onion, diced
    • 3 cloves garlic, minced
    • 1 teaspoon chipotle chili powder
    • 1 teaspoon ground cumin
    • 1 teaspoon dried oregano

    Cooking Liquid

    • 1 cup restaurant-style salsa
    • ½ cup Mexican beer, such as Modelo

    For Serving

    • Flour or corn tortillas
    • Pico de gallo
    • Sliced avocado
    • Sliced jalapeños

    Step-by-Step Instructions

    1. Turn the Instant Pot to the High Sauté setting.
    2. Season the chicken generously with kosher salt and black pepper.
    3. Add canola oil to the pot. Working in batches if necessary, brown the chicken for 3–4 minutes per side until lightly golden. Transfer to a plate.
    4. Add diced onion and cook for 2–3 minutes until softened.
    5. Stir in garlic, chipotle chili powder, cumin, and oregano. Cook for about 1 minute until fragrant.
    6. Pour in the salsa and Mexican beer. Stir well while scraping any browned bits from the bottom of the pot.
    7. Return the chicken to the Instant Pot and gently coat it with the salsa mixture.
    8. Secure the lid and set the valve to the sealing position.
    9. Cook on High Pressure:
      • 8 minutes for chicken thighs
      • 13 minutes for chicken breasts
    10. Once cooking is complete, carefully perform a quick pressure release according to the manufacturer’s instructions.
    11. Remove the chicken and shred using two forks.
    12. Return the shredded chicken to the sauce and stir to combine.
    13. Taste and adjust seasoning with additional salt and pepper if desired.
    14. Serve warm in flour or corn tortillas with pico de gallo, sliced avocado, and jalapeños.

    Nutritional Information

    Approximate values per serving (excluding tortillas and toppings)

    • Calories: 290
    • Protein: 32g
    • Fat: 13g
    • Carbohydrates: 6g
    • Fiber: 1g
    • Sugar: 3g
    • Sodium: 420mg

  • Instant Pot Mexican Rice Recipe – Easy, Fluffy, Restaurant-Style Side Dish Made in Under 20 Minutes

    Instant Pot Mexican Rice Recipe – Easy, Fluffy, Restaurant-Style Side Dish Made in Under 20 Minutes

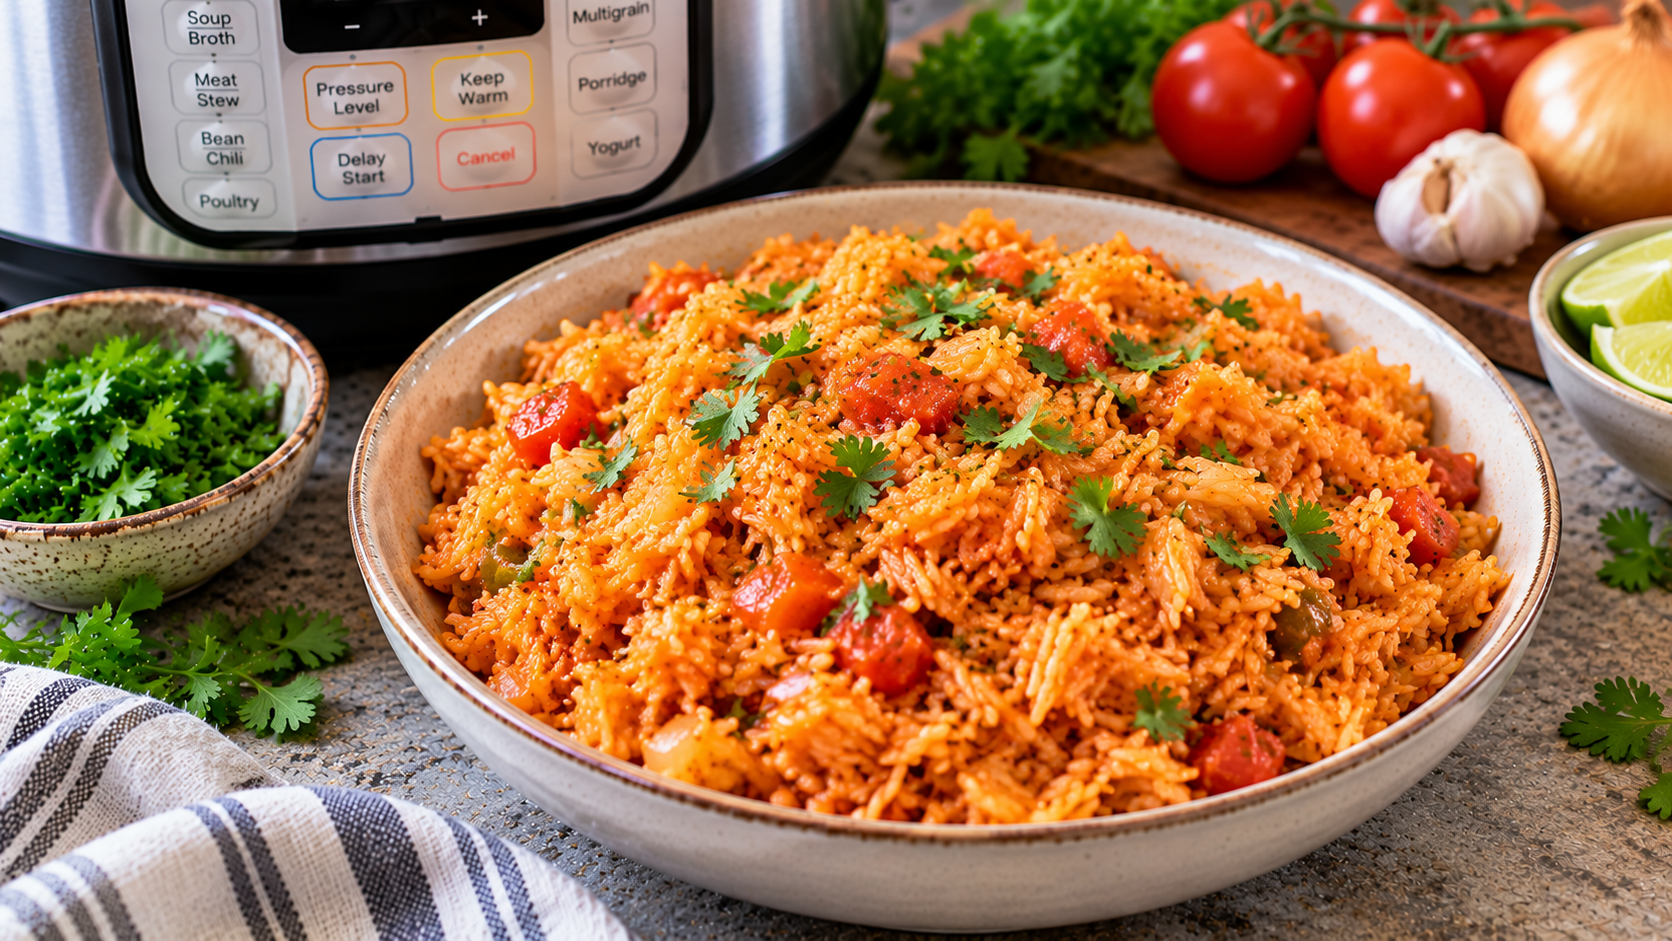
    Instant Pot Mexican Rice recipe is one of the most searched and loved pressure cooker side dishes because it delivers authentic restaurant-style flavor with minimal effort and consistent results.

    This easy Instant Pot Mexican rice is fluffy, perfectly seasoned, and made with simple pantry staples like long grain white rice, tomato sauce, garlic, and broth or water. Unlike stovetop methods that require constant attention, the Instant Pot version simplifies the cooking process while locking in flavor and texture.

    It is ideal for busy weeknights, taco nights, burrito bowls, enchilada dinners, or meal prep. The pressure cooking method ensures each grain cooks evenly, resulting in a light, fluffy Mexican rice that doesn’t turn mushy or sticky when the correct technique is followed.

    Why Instant Pot Mexican Rice Is Popular Side Dishes

    The popularity of Instant Pot Mexican Rice comes from its ability to recreate authentic Mexican restaurant-style rice in a fraction of the time.

    Traditional Mexican rice recipes often require careful stovetop simmering, constant stirring, and close monitoring to avoid burning or uneven cooking.

    With the Instant Pot, the process becomes almost hands-free once ingredients are added. The sealed pressure environment allows the rice to absorb tomato flavor deeply while maintaining a fluffy texture.

    This makes it one of the most reliable easy Instant Pot side dish recipes for beginners and experienced cooks alike.

    It pairs beautifully with tacos, grilled meats, fajitas, enchiladas, and even simple vegetarian meals. Its versatility and consistent results make it a go-to recipe for family dinners and meal prep planning.

    Ingredients Overview for Authentic Mexican Rice Flavor

    This Instant Pot Mexican Rice recipe uses simple, widely available ingredients that work together to create bold flavor and fluffy texture.

    Long grain white rice is the foundation, chosen for its ability to stay separate and fluffy under pressure cooking. Vegetable oil is used to toast the rice, enhancing both flavor and structure.

    Garlic adds aromatic depth, while tomato sauce gives the rice its signature red color and mild tangy taste. Salt and black pepper provide seasoning balance. Water or chicken broth forms the cooking liquid, with broth adding richer flavor complexity.

    Each ingredient plays a specific role in building the final restaurant-style Mexican rice texture. The key to success is maintaining the correct ratios and not altering the core ingredient balance, ensuring consistent pressure cooker rice results every time.

    Choosing the Right Rice for Fluffy Instant Pot Mexican Rice

    Selecting the right type of rice is essential for achieving fluffy Instant Pot Mexican Rice. Long grain white rice is the best option because it contains less starch compared to short grain varieties, which helps prevent stickiness.

    When pressure cooked, long grain rice expands evenly, producing separate grains with a light texture similar to restaurant-style Mexican rice.

    Brown rice can be used as an alternative, but it requires longer cooking time and additional liquid adjustment, which changes the final texture. Rinsing rice is optional in this recipe because sauté-toasting helps control starch release.

    The Instant Pot method relies heavily on correct rice type selection, as using the wrong variety can result in mushy or clumped rice. Understanding this simple ingredient science ensures consistent success with every batch of pressure cooker Mexican rice.

    Step-by-Step Instant Pot Cooking Method for Perfect Results

    Making Instant Pot Mexican Rice is simple when the pressure cooking steps are followed correctly. First, the Instant Pot is set to sauté mode, and vegetable oil is heated before adding rice.

    The rice is lightly toasted for several minutes until golden, which helps lock in flavor and improve texture. Garlic is then added briefly to release aroma without burning.

    Next, tomato sauce, salt, pepper, and water or broth are added and gently stirred while scraping the bottom to prevent sticking. The lid is sealed, and the Instant Pot is set to high pressure for 12 minutes.

    After cooking, a 5-minute natural release allows steam to settle before a quick release is performed. Finally, the rice is fluffed gently with a fork, creating light and separated grains perfect for serving.

    Importance of Toasting Rice for Authentic Mexican Rice Flavor

    Toasting the rice is one of the most important steps in making restaurant-style Instant Pot Mexican Rice. This step, done using sauté mode, allows the rice grains to absorb oil and develop a slightly nutty flavor before pressure cooking begins.

    It also helps create a protective coating around each grain, reducing the risk of mushiness during pressure cooking. In traditional Mexican cooking, rice is often browned in oil for similar reasons, and the Instant Pot method replicates this essential technique.

    Proper toasting also improves the final color and gives the dish a richer, deeper flavor profile. Skipping this step may result in softer, less flavorful rice. For best results, the rice should be stirred frequently during toasting to ensure even color and prevent burning at the bottom of the pot.

    Building Flavor with Tomato Sauce, Garlic, and Broth

    The signature taste of Instant Pot Mexican Rice comes from its simple but powerful flavor base made of tomato sauce, garlic, and liquid broth.

    Tomato sauce provides the classic reddish-orange color and slightly tangy, savory depth that defines Mexican-style rice. Fresh garlic enhances aroma and adds a subtle sharpness that balances the richness of the rice.

    Using chicken broth instead of water adds another layer of savory flavor, making the dish more robust and restaurant-like. When combined under pressure, these ingredients infuse deeply into every grain of rice, ensuring consistent flavor throughout the dish.

    The key is to stir gently before sealing the Instant Pot so that the liquid distributes evenly without disturbing the rice layer at the bottom, helping avoid sticking or uneven cooking.

    Expert Tips for Fluffy Instant Pot Mexican Rice Every Time

    Achieving perfectly fluffy Instant Pot Mexican Rice depends on a few essential cooking techniques. First, always measure liquid accurately because excess water leads to mushy rice. Second, avoid stirring after pressure cooking begins, as this can break grains and affect texture.

    Third, allow a short natural pressure release before quick releasing to prevent rapid steam disruption. Fourth, fluff rice gently with a fork instead of stirring aggressively, which keeps grains separate.

    Additionally, letting the rice rest uncovered for a minute after cooking helps excess moisture evaporate naturally. Adjusting seasoning at the end allows customization without affecting cooking chemistry.

    Adding optional spices like cumin or chili powder can enhance flavor without altering texture. These small but important steps ensure consistent restaurant-style results every time.

    Preventing the Instant Pot Burn Notice in Mexican Rice Recipes

    One common issue when making Instant Pot Mexican Rice is the burn notice, but it can be easily avoided with proper technique. The most important step is thoroughly scraping the bottom of the pot after sautéing rice and garlic to remove any stuck bits before adding liquid.

    These small particles can trigger the burn warning during pressure buildup. Another key tip is to avoid thick layering of tomato sauce without proper mixing into liquid, as concentrated sauce can settle at the bottom.

    Ensuring correct liquid ratios also helps prevent overheating. Additionally, deglazing the pot with broth or water before sealing ensures a clean base.

    Following these precautions guarantees smooth pressure cooking and prevents interruptions, resulting in perfectly cooked fluffy Mexican rice every time.

    Serving Ideas for Instant Pot Mexican Rice in Everyday Meals

    Instant Pot Mexican Rice is one of the most versatile side dishes in Mexican-inspired cooking. It pairs perfectly with tacos, burritos, enchiladas, fajitas, grilled chicken, and beef dishes.

    It can also be used as a base for burrito bowls or taco bowls, making it ideal for meal prep and quick lunches. The fluffy texture allows it to absorb sauces and juices from main dishes, enhancing overall flavor. It also works well alongside beans, roasted vegetables, or simple salads for a balanced meal.

    For added freshness, a squeeze of lime or chopped cilantro can be added before serving. Because of its neutral yet flavorful profile, this easy Instant Pot rice recipe complements both spicy and mild dishes, making it a staple in weekly meal planning.

    Storage, Meal Prep, and Reheating Instructions for Mexican Rice

    Proper storage makes Instant Pot Mexican Rice an excellent option for meal prep. Once cooled completely, the rice should be stored in an airtight container in the refrigerator for up to three days.

    For longer storage, it can be frozen for up to three months in freezer-safe containers. When reheating, adding a small splash of water helps restore moisture and prevents dryness.

    Microwave reheating works well when the rice is covered and stirred halfway through heating. Alternatively, stovetop reheating on low heat preserves texture and flavor.

    This recipe is ideal for batch cooking, as it reheats well without losing its fluffy structure. It can be used for quick lunches, dinner sides, or as a base for multiple meal variations throughout the week.

    Helpful Notes, Tips, and Frequently Asked Questions

    Instant Pot Mexican Rice is highly adaptable, but small adjustments can improve results depending on preference. Using broth instead of water enhances flavor significantly.

    Brown rice can be substituted, but it requires longer cooking time and more liquid adjustment. Doubling the recipe does not require changing cook time, making it perfect for larger families or gatherings.

    If rice turns out mushy, it usually means too much liquid was added or the rice was over-stirred after cooking. If it is undercooked, a small amount of additional liquid and a few extra pressure minutes can fix it. For extra flavor, spices like cumin or chili powder can be added, but the base recipe remains intentionally simple for versatility.

    This section also addresses common concerns such as rice texture issues, ingredient substitutions, and pressure cooker adjustments.

    Instant Pot Mexican Rice Recipe

    This Instant Pot Mexican Rice recipe is an easy, flavorful, and fluffy pressure cooker side dish made with long grain white rice, tomato sauce, garlic, and simple seasonings. It delivers authentic restaurant-style Mexican rice results in under 20 minutes, perfect for tacos, burritos, enchiladas, and everyday family meals.

    Duration

    • Prep Time: 5 minutes
    • Cook Time: 12 minutes
    • Total Time: 17 minutes
    • Course: Side Dish
    • Cuisine: Mexican
    • Servings: 4
    • Calories: 177 kcal

    Ingredients

    • 1 cup long grain white rice
    • 1 tablespoon vegetable oil
    • 4 garlic cloves minced
    • ¼ cup tomato sauce
    • 1 teaspoon salt
    • ¼ teaspoon black pepper
    • 1 ½ cups water or chicken broth

    Step-by-step Instructions

    • Set the Instant Pot to Sauté mode and add vegetable oil.
    • Once hot, add long grain white rice and sauté for 3–5 minutes until lightly golden, stirring occasionally.
    • Add minced garlic and cook for 1 minute until fragrant.
    • Pour in tomato sauce, salt, black pepper, and water or chicken broth, then gently stir and scrape the bottom clean.
    • Turn off Sauté mode, secure the lid, and set valve to Sealing.
    • Cook on High Pressure for 12 minutes.
    • Allow a 5-minute natural release, then perform a quick release.
    • Fluff the rice gently with a fork and serve warm.

    Nutritional Information (per serving)

    • Calories: 177 kcal
    • Carbohydrates: 39 g
    • Protein: 4 g
    • Fat: 1 g
    • Saturated Fat: 1 g
    • Polyunsaturated Fat: 1 g
    • Monounsaturated Fat: 1 g
    • Sodium: 661 mg
    • Potassium: 112 mg
    • Fiber: 1 g
    • Sugar: 1 g
    • Vitamin A: 67 IU
    • Vitamin C: 2 mg
    • Calcium: 24 mg
    • Iron: 1 mg

  • Instant Pot Pasta Recipe

    Instant Pot Pasta Recipe

    Instant Pot pasta recipe is one of the most searched easy weeknight dinner ideas because it delivers creamy, restaurant-style pasta with minimal effort and maximum flavor. This easy Instant Pot pasta is a true dump-and-go meal that combines dry pasta, rich tomato sauce, broth, and cheese into a perfectly cooked one-pot dinner.

    Unlike traditional stovetop pasta recipes that require boiling water separately and preparing sauce in multiple pans, this pressure cooker pasta recipe simplifies everything into a single pot.

    The result is tender pasta coated in a creamy, cheesy tomato sauce that feels indulgent yet is incredibly easy to prepare. It is perfect for busy families, beginner cooks, meal prep lovers, and anyone searching for quick Instant Pot dinner recipes that are both comforting and satisfying.

    Why This Recipe So Popular?

    Instant Pot pasta has become a popular weeknight dinner solution because it eliminates multiple cooking steps while still delivering rich, flavorful results. Traditional pasta recipes often require boiling pasta separately, draining water, preparing sauce, and then combining everything together.

    With the Instant Pot method, all ingredients cook together under pressure, allowing the pasta to absorb flavor directly from broth, spices, and tomato sauce. This creates a deeply infused, restaurant-quality taste without extra effort.

    The pressure cooking environment ensures even cooking and reduces the risk of overboiling or burning. For busy households looking for quick pasta dinner ideas, this method is ideal because it saves time, reduces cleanup, and guarantees consistent results every time.

    Ingredients Required

    The success of Instant Pot pasta lies in the balance of simple yet flavorful ingredients. Low-sodium broth acts as the cooking liquid, adding depth compared to plain water. Dry red wine, although optional, enhances complexity and richness in the sauce. Garlic is essential for aromatic flavor, while oregano brings classic Italian seasoning notes.

    Pasta forms the base, and selecting ridged shapes like rotini, ziti, or rigatoni helps hold the sauce better. Diced tomatoes contribute acidity, texture, and moisture, while spaghetti sauce provides a rich tomato base. Ricotta cheese adds creaminess, mozzarella brings meltability, and parmesan delivers salty umami flavor.

    Each ingredient plays a key role in building the final creamy Instant Pot pasta texture and flavor profile.

    Best Pasta Types for Pressure Cooker Pasta

    Choosing the right pasta shape is essential for achieving perfect Instant Pot pasta results. Short pasta shapes such as rotini, penne, rigatoni, and ziti work best because they hold their structure under pressure cooking and capture sauce inside their ridges. These shapes ensure every bite is coated in creamy tomato sauce.

    Long pasta like spaghetti is generally not recommended because it can clump or cook unevenly under pressure. Cooking time also varies depending on pasta shape, and the rule of thumb is to use half the package cooking time.

    This ensures al dente texture instead of mushy pasta. Understanding pasta selection is one of the most important factors in mastering pressure cooker pasta recipes for consistent, restaurant-style results.

    Step-by-Step Instructions

    Making Instant Pot pasta begins with layering ingredients carefully to ensure even cooking and prevent burning.

    First, broth, wine (if used), garlic, oregano, salt, pepper, and red pepper flakes are added to the inner pot.

    Dry pasta is then spread evenly into the liquid without stirring.

    Next, diced tomatoes are poured over the pasta, followed by spaghetti sauce spread evenly on top.

    If using ricotta cheese, it is added in small dollops without mixing. The lid is then secured, and the Instant Pot is set to high pressure for 4 to 5 minutes depending on pasta type.

    After cooking, a 5-minute natural release is essential before quick releasing remaining pressure.

    This step ensures proper texture and prevents overcooking.

    Why Layering Technique Is Critical in Instant Pot Pasta Recipes

    Layering ingredients correctly is one of the most important techniques in making Instant Pot pasta successfully. Unlike traditional cooking methods, stirring ingredients before pressure cooking can cause uneven texture and trigger the burn warning.

    The correct order ensures liquid surrounds the pasta evenly while preventing sauce from sticking to the bottom of the pot.

    Broth and seasonings go first to create a flavorful base, followed by dry pasta, which should be fully submerged. Tomatoes and sauce are added on top to protect the pasta during cooking.

    This layering method allows steam and pressure to distribute heat evenly, resulting in perfectly cooked pasta coated in rich sauce without burning or clumping.

    How Cheese Transforms Instant Pot Pasta Into Creamy Comfort Food

    Cheese plays a major role in transforming Instant Pot pasta into a creamy, comforting dish. Ricotta cheese adds a soft, creamy texture that blends into the tomato sauce, making it richer and smoother. Mozzarella melts beautifully, creating stretchy, cheesy layers that enhance the overall mouthfeel. Parmesan adds a sharp, salty flavor that balances the richness of the sauce and cheese combination.

    After pressure cooking, adding cheese and allowing it to melt with residual heat creates a baked pasta-like texture without using an oven. This step is what turns simple pressure cooker pasta into a restaurant-style creamy pasta dish that feels indulgent and satisfying while remaining easy to prepare.

    Expert Tips for Perfect Pasta Every Time

    Achieving perfect Instant Pot pasta requires attention to timing and layering. The most important rule is to cook pasta for half the time listed on the package to avoid overcooking. Allowing exactly 5 minutes of natural pressure release is critical because it finishes the cooking process gently without making the pasta mushy.

    Avoid stirring before cooking, as this can cause sticking and uneven results. Using broth instead of water enhances flavor significantly, while adding wine creates deeper complexity.

    After cooking, stirring thoroughly helps combine sauce and pasta evenly. For extra creaminess, adding cheese at the end and allowing it to melt under residual heat improves texture and flavor dramatically.

    Common Mistakes to Avoid

    One of the most common issues with Instant Pot pasta is the burn warning, but it can be easily avoided with proper technique. The key is ensuring enough liquid is present at the bottom of the pot before sealing. Layering ingredients without stirring prevents thick sauce from sticking directly to the base.

    Using broth instead of water helps maintain proper liquid balance. Another mistake is skipping the natural release, which can cause pressure imbalance and uneven texture. Ensuring that tomatoes and sauce are spread evenly over the pasta also prevents hot spots. Following these precautions ensures smooth pressure cooking and consistent, perfectly cooked pasta every time.

    Serving Ideas

    Instant Pot pasta is a versatile dish that pairs well with many sides and toppings. It can be served with garlic bread, cheesy toast, or warm dinner rolls for a complete Italian-style meal. A fresh green salad with vinaigrette adds balance and freshness to the rich, creamy pasta.

    For extra protein, it can be served alongside grilled chicken, meatballs, or roasted vegetables. A sprinkle of fresh basil or parsley adds brightness before serving. This easy Instant Pot dinner recipe is also ideal for family gatherings, potlucks, and meal prep because it stays flavorful even after reheating. Its creamy texture and rich tomato base make it a crowd-pleasing comfort food.

    Storage, Freezing, and Reheating

    Instant Pot pasta stores very well, making it perfect for meal prep. Once cooled, it can be stored in an airtight container in the refrigerator for up to four days. For longer storage, it can be frozen in freezer-safe containers for up to one month. When reheating, adding a small splash of water or broth helps restore creaminess and prevents dryness.

    Microwave reheating works well when covered with a damp paper towel to retain moisture. Alternatively, stovetop reheating over low heat helps maintain texture. Stirring occasionally ensures even heating. This makes Instant Pot pasta a convenient make-ahead meal for busy weekdays and quick lunches.

    Notes, Variations, and Frequently Asked Questions

    Instant Pot pasta can be easily customized depending on taste preferences. Adding ground beef, sausage, or turkey enhances protein content and makes it a complete meal.

    Gluten-free pasta can be used, but only certain brands hold up well under pressure cooking. Ricotta is optional and can be replaced with cottage cheese for a lighter texture. For extra flavor, homemade sauce or additional herbs can be added.

    A common question is how to prevent mushy pasta, which is solved by precise timing and correct liquid ratios. Another frequent concern is sauce thickness, which can be adjusted after cooking by simmering or adding extra cheese. These adjustments make this recipe flexible and adaptable for different diets and preferences.

    Instant Pot Pasta Recipe


    This Instant Pot pasta recipe is a creamy, cheesy, and easy dump-and-go pressure cooker dinner made with pasta, tomato sauce, broth, and cheese for a rich and comforting one-pot meal ready in under 30 minutes.

    Servings: 8
    Prep Time: 5 minutes
    Cook Time: 25 minutes
    Total Time: 30 minutes
    Course: Dinner
    Cuisine: Italian-American
    Calories: 322 kcal per serving

    Ingredients

    • 2½ cups low-sodium broth (chicken, vegetable, or beef)
    • ½ cup dry red wine or additional broth
    • 2 teaspoons minced garlic
    • 1 teaspoon dried oregano
    • ¼ teaspoon kosher salt
    • ⅛ teaspoon black pepper
    • ⅛ teaspoon crushed red pepper flakes (optional)
    • 16 ounces dried pasta (ziti, rotini, corkscrew, rigatoni, etc.)
    • 1 (15-ounce) can diced tomatoes, not drained
    • 24 ounces spaghetti sauce
    • 8 ounces full-fat ricotta cheese (optional)
    • ¼ cup grated parmesan cheese
    • 1 cup shredded mozzarella cheese

    Step-by-step Instructions

    • Combine broth, wine (or additional broth), garlic, oregano, salt, pepper, and red pepper flakes in the Instant Pot.
    • Add dry pasta and spread evenly into the liquid without stirring.
    • Pour diced tomatoes and spaghetti sauce over the pasta, ensuring even coverage. Do not stir.
    • If using, add ricotta cheese in small dollops over the top.
    • Close lid, set valve to sealing, and cook on high pressure for 4–5 minutes depending on pasta type.
    • Allow a 5-minute natural pressure release, then quick release remaining pressure.
    • Open lid and stir everything until well combined.
    • Top with parmesan and mozzarella cheese, then cover for 2–5 minutes until melted.
    • Serve warm.

    Nutritional Information (per serving)

    • Calories: 322 kcal
    • Carbohydrates: 53 g
    • Protein: 15 g
    • Fat: 4 g
    • Saturated Fat: 2 g
    • Cholesterol: 16 mg
    • Sodium: 720 mg
    • Potassium: 571 mg
    • Fiber: 4 g
    • Sugar: 8 g
    • Vitamin A: 598 IU
    • Vitamin C: 12 mg
    • Calcium: 161 mg
    • Iron: 2 mg
  • Instant Pot Lentil Soup Recipe – Easy, Healthy, High-Protein Pressure Cooker Soup for Meal Prep and Comfort Food

    Instant Pot Lentil Soup Recipe – Easy, Healthy, High-Protein Pressure Cooker Soup for Meal Prep and Comfort Food

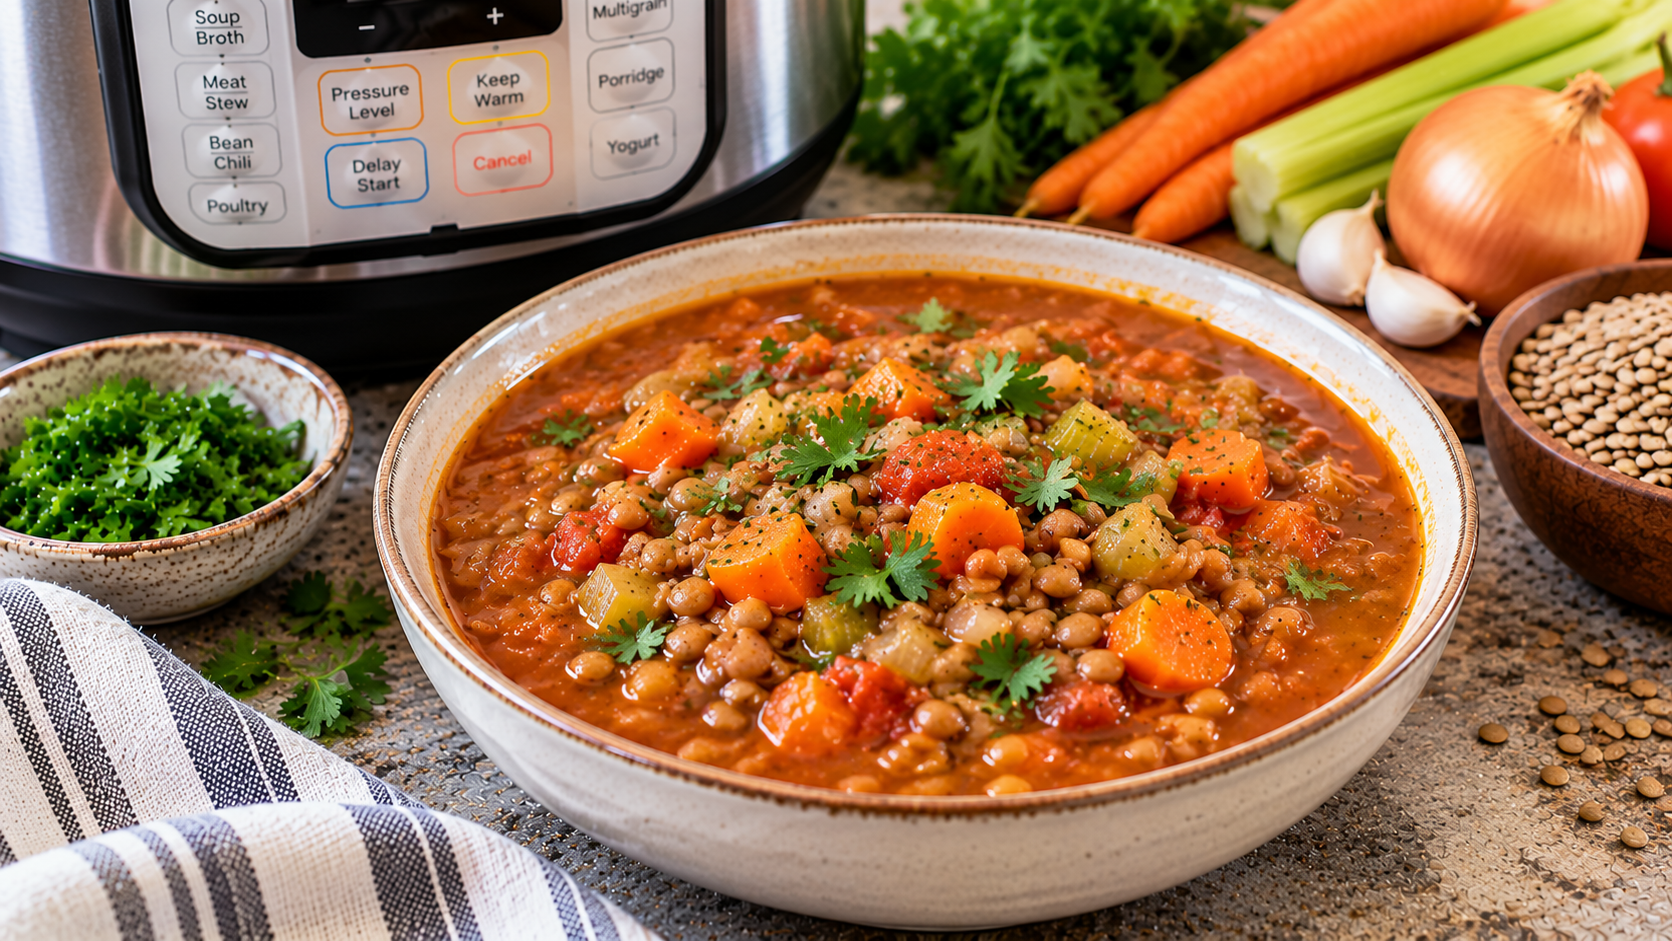
    Instant Pot lentil soup recipe has become one of the most searched healthy pressure cooker meals because it combines convenience, nutrition, and deep comfort in one bowl.

    This easy Instant Pot lentil soup is packed with plant-based protein, fiber, and vegetables, making it an ideal option for healthy lunch meal prep, weight-friendly dinners, and cozy winter comfort food.

    Unlike traditional stovetop lentil soup that requires long simmering and frequent stirring, the Instant Pot version dramatically reduces cooking time while intensifying flavor.

    With simple ingredients like lentils, carrots, celery, onions, garlic, crushed tomatoes, and aromatic spices, this soup delivers a rich, hearty texture that feels both nourishing and satisfying. It is a perfect one-pot recipe for busy families, beginners, and anyone looking for a nutritious and filling meal without complicated steps.

    Why Instant Pot Lentil Soup Is a Healthy Comfort Food Favorite

    Instant Pot lentil soup is widely considered one of the best healthy comfort food recipes because it balances nutrition with ease of preparation. Lentils are naturally rich in protein, fiber, iron, and essential minerals, making them an excellent meat-free protein source.

    When combined with vegetables like carrots, celery, and onions, the soup becomes a complete, nutrient-dense meal that supports digestion and sustained energy.

    The pressure cooking process helps break down the lentils quickly while preserving their nutritional value, resulting in a thick and flavorful soup without long cooking times.

    This makes it ideal for meal prep soup recipes, especially for people looking for high-fiber vegetarian or budget-friendly healthy meals. Its warming spices and tomato-based broth also enhance flavor depth, making it satisfying enough to serve as a main dish.

    Ingredients Required

    The foundation of Instant Pot lentil soup lies in simple pantry ingredients that combine to create deep, layered flavor. Olive oil is used to sauté aromatics and build a rich base.

    Onion provides natural sweetness, while carrots add subtle earthiness and texture. Celery completes the classic mirepoix base, adding a light savory note. Garlic enhances aroma and depth, making the soup more flavorful.

    Lentils act as the protein-rich base and do not require soaking, only rinsing.

    Chicken broth forms the liquid foundation, adding savory richness, while crushed tomatoes bring acidity, body, and color.

    Herbs like thyme and spices such as cumin, paprika, and black pepper give warmth and complexity. A bay leaf infuses subtle depth during pressure cooking, and fresh parsley adds brightness at the end.

    Choosing the Best Lentils for Instant Pot Soup Recipes

    Selecting the right type of lentils is essential for achieving the desired texture in Instant Pot lentil soup. Brown lentils are the most commonly used because they hold their shape well while still becoming tender and soft after pressure cooking.

    Green lentils, especially French green lentils, also maintain structure and provide a slightly firmer bite, making them ideal for a chunkier soup. Red lentils, on the other hand, break down quickly and create a creamy, almost puree-like consistency, which is perfect for those who prefer a smoother soup texture. Regardless of type, lentils should always be rinsed before cooking to remove dust or impurities.

    One of the advantages of Instant Pot cooking is that no soaking is required, making this a fast and convenient healthy lentil soup option.

    Step-by-Step Instant Pot Cooking Method for Lentil Soup

    Making Instant Pot lentil soup begins with sautéing vegetables using the pressure cooker’s sauté function. Olive oil is heated first, followed by onions, carrots, and celery, which are cooked until softened. Garlic, thyme, cumin, paprika, salt, and pepper are then added to release their aroma and build a flavorful base.

    Next, rinsed lentils are added along with chicken broth, crushed tomatoes, and a bay leaf. The mixture is stirred well to combine all ingredients evenly.

    The lid is then secured, and the Instant Pot is set to high pressure for 15 minutes. After cooking, natural pressure release is essential to allow the soup to settle and develop full flavor.

    Once the lid is removed, the bay leaf is discarded, and fresh parsley is sprinkled on top before serving.

    How Herbs and Spices Add Flavor to Lentil Soup

    One of the most important aspects of Instant Pot lentil soup is the way aromatics and spices build flavor during cooking. The combination of onion, carrot, celery, and garlic forms a traditional flavor base used in many global soup recipes.

    When sautéed before pressure cooking, these ingredients release natural sugars and aromatic compounds that deepen the soup’s overall taste. Spices such as cumin and paprika add warmth and mild smokiness, while thyme contributes herbal freshness.

    Crushed tomatoes balance acidity and richness, ensuring the soup does not taste overly heavy. Under pressure cooking conditions, all these flavors blend together intensely, creating a well-rounded and satisfying lentil soup that tastes like it has been slow simmered for hours, even though it is prepared in a fraction of the time.

    Healthy Benefits of Instant Pot Lentil Soup for Everyday Diets

    Instant Pot lentil soup is highly valued in healthy eating plans due to its nutritional density and balance of macronutrients. Lentils provide high-quality plant protein, making the soup suitable for vegetarian and flexitarian diets.

    They are also rich in dietary fiber, which supports digestion, improves gut health, and helps maintain stable blood sugar levels. The vegetables in the soup contribute vitamins and antioxidants that support overall wellness.

    This soup is naturally low in fat and can be made even lighter by using broth instead of oil-heavy bases. Because it is filling and nutrient-rich, it is often included in weight management meal plans and healthy meal prep routines. Its combination of protein, fiber, and hydration makes it one of the most balanced Instant Pot healthy soup recipes available.

    Expert Tips for Best Results

    To achieve the best Instant Pot lentil soup results, a few simple techniques can significantly improve texture and flavor. Always sauté aromatics first, as this step enhances depth and prevents a flat-tasting soup.

    Rinsing lentils is essential to remove debris and improve consistency. Using low-sodium broth allows better control over seasoning, especially since pressure cooking intensifies flavors. It is important not to skip the natural pressure release, as quick release can cause foam and uneven texture.

    For a thicker soup, reduce broth slightly or allow the soup to rest after cooking. For a thinner consistency, simply add extra broth after cooking.

    Adjusting spices after pressure cooking allows better flavor control. These small adjustments ensure a perfectly balanced, restaurant-quality lentil soup every time.

    Serving Ideas and Meal Pairing Suggestions for Lentil Soup

    Instant Pot lentil soup is extremely versatile and can be served in multiple ways depending on preference. It pairs beautifully with crusty bread, dinner rolls, or crackers, making it a complete and comforting meal.

    For a more filling option, it can be served over rice, similar to a lentil dal-inspired dish. It also works well as a light lunch when paired with a simple salad. Some people enjoy topping it with grated Parmesan cheese for extra umami flavor or a spoonful of Greek yogurt for creaminess.

    A drizzle of olive oil or fresh lemon juice can also enhance freshness. Because of its rich texture and bold flavor, this soup can easily function as a main dish or a hearty side, making it a flexible recipe for weekly meal planning.

    Storage, Freezing, and Reheating Instant Pot Lentil Soup

    Instant Pot lentil soup is ideal for meal prep because it stores and reheats very well. Once cooled completely, it can be kept in an airtight container in the refrigerator for up to four days.

    For longer storage, it can be frozen for up to three months in portion-sized containers, making it convenient for quick future meals. When reheating, the soup may thicken slightly, so adding a splash of water or broth helps restore the original consistency.

    It can be reheated on the stovetop over medium heat or in the microwave until warmed through. Stirring occasionally ensures even heating. This makes it one of the best freezer-friendly healthy soup recipes for busy schedules, allowing nutritious meals to be ready within minutes.

    Common Questions, Troubleshooting, and Notes for Lentil Soup Success

    Instant Pot lentil soup is easy to prepare, but understanding a few common adjustments helps improve results. If the soup becomes too thick, it can be thinned with additional broth after cooking.

    If it appears too thin, letting it rest uncovered will naturally thicken it. Overcooking is rarely an issue in pressure cooking, but using the correct ratio of liquid to lentils is important.

    Different lentil types affect texture, so choosing the right variety based on preference is key. Brown and green lentils provide structure, while red lentils create creaminess.

    The recipe can also be adapted with additional spices such as turmeric or curry powder for variation. Adding meat like sausage or chicken can increase protein content, while toppings like cheese or yogurt enhance flavor and texture.

    Instant Pot Lentil Soup Recipe


    This Instant Pot lentil soup is a hearty, healthy, and protein-rich pressure cooker recipe made with lentils, vegetables, crushed tomatoes, and warm spices. It is perfect for easy meal prep, weeknight dinners, and comforting cold-weather meals.

    • Yield: 6 servings
    • Prep: 10 minutes
    • Cook: 20 minutes
    • Course: Soup
    • Cuisine: American / Healthy Vegetarian
    • Calories: 182 kcal per serving

    Ingredients

    • 1 tablespoon olive oil
    • 1 medium onion, chopped
    • 1 medium carrot, chopped
    • 1 celery rib, chopped
    • 3 garlic cloves, minced
    • 1/2 teaspoon salt
    • 1/2 teaspoon dried thyme
    • 1/4 teaspoon ground cumin
    • 1/4 teaspoon paprika
    • 1/4 teaspoon pepper
    • 1 cup dried lentils, rinsed
    • 4 cups reduced-sodium chicken broth
    • 1 can (15 ounces) crushed tomatoes
    • 1 bay leaf
    • 2 tablespoons minced fresh parsley

    Step-by-step Instructions

    • Set a 6-quart Instant Pot to sauté mode and add olive oil.
    • Add onion, carrot, and celery, and cook for 3–4 minutes until softened.
    • Stir in garlic, salt, thyme, cumin, paprika, and pepper, cooking for 1–2 minutes until fragrant.
    • Add rinsed lentils, chicken broth, crushed tomatoes, and bay leaf, and mix well.
    • Secure the lid, set valve to sealing, and cook on high pressure for 15 minutes.
    • Allow natural pressure release, then open the lid carefully.
    • Remove and discard the bay leaf.
    • Stir and garnish with fresh parsley before serving warm.

    Nutritional Information (per serving)

    • Calories: 182 kcal
    • Fat: 3 g
    • Saturated Fat: 0 g
    • Cholesterol: 0 mg
    • Sodium: 725 mg
    • Carbohydrates: 30 g
    • Sugars: 6 g
    • Fiber: 6 g
    • Protein: 12 g