Category: Instant Pot Recipes

  • Instant Pot Garlic Butter Chicken

    Instant Pot Garlic Butter Chicken

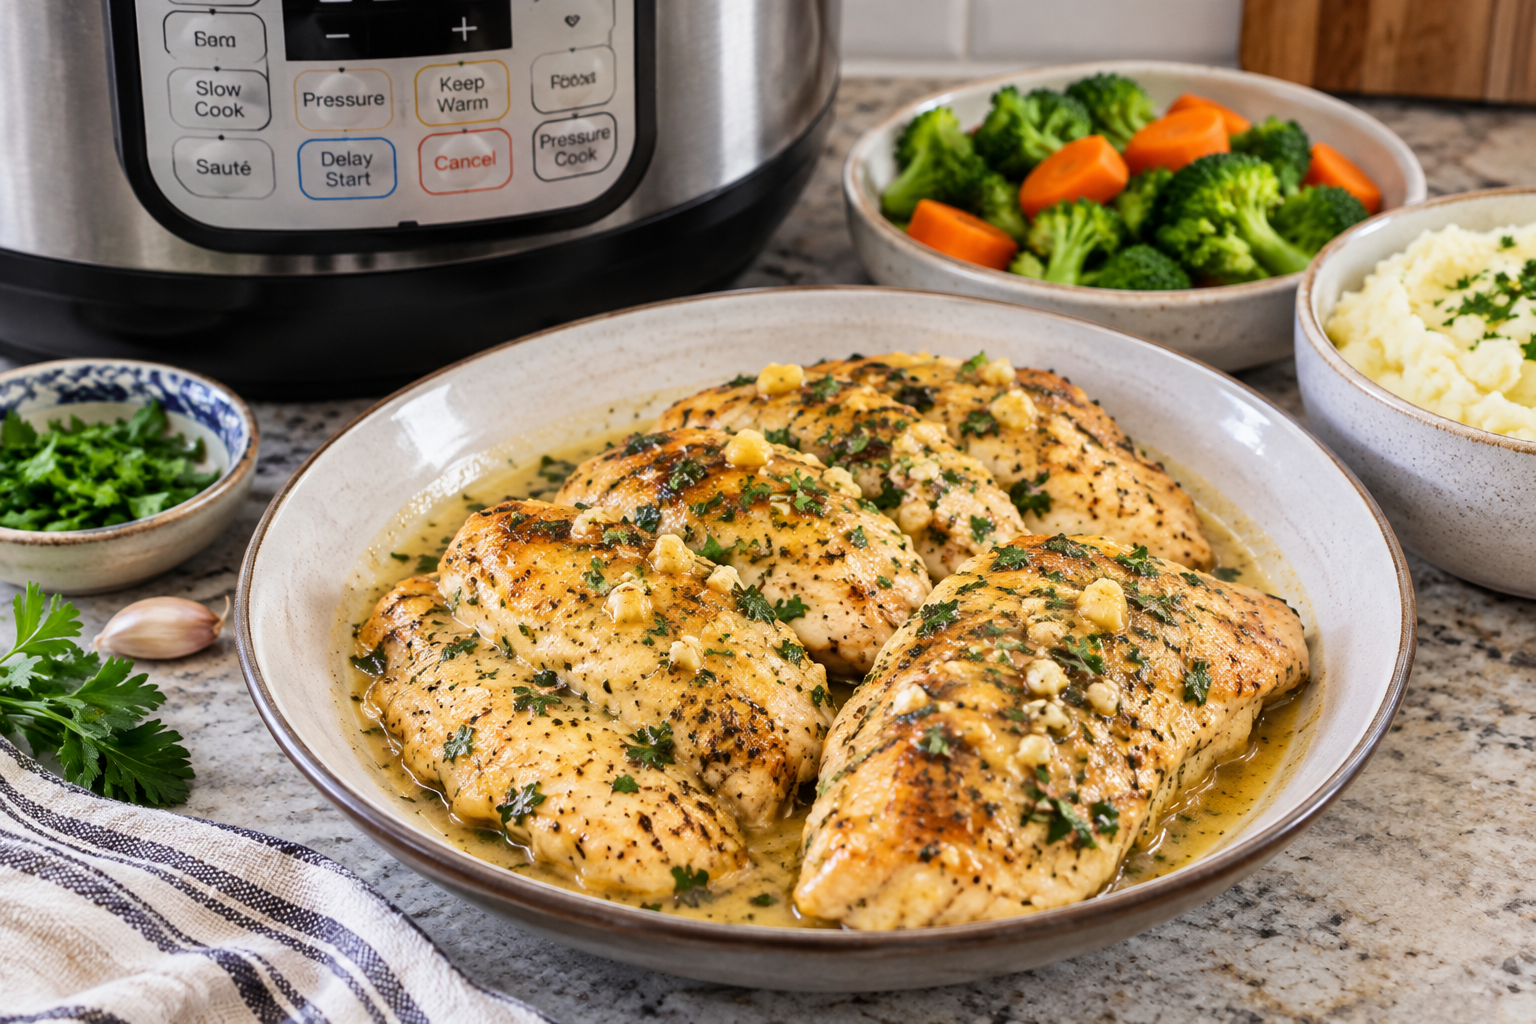
    Instant Pot Garlic Butter Chicken is one of the easiest and most flavorful pressure cooker chicken recipes you can prepare at home. It combines juicy chicken thighs with rich butter, fresh garlic, soy sauce, and simple seasonings to create a deeply savory sauce that tastes like restaurant-quality comfort food.

    This recipe is especially popular for busy weeknights because it uses basic pantry ingredients and requires very little preparation time. The Instant Pot method allows the chicken to cook quickly while absorbing all the buttery garlic flavors, resulting in tender meat and a rich, silky gravy that pairs perfectly with rice, potatoes, or vegetables.

    Why Instant Pot Garlic Butter Chicken Is a Family Favorite

    This Instant Pot garlic butter chicken recipe is loved by families because it is both simple and satisfying. The flavor profile is rich but not complicated, making it appealing to both adults and children. Chicken thighs are used because they stay juicy and tender under pressure cooking, even when cooked quickly.

    The combination of garlic and butter creates a warm, aromatic base, while soy sauce adds depth and umami flavor. This dish is also budget-friendly, making it a great option for weekly meal planning. With minimal ingredients and maximum flavor, it easily becomes a go-to dinner recipe.

    The Secret to Perfect Garlic Butter Flavor in the Instant Pot

    The key to achieving deep garlic butter flavor in this Instant Pot chicken recipe is sautéing the garlic in butter before pressure cooking.

    This step releases the natural oils from the garlic and infuses the butter with a rich aroma. Adding dried rosemary at this stage enhances the herbal notes and gives the sauce a subtle earthy depth.

    Once the garlic is fragrant, chicken stock is added to deglaze the pot, lifting all the flavorful browned bits from the bottom. These bits are essential for creating a rich garlic butter sauce that forms the base of the final dish.

    Choosing the Best Chicken for Garlic Butter Chicken Recipe

    Chicken thighs are the preferred cut for Instant Pot garlic butter chicken because they remain juicy under high pressure cooking. Bone-in or boneless thighs both work well, but thighs with skin provide extra flavor and richness.

    Chicken breasts can also be used, but they require shorter cooking time to prevent dryness. The fat content in chicken thighs blends perfectly with butter and garlic, creating a naturally creamy sauce without needing heavy cream. This makes the dish both flavorful and balanced while still feeling light enough for everyday meals.

    Step-by-Step Pressure Cooking Method

    The Instant Pot method ensures that garlic butter chicken cooks evenly and quickly while locking in moisture. After sautéing garlic and adding broth, the seasoned chicken is placed in the pot and pressure cooked for a short time on high pressure.

    A natural release allows the meat to finish cooking gently, keeping it tender and juicy. This step is important because it prevents the chicken from becoming tough.

    Once cooked, the chicken is removed and the remaining sauce is thickened using a cornstarch slurry, creating a glossy garlic butter gravy that coats every piece of chicken beautifully.

    How to Make Rich Garlic Butter Sauce in Instant Pot

    The garlic butter sauce is what makes this recipe stand out. After pressure cooking, the Instant Pot is switched back to sauté mode to reduce and intensify the flavors.

    A cornstarch mixture is added slowly to thicken the sauce into a smooth, velvety gravy. This step allows the butter, garlic, soy sauce, and chicken broth to combine into a deeply flavorful sauce.

    The consistency can be adjusted depending on preference, from light and silky to thick and rich. The final sauce is then poured over the chicken, ensuring every bite is packed with flavor.

    Optional Crisping Step for Restaurant-Style Garlic Butter Chicken

    For those who prefer crispy chicken skin, there are two optional finishing methods. The oven broiler method caramelizes the garlic butter sauce and crisps the outer layer of the chicken, enhancing texture and flavor.

    Alternatively, an air fryer or air fryer lid can be used to achieve a similar crispy finish. This step is optional but highly recommended for those who enjoy a contrast between crispy skin and juicy meat.

    The combination of pressure cooking and crisping creates a restaurant-style dish that feels both indulgent and satisfying.

    Best Side Dishes for Instant Pot Garlic Butter Chicken

    This garlic butter chicken pairs well with a variety of side dishes, making it a versatile meal option. Popular pairings include mashed potatoes, rice, quinoa, roasted vegetables, and pasta.

    The rich garlic butter sauce works especially well over starch-based sides that can absorb the gravy. Vegetables such as broccoli, green beans, or cabbage provide a fresh contrast to the richness of the dish.

    For a complete comfort meal, serving it with warm bread or dinner rolls allows the sauce to be enjoyed to the last drop.

    Notes, Tips & Cooking Variations

    For best results, always use unsalted butter and unsalted chicken stock to control seasoning levels. If using salted ingredients, adjust salt carefully at the end. Soy sauce brands vary in strength, so tasting and adjusting is recommended.

    Chicken thighs should be arranged skin-side up to maintain texture during cooking. If a thicker sauce is preferred, increase cornstarch slightly.

    This recipe can also be adapted using chicken legs or drumsticks with adjusted cooking time. Leftovers store well in the refrigerator and often taste even better the next day as the garlic flavor deepens.

    Instant Pot Garlic Butter Chicken Recipe

    A quick and flavorful Instant Pot garlic butter chicken recipe made with tender chicken thighs, fresh garlic, butter, and soy sauce. This pressure cooker chicken dish delivers rich, savory flavor and a silky garlic butter gravy perfect for weeknight dinners.

    Preparation & Cooking Duration

    • Prep Time: 10 minutes
    • Cook Time: 25 minutes
    • Natural Release: 10 minutes
    • Total Time: 35 minutes

    Serving

    • Serves: 4–6

    Ingredients

    • 4–8 chicken thighs (about 811g)
    • 1–2 tablespoons unsalted butter (14g–28g)
    • 1 whole head garlic, crushed (56g)
    • A pinch dried rosemary (0.4g)
    • ¾ cup unsalted chicken stock (188ml)
    • ⅛ teaspoon fine table salt (0.88g)
    • 2 tablespoons regular soy sauce (30ml)
    • Salt and black pepper, to taste

    Thickener

    • 2½ tablespoons cornstarch (22.5g)
    • 3 tablespoons cold water (45ml)

    Step-by-Step Instructions

    • Heat Instant Pot using sauté mode until hot. Add butter, crushed garlic, and dried rosemary. Sauté for 45 seconds to 1 minute until fragrant.
    • Pour in chicken stock and deglaze the pot by scraping browned bits from the bottom.
    • Add salt and soy sauce, then stir briefly. Place chicken thighs skin-side up into the pot.
    • Close lid, set valve to sealing, and pressure cook on high for 5 minutes. Allow natural release for 10 minutes, then release remaining pressure.
    • Remove chicken and set aside.
    • Switch to sauté mode. Mix cornstarch and cold water, then slowly add to the sauce, stirring until thickened.
    • Taste and adjust seasoning with salt and pepper.
    • Pour garlic butter sauce over chicken.
    • (Optional) Broil in oven or use air fryer lid at 400°F for 10–15 minutes to crisp skin and caramelize sauce.

    Nutritional Information (Per Serving)

    • Calories: 341 kcal
    • Carbohydrates: 6 g
    • Protein: 23 g
    • Fat: 25 g
    • Saturated Fat: 7 g
    • Cholesterol: 137 mg
    • Sodium: 173 mg
    • Fiber: 0.2 g
    • Sugar: 0.1 g
    • Iron: 1 mg

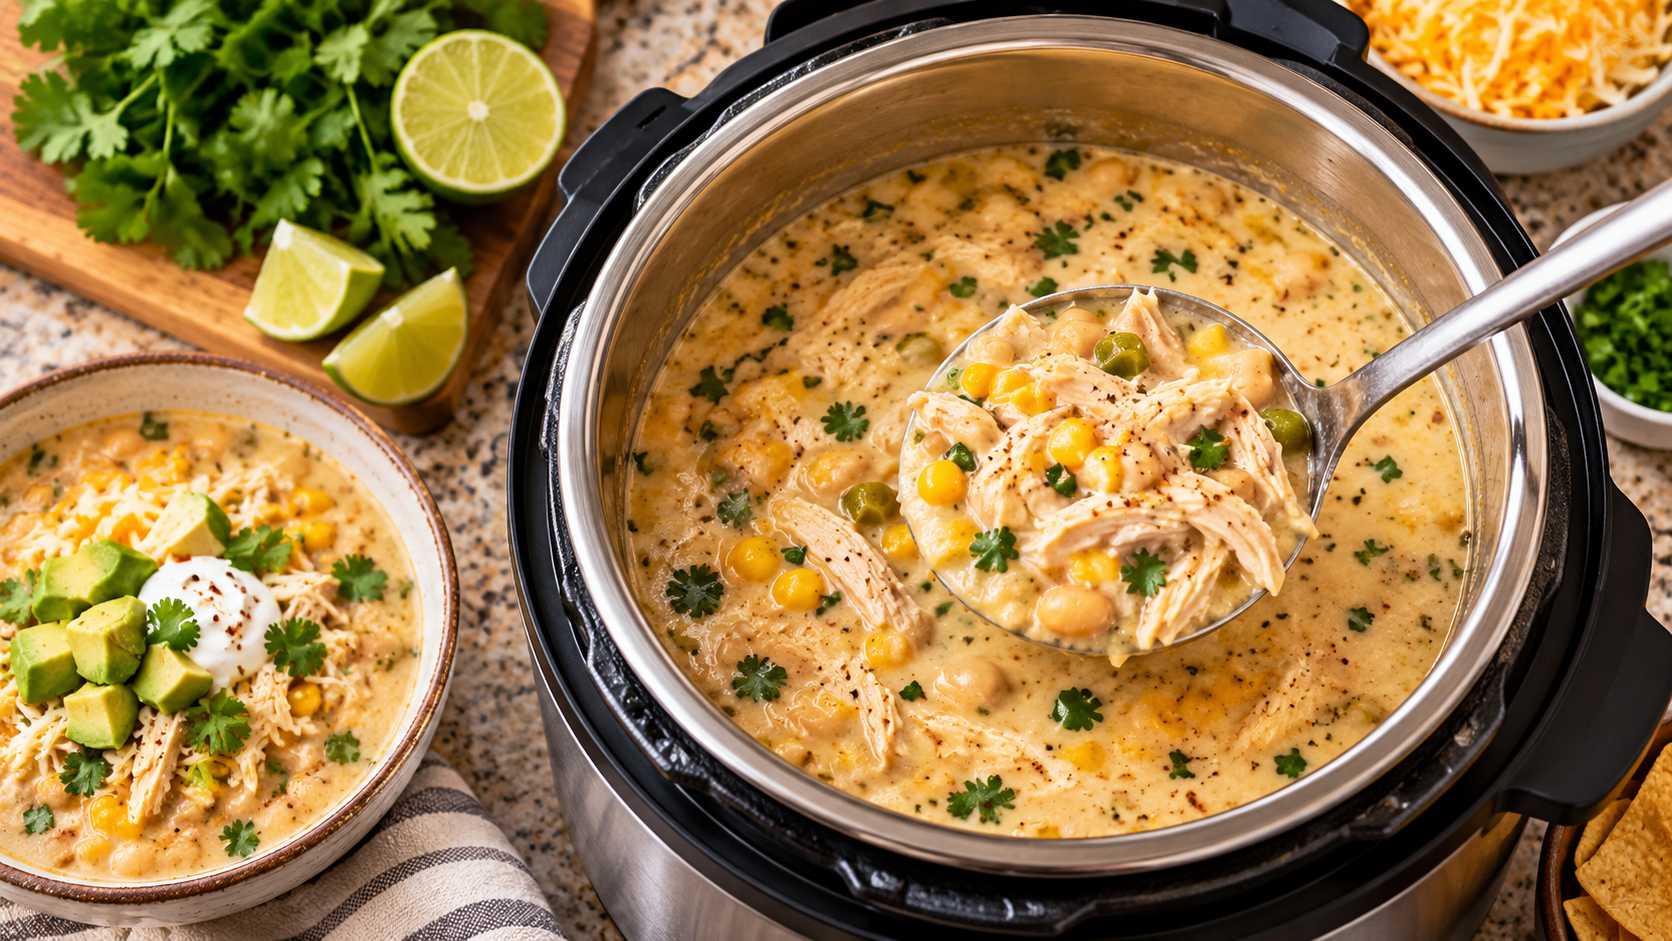
  • Instant Pot White Chicken Chili

    Instant Pot White Chicken Chili

    Instant Pot White Chicken Chili is one of the most popular quick dinner recipes for families looking for a creamy, hearty, and protein-rich meal without spending hours in the kitchen.

    This pressure cooker white chicken chili combines tender chicken breasts, beans, corn, tomatoes, and warm spices into a comforting bowl that tastes like it simmered all day. The Instant Pot method makes it possible to achieve deep, slow-cooked flavor in under an hour, making it ideal for meal prep, weeknight dinners, or feeding a crowd.

    Unlike traditional stovetop chili that requires long simmering, this Instant Pot white chicken chili recipe locks in flavor using pressure cooking, while keeping the chicken incredibly soft and easy to shred.

    Why White Chicken Chili Is So Popular for Healthy Meal Prep

    One of the main reasons Instant Pot white chicken chili has become a viral pressure cooker recipe is its balance of convenience and nutrition. It is packed with lean protein from chicken breasts, fiber from beans, and natural sweetness from corn, making it a well-rounded meal in a single bowl.

    This recipe also works well for healthy meal prep because it stores and reheats beautifully without losing texture or flavor. Many home cooks prefer this recipe over traditional chili because it feels lighter, creamier, and less heavy while still being filling.

    The addition of ranch seasoning and cream cheese gives the chili a rich, tangy flavor profile that appeals to both adults and kids.

    The Role of the Instant Pot in Perfect White Chicken Chili Texture

    The Instant Pot is essential in achieving the signature texture of this white chicken chili recipe. Pressure cooking allows the chicken to cook quickly while staying juicy and tender, while also infusing the broth with flavor from beans, spices, and aromatics.

    Unlike slow cookers, the Instant Pot traps steam and intensifies seasoning, creating a more concentrated taste in less time. The controlled high-pressure environment ensures that the beans remain intact while still absorbing the chili’s creamy base.

    This method is especially helpful for busy households that want homemade comfort food without long preparation times or constant monitoring on the stove.

    Ingredients Required

    The ingredients used in Instant Pot white chicken chili are simple pantry staples, yet they combine to create a rich and satisfying dish.

    Chicken breasts form the protein base, while black beans and white beans add texture and fiber.

    Corn brings a subtle sweetness that balances the spice from chili powder and cumin.

    Rotel diced tomatoes with green chilies add acidity and a mild heat that enhances overall depth.

    Chicken broth creates the base liquid for pressure cooking, ensuring everything cooks evenly.

    Ranch seasoning introduces a creamy, herby undertone that makes this chili stand out from traditional versions. Finally, cream cheese melts into the broth, transforming it into a smooth, velvety chili.

    How to Layer Ingredients Correctly in the Instant Pot

    Proper layering is important when making Instant Pot white chicken chili to avoid burning and ensure even cooking.

    The chicken breasts should be placed first so they cook directly in the seasoned liquid. Beans, corn, onions, and tomatoes are added next to create a balanced mixture around the chicken.

    The chicken broth is poured in carefully to distribute moisture throughout the pot. Spices such as chili powder, cumin, and ranch seasoning should be mixed in to evenly coat the ingredients.

    Cream cheese is placed on top in chunks so it melts gradually during pressure cooking. This layering technique helps maintain flavor balance and prevents ingredients from sticking to the bottom of the pot.

    Pressure Cooking Method for Creamy White Chicken Chili

    Cooking Instant Pot white chicken chili requires a simple but precise pressure cooking process. Once all ingredients are added, the lid is sealed, and the Instant Pot is set to high pressure for about 20 minutes.

    During this time, the chicken cooks through and absorbs the flavors of the chili base. After cooking, a natural pressure release of around 10 minutes is recommended to keep the chicken tender and prevent liquid splatter. The remaining pressure is then released manually before opening the lid.

    This method ensures that the chili maintains a smooth consistency and that the chicken remains juicy and easy to shred.

    Shredding Chicken for the Perfect Chili Texture

    After pressure cooking, the chicken is removed and shredded using two forks. This step is essential for achieving the classic texture of white chicken chili.

    Once shredded, the chicken is returned to the pot and mixed thoroughly with the creamy broth. As it is stirred, the shredded chicken absorbs the chili base, making every bite flavorful and moist.

    This step also helps distribute the cream cheese evenly throughout the dish, ensuring a smooth and creamy consistency. The final result is a thick, hearty chili that feels rich without being overly heavy.

    Serving Ideas for Instant Pot White Chicken Chili

    Instant Pot white chicken chili can be served in many creative ways depending on preference. It is commonly enjoyed as a standalone bowl meal, topped with fresh cilantro, diced avocado, shredded cheese, or sour cream.

    For a more filling option, it can be served over baked potatoes or paired with tortilla chips for added crunch. Some people also use it as a topping for rice bowls or serve it alongside cornbread for a complete comfort food experience.

    The versatility of this dish makes it suitable for both casual dinners and meal prep lunches throughout the week.

    Notes, Tips & Variations for Best Results

    To improve flavor, using freshly cooked chicken broth instead of water enhances depth significantly. If a thicker chili is preferred, reduce the broth slightly or add extra cream cheese.

    For a spicier version, additional chili powder or diced jalapeños can be included. To lighten the recipe, reduced-fat cream cheese can be used without compromising texture. It is important not to skip the natural pressure release step, as it helps maintain chicken tenderness.

    Leftovers can be refrigerated for several days and often taste even better the next day as flavors continue to develop. This recipe also freezes well, making it ideal for batch cooking.

    Instant Pot White Chicken Chili Recipe (Creamy Pressure Cooker Chicken Chili)

    A creamy and flavorful Instant Pot white chicken chili made with chicken breasts, beans, corn, Rotel tomatoes, and cream cheese. This easy pressure cooker chili is perfect for quick weeknight dinners, meal prep, and family meals.

    Preparation & Cooking Duration

    • Prep Time: 10 minutes
    • Cook Time: 20 minutes
    • Natural Release: 10 minutes
    • Total Time: 40 minutes

    Serving

    • Serves: 8 people (about 1 cup per serving)

    Ingredients

    • 2 large chicken breasts
    • 15 oz can black beans, drained and rinsed
    • 15 oz can white beans, drained
    • 1 medium onion, chopped
    • 15 oz can corn with juice
    • 10 oz can Rotel diced tomatoes with green chilis, with juice
    • 1/2 cup chicken broth or stock
    • 1 tsp chili powder, or to taste
    • 1 tsp cumin powder
    • 0.4 oz packet ranch dip or dressing mix
    • 8 oz package cream cheese, cut into 6 pieces
    • Optional toppings:
      • 1/2 cup chopped cilantro
      • 1 avocado, diced
      • Tortilla chips or baked potatoes for serving

    Step-by-Step Instructions

    • Place chicken breasts at the bottom of the Instant Pot.
    • Add drained black beans, white beans, chopped onion, corn with juice, and Rotel tomatoes with juice. Pour in chicken broth.
    • Add chili powder and cumin, then sprinkle ranch seasoning over the mixture. Stir gently to combine without disturbing the bottom layer too much.
    • Place cream cheese pieces on top of the mixture without stirring. Secure lid and set valve to sealing position.
    • Cook on high pressure for 20 minutes. Once done, allow natural pressure release for 10 minutes, then carefully release remaining pressure.
    • Remove chicken, shred it using two forks, and return it to the pot. Stir well until cream cheese fully melts and chili becomes creamy and smooth.
    • Serve hot with cilantro, avocado, tortilla chips, or baked potatoes.

    Nutritional Information (Per Serving)

    • Calories: 308 kcal
    • Carbohydrates: 36 g
    • Protein: 17 g
    • Fat: 11 g

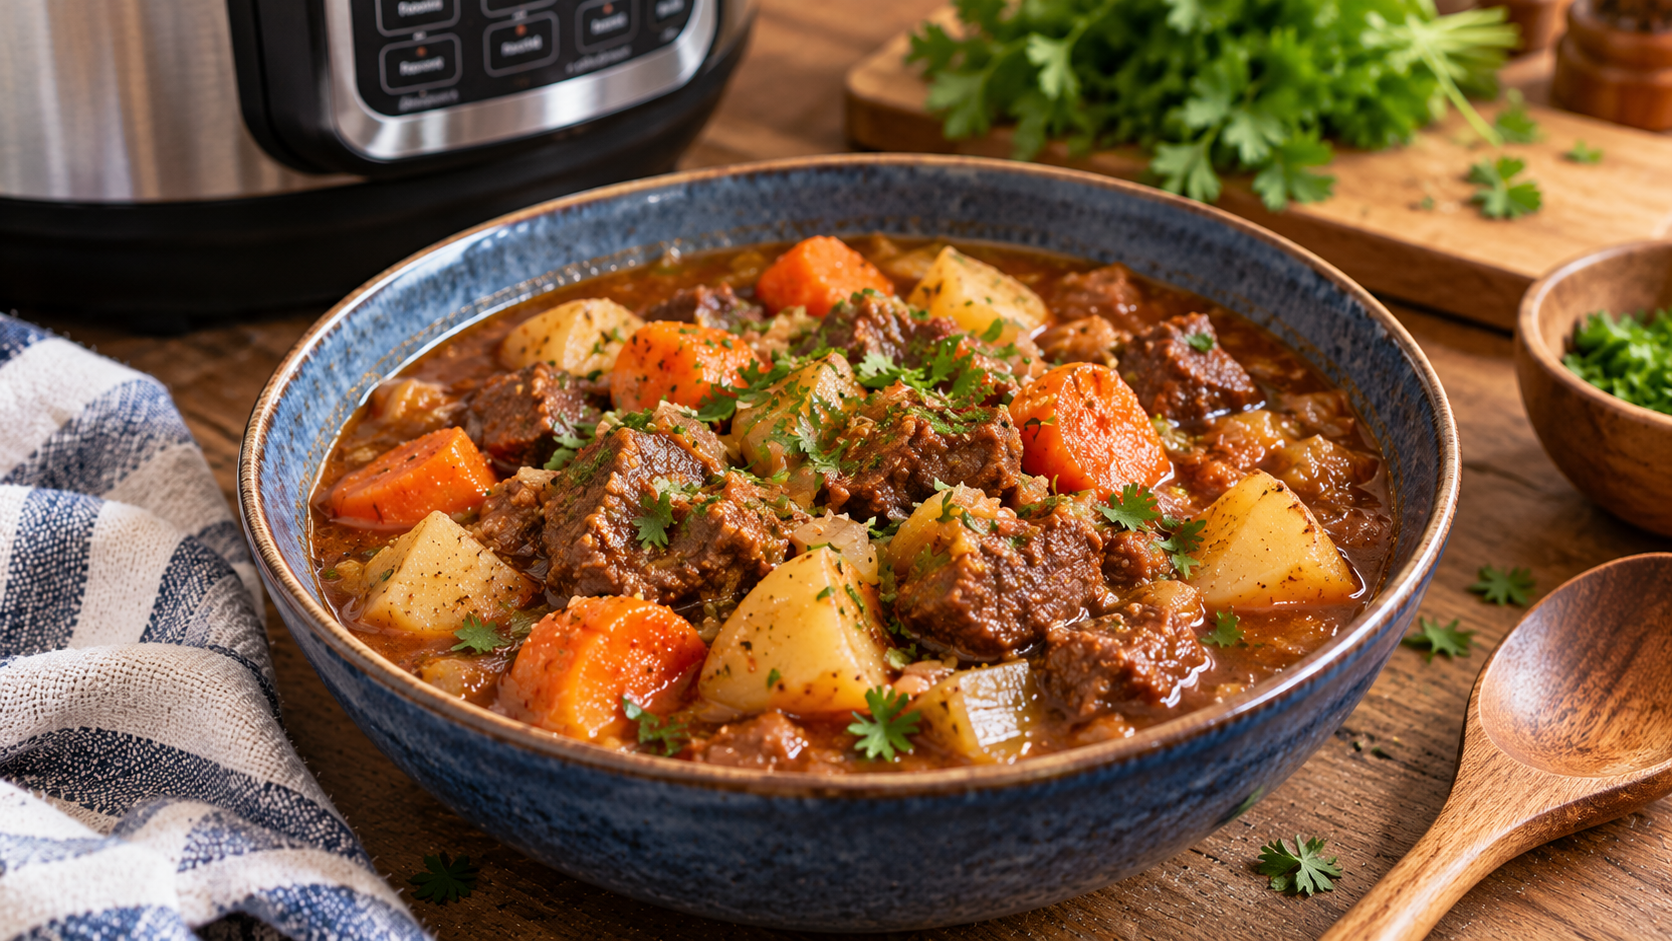
  • Instant Pot Beef Stew

    Instant Pot Beef Stew

    Instant Pot beef stew has become one of the most searched comfort food recipes because it delivers the deep, slow-cooked flavor of traditional beef stew in a fraction of the time.

    Instead of simmering for hours on the stovetop or in a slow cooker, the pressure cooker transforms tough beef chuck into tender, melt-in-your-mouth pieces in under an hour.

    This makes it ideal for busy families, meal prep lovers, and anyone searching for quick dinner recipes that still feel homemade and hearty. The combination of beef, potatoes, carrots, and rich brown gravy creates a classic one-pot meal that satisfies hunger while offering warmth and comfort in every bite.

    How Pressure Cooking Creates Tender Beef Stew in Less Time

    The Instant Pot works by trapping steam and increasing pressure inside the pot, which raises the cooking temperature and speeds up the breakdown of connective tissues in beef chuck.

    This process mimics slow braising but in a much shorter time. As the beef cooks under pressure, it releases natural juices that blend with broth, Worcestershire sauce, and aromatics to form a deep, savory gravy.

    Unlike stovetop methods, nothing evaporates, so all the flavor stays inside the pot. This is why pressure cooker beef stew tastes richer and more concentrated compared to traditional methods, making it one of the most efficient ways to prepare a classic stew recipe.

    Choosing the Best Beef Cut for Instant Pot Beef Stew

    The choice of beef is one of the most important factors in achieving a tender and flavorful stew. Boneless beef chuck is the preferred cut because it contains enough fat and connective tissue to become soft and juicy during pressure cooking.

    Pre-cut stew meat is often inconsistent in quality and may contain tough pieces that do not break down evenly. Cutting beef chuck into uniform chunks ensures even cooking and better texture.

    Before pressure cooking, searing the beef helps develop a rich, caramelized surface that enhances the final flavor of the stew. This step also creates browned bits at the bottom of the pot, which dissolve into the sauce and deepen the overall taste.

    Key Ingredients

    Instant Pot beef stew relies on simple but powerful ingredients that work together to create depth and balance.

    Carrots add natural sweetness, while Yukon Gold potatoes provide a creamy, slightly buttery texture that holds up well under pressure cooking.

    Onion and garlic form the aromatic base, infusing the broth with savory notes.

    Tomato paste adds richness and slight acidity, which enhances the overall flavor profile.

    Beef broth and Worcestershire sauce combine to create a deeply savory gravy that coats every ingredient.

    Dried thyme adds earthiness, while frozen peas introduced at the end bring a pop of color and freshness that balances the heavy, slow-cooked flavors.

    Step-by-Step Instructions

    The cooking process begins by seasoning and searing beef in batches using the sauté function of the Instant Pot. This step locks in flavor and builds the foundation of the stew.

    Once the beef is browned and set aside, onions and garlic are sautéed until softened, followed by tomato paste and thyme to deepen the aroma.

    Beef broth and Worcestershire sauce are then added to deglaze the pot, lifting all the flavorful bits stuck to the bottom. Next, carrots, potatoes, and seared beef are combined in the pot before pressure cooking.

    The stew cooks under high pressure for about 25 minutes, followed by a short natural release. After cooking, frozen peas and a cornstarch slurry are added to thicken the sauce into a rich, glossy gravy.

    How to Thicken Instant Pot Beef Stew Into a Rich Gravy

    One of the defining features of a great beef stew is its thick, hearty gravy. In this recipe, thickness is achieved using a simple cornstarch slurry added after pressure cooking.

    As the stew simmers on sauté mode, the slurry blends with the hot liquid and naturally thickens the sauce without altering flavor. This method is preferred over flour because it keeps the recipe gluten-free and avoids the risk of burning during the searing stage.

    The result is a smooth, velvety gravy that clings to the beef and vegetables, giving the stew its signature comforting texture.

    Common Mistakes to Avoid

    A common mistake is cutting vegetables too small, which causes them to overcook and break apart under pressure. Large, uniform chunks help maintain structure and texture.

    Another mistake is skipping the searing step, which significantly reduces flavor depth. It is also important not to overload the Instant Pot, as too much liquid or ingredients can affect pressure buildup and cooking consistency.

    Stirring too much before sealing the lid can also cause uneven cooking. Following the correct layering technique ensures even heat distribution and prevents burning warnings.

    Serving Ideas and Meal Pairing Suggestions

    Instant Pot beef stew is a complete meal on its own, but it pairs beautifully with crusty bread, dinner rolls, or mashed potatoes for an even more filling experience.

    Some people enjoy serving it over rice or egg noodles to stretch the meal further. A light green salad or steamed vegetables can balance the richness of the stew.

    Fresh parsley sprinkled on top adds brightness and freshness, while a crack of black pepper enhances the final flavor. This dish is also ideal for meal prep, as it tastes even better the next day when flavors fully develop.

    Storage, Reheating, and Freezing Tips

    Beef stew stores extremely well, making it a great option for batch cooking. It can be refrigerated in an airtight container for several days without losing flavor.

    When reheating, adding a splash of broth or water helps restore its original consistency. The stew can also be frozen for longer storage, making it convenient for future meals.

    After thawing overnight in the refrigerator, it can be gently reheated on the stove or in the microwave. The texture remains rich and satisfying even after freezing, making it a reliable make-ahead dinner option.

    Notes for Best Results

    For best results, always use beef chuck instead of lean cuts, as fat content is essential for tenderness. Do not skip the natural pressure release step, as it helps the meat relax and stay juicy.

    Adjust seasoning at the end rather than the beginning to fine-tune flavor. If the stew becomes too thick, a small amount of broth can be added to loosen it. If too thin, simmering on sauté mode will naturally reduce and concentrate the sauce.

    Instant Pot Beef Stew – Easy Pressure Cooker Beef Stew Recipe


    This Instant Pot Beef Stew is a rich, hearty one-pot meal made with tender beef chuck, potatoes, carrots, and a deeply flavored brown gravy. Perfect for cold weather or family dinners, this pressure cooker recipe delivers slow-cooked taste in under an hour.

    • Prep Time: 5 minutes
    • Cook Time: 55–65 minutes
    • Total Time: 1 hour
    • Servings: 4

    Ingredients

    • 2 1/2 pounds boneless beef chuck, cut into 1 1/2-inch pieces
    • 1 medium yellow onion, diced
    • 2 cloves garlic, minced
    • 1 1/2 teaspoons kosher salt, plus more as needed
    • 1/2 teaspoon black pepper, plus more as needed
    • 2 tablespoons vegetable oil, divided
    • 1 tablespoon tomato paste
    • 1 teaspoon dried thyme
    • 1/2 cup beef broth
    • 2 tablespoons Worcestershire sauce
    • 3 medium carrots, peeled and cut into chunks
    • 3 medium Yukon Gold potatoes, quartered
    • 1 tablespoon cornstarch
    • 1 tablespoon water
    • 3/4 cup frozen peas
    • Fresh parsley, chopped (optional garnish)

    Step-by-Step Instructions

    1. Season beef with salt and pepper. Set Instant Pot to sauté mode and heat oil.
    2. Sear beef in two batches until browned on one side. Remove and set aside.
    3. Add onion and garlic to the pot and cook until softened.
    4. Stir in tomato paste and thyme, cooking until fragrant and darkened.
    5. Pour in beef broth and Worcestershire sauce, scraping the bottom to deglaze.
    6. Add carrots, potatoes, and seared beef back into the pot.
    7. Close lid, seal valve, and cook on high pressure for 25 minutes.
    8. Allow natural release for 10 minutes, then quick release remaining pressure.
    9. Turn on sauté mode, add peas, and stir in cornstarch slurry. Simmer until thickened.
    10. Adjust seasoning and serve hot with parsley garnish if desired.

    Nutritional Information (Approximate per serving)

    • Calories: 628 kcal
    • Protein: 67.5 g
    • Fat: 21.1 g
    • Saturated Fat: 6.2 g
    • Carbohydrates: 44.1 g
    • Fiber: 6.6 g
    • Sugar: 7.4 g
    • Sodium: 1202 mg
    • Iron: 3.9 mg
    https://chatgpt.com/backend-api/sentinel/frame.html?sv=20260423af3cRs0

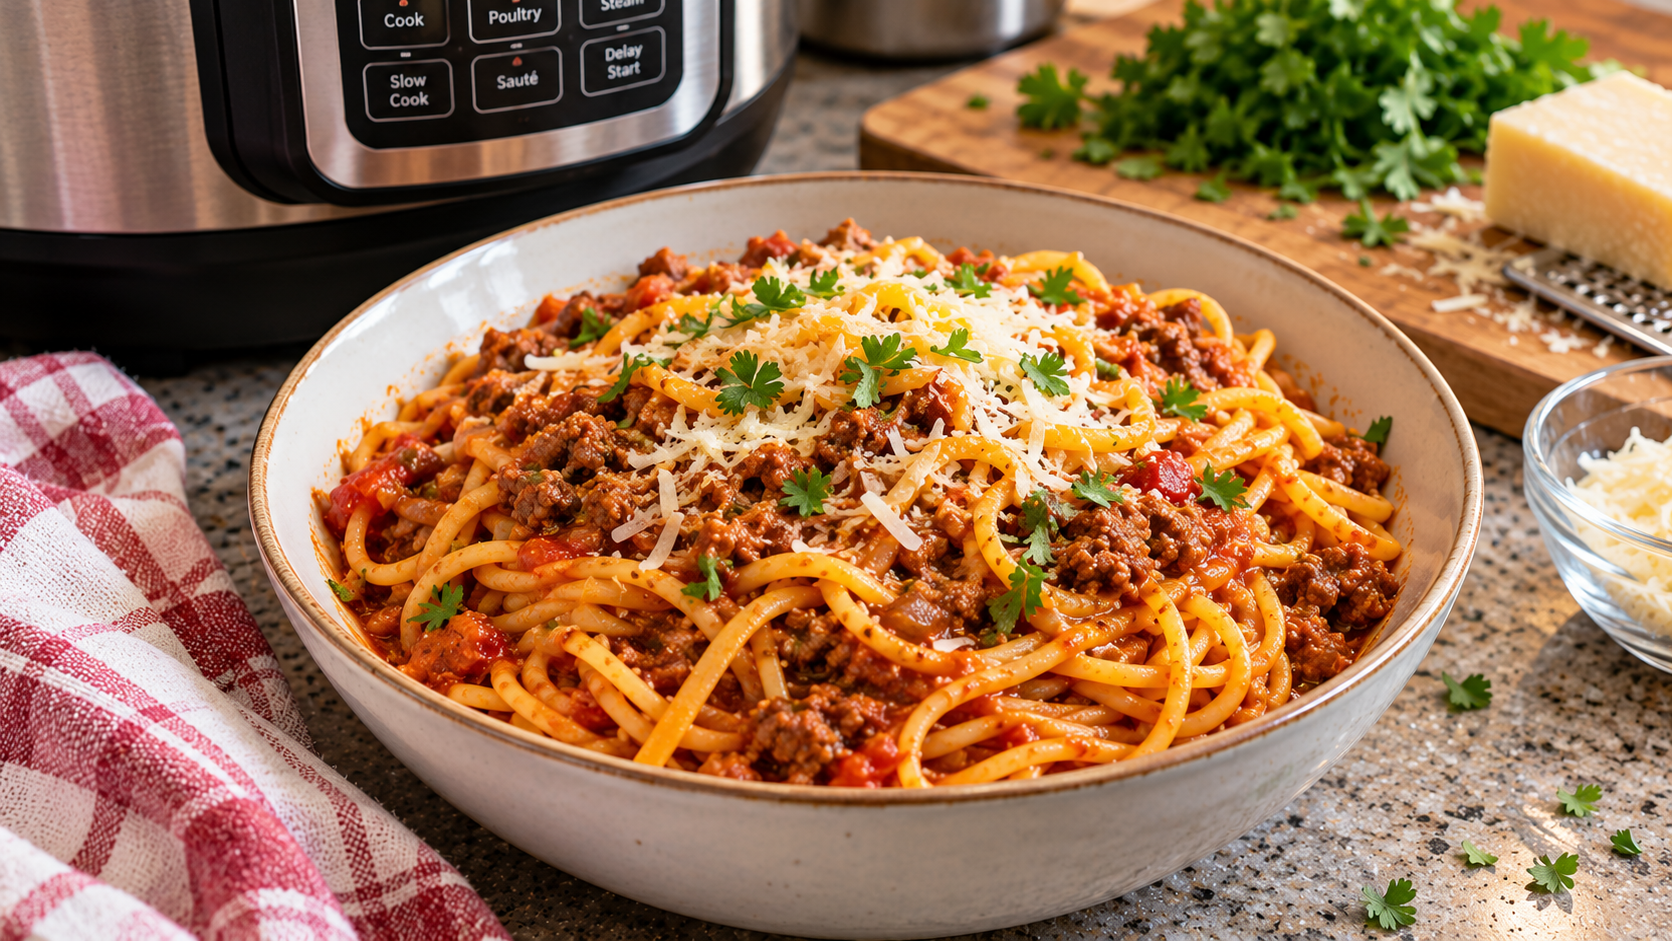
  • Instant Pot Spaghetti Recipe

    Instant Pot Spaghetti Recipe

    Instant Pot spaghetti has become one of the most searched and loved weeknight dinner recipes because it removes almost every traditional cooking step while still delivering rich, slow-simmered flavor.

    Instead of boiling pasta separately and preparing sauce in another pan, everything cooks together in a single pressure cooker pot. This method not only saves time but also reduces cleanup, making it ideal for busy families, meal preppers, and beginners looking for easy Instant Pot pasta recipes.

    The pressure cooking process allows the spaghetti noodles to absorb the flavor of the meat, tomatoes, garlic, and herbs, resulting in a deeply seasoned dish that tastes like it has been simmering for hours.

    This recipe is especially popular for those searching for quick dinner ideas, one pot pasta recipes, and family-friendly meals that require minimal effort but deliver maximum taste.

    How Pressure Cooking Transforms Classic Spaghetti Into a Flavor-Packed Meal

    Traditional spaghetti requires boiling water, draining pasta, and simmering sauce separately, but the Instant Pot method simplifies everything into a single cooking cycle.

    The sealed pressure environment forces flavors from ground beef, Italian sausage, garlic, onions, and tomato sauce directly into the pasta. This creates a more cohesive and rich taste compared to stovetop versions.

    As the pasta cooks under pressure, it releases starch that naturally thickens the sauce, eliminating the need for heavy cream or additional thickeners. This technique is one of the reasons why Instant Pot pasta recipes have become extremely popular in modern home cooking. It also ensures consistent results, even for beginners, because the pressure cooker controls temperature and timing precisely.

    Choosing the Right Ingredients for the Best Spaghetti

    The success of Instant Pot spaghetti depends heavily on ingredient quality and balance. Lean ground beef combined with Italian sausage provides a perfect mix of flavor and texture, giving the sauce depth and richness.

    Aromatics like onion and garlic build the base of the dish, while Italian seasoning and basil enhance the classic Mediterranean flavor profile. Crushed tomatoes and tomato paste create a thick, hearty sauce that coats the pasta evenly.

    Spaghetti noodles are broken in half before cooking to ensure they fit properly in the Instant Pot and cook evenly under pressure. A small amount of water helps create steam for pressure cooking, while parmesan cheese added at the end brings a salty, umami finish that ties everything together.

    Step-by-Step Cooking Process for Perfect Instant Pot Pasta Every Time

    The cooking process begins by sautéing ground beef and Italian sausage directly in the Instant Pot until browned, which locks in flavor and removes excess fat.

    Next, onions are softened and garlic is added along with seasoning to build a fragrant base. After turning off the sauté mode, broken spaghetti noodles are layered on top of the meat mixture without stirring excessively.

    A blend of crushed tomatoes, tomato paste, and water is poured over the pasta to ensure even coverage. The Instant Pot is then sealed and set to high pressure for a short cooking cycle, typically around five minutes.

    After cooking, a brief natural pressure release helps stabilize the sauce before a quick release finishes the process. The result is tender pasta coated in a rich, flavorful meat sauce.

    Common Mistakes and How to Avoid

    One of the most common mistakes when making Instant Pot spaghetti is stirring the ingredients before pressure cooking. This can cause uneven cooking and trigger a burn warning due to thick tomato sauce settling at the bottom.

    Another mistake is using too little liquid, which prevents proper pressure buildup and leads to undercooked pasta. Overcooking the pasta is also a concern, as pressure cooking continues to soften noodles quickly even after the timer ends.

    To avoid this, it is important to follow precise timing and allow a short natural release before opening the lid. Choosing the right ratio of sauce to pasta ensures that the spaghetti remains creamy and not dry or overly thick after cooking.

    Serving Ideas and Flavor Enhancements

    Instant Pot spaghetti is a complete meal on its own, but it can be elevated with simple toppings and sides. Freshly grated parmesan cheese adds a salty richness, while chopped parsley brings freshness and color.

    Red pepper flakes can be sprinkled on top for those who enjoy a spicy kick. Many people also serve this dish with garlic bread, breadsticks, or a simple green salad to balance the richness of the pasta. For a more indulgent version, a drizzle of olive oil or a sprinkle of mozzarella cheese can be added just before serving.

    This recipe is also ideal for meal prep because it reheats well and maintains its flavor and texture over several days.

    Storage, Meal Prep, and Reheating Tips for Busy Lifestyles

    Instant Pot spaghetti is highly suitable for meal prepping and leftovers. Once cooled, it can be stored in airtight containers in the refrigerator for several days without losing flavor.

    When reheating, adding a small splash of water or broth helps restore the original saucy consistency. It can be reheated on the stovetop or in the microwave, depending on convenience.

    This dish also freezes well, making it a great option for batch cooking. When frozen, it should be thawed overnight in the refrigerator before reheating.

    This makes it a practical solution for families looking for ready-to-eat meals during busy weekdays or for individuals who prefer cooking in large batches.

    Tips for Best Results

    For best results, ensure the meat is properly browned before adding other ingredients, as this builds a strong flavor base. Avoid over-stirring after adding the pasta to maintain even layering.

    If the sauce appears too thick after cooking, a small amount of broth or water can be added and stirred in. If it is too thin, letting it sit uncovered for a few minutes will help it thicken naturally.

    Using fresh herbs at the end enhances aroma and freshness. For variation, ground turkey or chicken can replace beef, and gluten-free pasta can be used with adjusted timing.

    Instant Pot Spaghetti Recipe


    This Instant Pot Spaghetti is a quick and easy one-pot dinner made with ground beef, Italian sausage, tomatoes, and pasta cooked together under pressure. Perfect for busy weeknights, it delivers rich, homemade flavor in under 30 minutes with minimal cleanup.

    • Preparation Time: 10 minutes
    • Cooking Time: 15 minutes
    • Total Time: 25 minutes
    • Servings: 6

    Ingredients

    • 1/2 pound lean ground beef
    • 1/2 pound ground Italian sausage
    • Salt and black pepper (to taste)
    • 1 small yellow onion, chopped
    • 2 cloves garlic, minced
    • 3 tablespoons fresh basil (or 2 teaspoons dried basil)
    • 1/2 teaspoon garlic powder and sugar
    • 1 teaspoon Italian seasoning
    • 1 tablespoon red wine vinegar
    • 8 ounces spaghetti noodles, broken in half
    • 28 ounce can crushed tomatoes
    • 2 tablespoons tomato paste
    • 1 cup water
    • 1/3 cup freshly grated parmesan cheese (for topping)
    • Fresh parsley (for garnish)
    • Crushed red pepper flakes (optional garnish)

    Step-by-Step Instructions

    1. Set Instant Pot to sauté mode. Add ground beef and Italian sausage. Season with salt and pepper and cook until browned. Drain excess fat.
    2. Add chopped onion and cook for 2–3 minutes until softened. Stir in garlic, basil, garlic powder, sugar, Italian seasoning, and red wine vinegar. Turn off sauté mode.
    3. Place broken spaghetti noodles over the meat mixture without stirring.
    4. Mix crushed tomatoes and tomato paste together, then pour over noodles. Add water evenly on top.
    5. Seal the lid and cook on high pressure for 5 minutes.
    6. Allow a 5-minute natural release, then perform a quick release.
    7. Open lid and gently stir everything until well combined.
    8. Serve hot topped with parmesan, parsley, and red pepper flakes if desired.

    Nutritional Information (Approximate per serving)

    • Calories: 380 kcal
    • Carbohydrates: 41 g
    • Protein: 21 g
    • Fat: 14 g
    • Saturated Fat: 5 g
    • Cholesterol: 52 mg
    • Sodium: 523 mg
    • Fiber: 4 g
    • Sugar: 8 g
    • Iron: 3.9 mg
    • Calcium: 78 mg

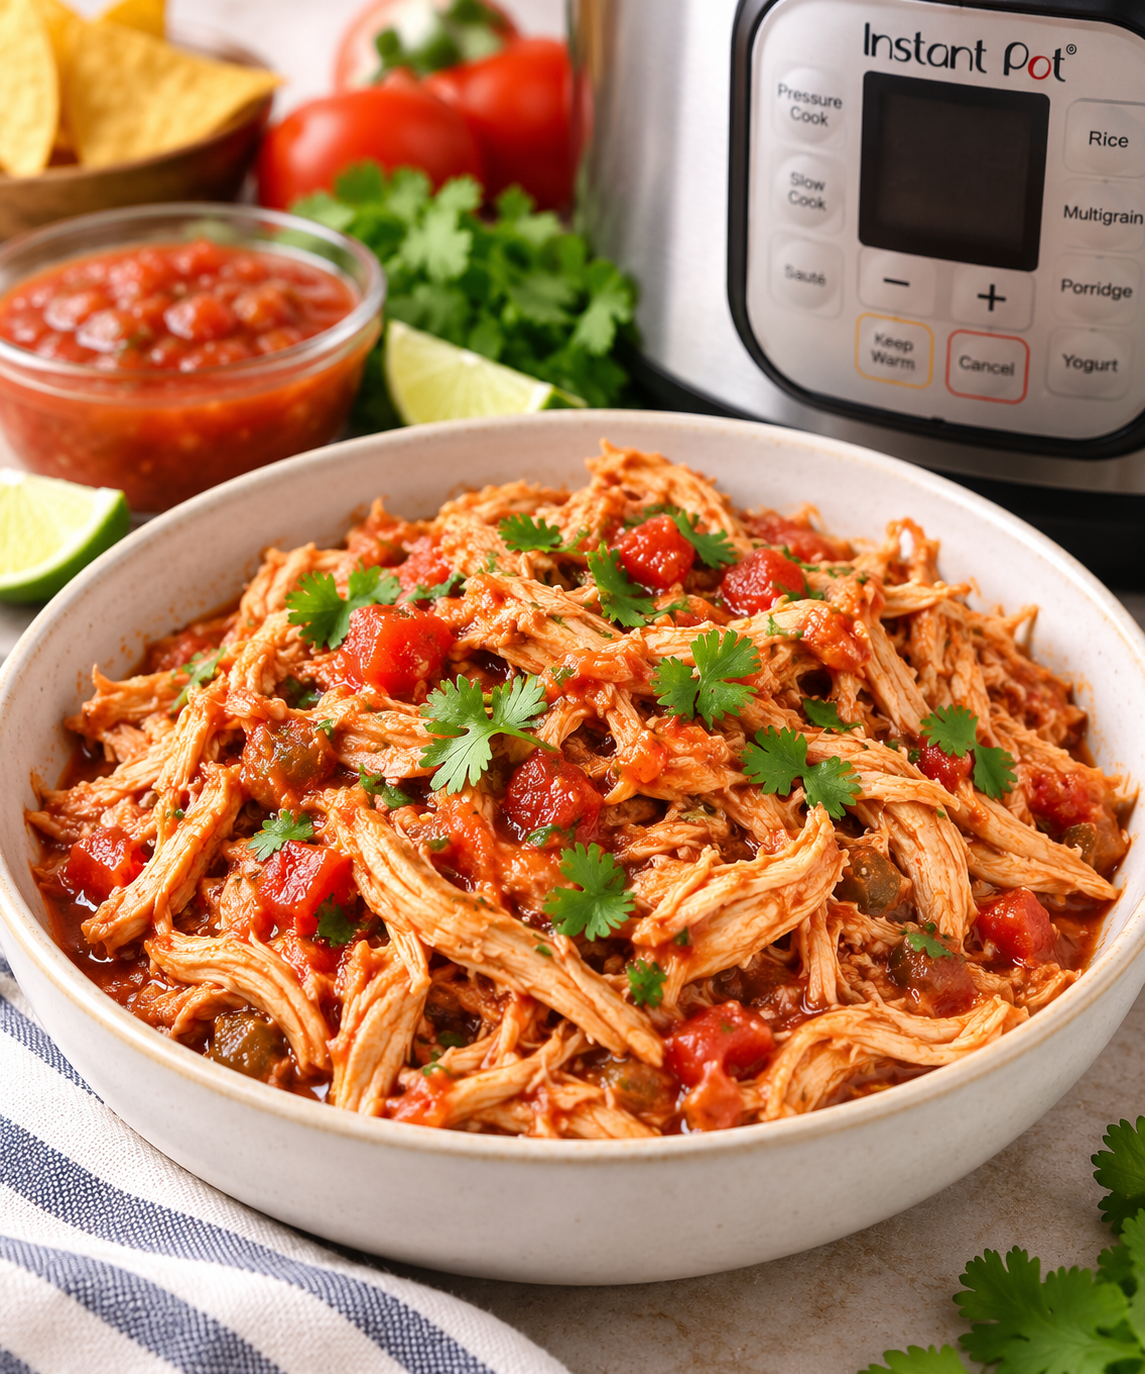
  • Instant Pot Salsa Chicken

    Instant Pot Salsa Chicken

    Instant Pot Salsa Chicken has become one of the most searched pressure cooker recipes for busy home cooks who want fast, flavorful, and versatile meals. When users look for terms like “easy Instant Pot chicken tacos,” “Mexican shredded chicken pressure cooker,” or “meal prep salsa chicken recipe,” this dish consistently appears as a top choice.

    The reason is simple: it requires minimal ingredients, very little hands-on time, and delivers tender, juicy shredded chicken that can be used in countless meals. The Instant Pot locks in moisture while infusing the chicken with bold salsa flavor, making it a reliable option for both beginners and experienced cooks.

    Whether you are planning weekly meal prep or feeding a family dinner, this recipe saves time while still delivering restaurant-style Mexican-inspired flavor.

    How Pressure Cooking Transforms Chicken into Juicy Shredded Perfection

    One of the biggest advantages of making Instant Pot Salsa Chicken is the pressure cooking method itself, which is why it ranks highly for searches like “how to shred chicken in Instant Pot” and “juicy pressure cooker chicken breast recipe.”

    The sealed environment of the Instant Pot traps steam and heat, allowing chicken breasts to cook evenly and quickly without drying out. Unlike oven baking or stovetop simmering, pressure cooking infuses the chicken with the salsa mixture, creating deep flavor in every bite.

    The combination of steam pressure and moisture ensures that even lean chicken breasts remain tender and easy to shred. This makes the dish ideal for meal prep, tacos, burrito bowls, enchiladas, salads, and freezer-friendly protein packs.

    Choosing the Best Chicken for Instant Pot Salsa Chicken Recipe

    Selecting the right chicken is important for achieving the best texture in Instant Pot Salsa Chicken. Boneless, skinless chicken breasts are commonly used because they cook quickly and shred easily after pressure cooking.

    Many users searching “best chicken for Instant Pot shredded chicken” prefer this cut due to its lean protein content and versatility. However, chicken thighs can also be used for a richer, more tender result.

    The size and thickness of the chicken breasts can affect cooking time, so even sizing ensures consistent results. Larger pieces may require a few extra minutes of pressure cooking, while smaller ones cook more quickly. Choosing fresh, high-quality chicken improves both flavor and texture in the final shredded dish.

    Essential Ingredients That Build Bold Mexican Flavor

    Instant Pot Salsa Chicken relies on simple pantry ingredients that create bold Mexican-inspired flavor. Salsa acts as the main cooking liquid, infusing the chicken with tomato, chili, and spice notes. Seasonings such as salt, pepper, garlic powder, taco seasoning, and oregano enhance depth and aroma.

    Many people searching for “best seasoning for salsa chicken Instant Pot” appreciate this combination because it balances savory and slightly smoky flavors. Taco seasoning adds warmth and complexity, while oregano brings an earthy, herbal note that complements the salsa base.

    Garlic powder enhances overall richness, making the final shredded chicken flavorful enough to eat on its own or use as a base for multiple dishes.

    Step-by-Step Cooking Process for Perfect Instant Pot Salsa Chicken

    The cooking process for Instant Pot Salsa Chicken is simple but effective, making it a favorite among users searching for “easy Instant Pot chicken recipes for beginners.” First, the chicken is seasoned evenly with salt, pepper, and garlic powder.

    A layer of salsa is added to the bottom of the Instant Pot to prevent sticking and build flavor. The chicken is placed inside and topped with taco seasoning and oregano before being covered with more salsa. The Instant Pot is then sealed and set to pressure cook for a short time depending on chicken thickness.

    After cooking, a natural pressure release allows the juices to settle, ensuring maximum tenderness. Finally, the chicken is shredded and mixed back into the flavorful sauce.

    Why Natural Pressure Release Improves Texture and Flavor

    A key technique in making Instant Pot Salsa Chicken is allowing a natural pressure release, which is often highlighted in searches like “why is my Instant Pot chicken dry.”

    When pressure is released naturally, the chicken continues to cook gently while absorbing remaining moisture from the salsa. This prevents the meat from becoming tough or stringy. The resting period also allows the juices to redistribute throughout the shredded chicken, resulting in a softer, more flavorful texture.

    Skipping this step and using quick release can sometimes lead to drier results. This simple but important technique ensures consistently juicy and tender Mexican shredded chicken every time.

    Best Ways to Shred and Use Instant Pot Salsa Chicken

    Once cooked, Instant Pot Salsa Chicken can be easily shredded using two forks or even a hand mixer for faster results. Many users searching “what to do with shredded salsa chicken” enjoy its versatility in meal prep and family dinners.

    It can be used in tacos, burrito bowls, quesadillas, enchiladas, salads, nachos, and wraps. For meal prep, it pairs well with rice, beans, corn, cheese, and fresh toppings like sour cream or avocado.

    The leftover cooking liquid can also be spooned over rice or vegetables for added flavor. This adaptability makes it one of the most practical and high-value Instant Pot recipes for weekly cooking.

    Meal Prep and Storage Tips for Busy Weekdays

    Instant Pot Salsa Chicken is widely used in meal prep routines due to its storage flexibility. Once cooled, it can be refrigerated in airtight containers for several days, making it ideal for quick lunches and dinners.

    Many people searching “how to store shredded chicken meal prep” appreciate that it retains moisture and flavor even after refrigeration. It can also be frozen in portions for long-term storage, making it a great freezer-friendly protein option.

    Reheating is simple and can be done in the microwave or stovetop with a splash of water or extra salsa to maintain juiciness. This makes it perfect for busy schedules and weekly planning.

    Serving Ideas and Mexican-Inspired Meal Variations

    Instant Pot Salsa Chicken works as a base for countless Mexican-inspired dishes. It can be served in taco shells with lettuce, cheese, and salsa for quick tacos or layered into burrito bowls with rice, beans, and guacamole.

    Many users searching “easy chicken taco bowl recipe” use this dish as their go-to protein. It also works well in enchiladas baked with cheese and sauce, or as a topping for nachos.

    For a lighter option, it can be added to salads with lime dressing or used in lettuce wraps. The flavor is versatile enough to pair with both traditional and modern fusion dishes.

    Instant Pot Salsa Chicken Recipe


    Juicy Mexican-style shredded chicken cooked in salsa and spices using the Instant Pot. Perfect for tacos, burrito bowls, salads, and meal prep.

    Preparation & Cooking Duration

    • Prep Time: 5 minutes
    • Cook Time: 10 minutes
    • Total Time: 15–30 minutes

    Serving

    Serves: 6–8

    Ingredients

    • 3–4 boneless skinless chicken breasts (approx. 8 oz each)
    • Salt (for seasoning)
    • Black pepper (for seasoning)
    • 2 tsp garlic powder (for seasoning)
    • 1 tbsp taco seasoning
    • 1 tsp oregano
    • 16 oz salsa

    Instructions

    • Season chicken breasts evenly with salt, pepper, and garlic powder.
    • Add ½ cup salsa to the Instant Pot inner pot, then place chicken on top.
    • Sprinkle taco seasoning and oregano over chicken.
    • Pour remaining salsa over chicken, covering completely.
    • Seal lid and set pressure valve to sealing position.
    • Cook on Pressure Cook/Manual for 10–12 minutes depending on chicken size.
    • Allow natural pressure release for 10 minutes, then release remaining pressure.
    • Remove chicken and shred using two forks.
    • Return shredded chicken to pot and mix with sauce.
    • Serve in tacos, bowls, or salads.

    Notes

    • For larger chicken breasts, increase cook time by 3 minutes.
    • If sauce is too thick, add a small amount of water before cooking.
    • Shredded chicken can be stored in fridge for up to 3 days or frozen for future meals.

    Nutritional Information (approx. per serving)

    • Calories: 160 kcal
    • Protein: High (lean chicken source)
    • Carbohydrates: Low
    • Fat: Low
    • Sodium: Moderate (depends on salsa and seasoning)

  • Instant Pot Chili Recipe

    Instant Pot Chili Recipe

    Instant Pot Chili is one of the most searched comfort food recipes because it delivers deep, slow-cooked flavor in a fraction of the time. This pressure cooker chili combines ground beef, beans, tomatoes, and bold spices into a rich, thick, and satisfying meal that tastes like it has been simmering all day.

    The Instant Pot transforms simple pantry ingredients into a restaurant-quality beef chili in under an hour, making it ideal for weeknight dinners, game day gatherings, or meal prep.

    The combination of cumin, chili powder, garlic, and optional chipotle in adobo creates a smoky, slightly spicy base that defines classic American chili while enhancing its depth and complexity.

    What makes Instant Pot Chili especially popular is its balance between convenience and flavor. Traditional chili recipes often require hours of stovetop simmering, but pressure cooking locks in flavor quickly while keeping the meat tender and juicy.

    The beans absorb the seasoned broth, the tomatoes add acidity, and the spices blend into a thick, rich sauce that coats every bite. This method also reduces kitchen cleanup since everything is cooked in a single pot.

    For home cooks looking for an easy yet deeply satisfying dinner, Instant Pot Chili is one of the most reliable and flavorful pressure cooker recipes available.

    Why This Recipe Popular

    Instant Pot Chili has become a staple in modern kitchens because it offers a complete, balanced meal in one pot. It contains protein from ground beef, fiber from beans, and antioxidants from tomatoes, making it both filling and nutritious.

    Unlike many quick meals, it does not sacrifice flavor for speed. Instead, the pressure cooking process intensifies seasoning, allowing every ingredient to contribute to a rich, layered taste profile. This makes it especially popular for families who want hearty comfort food without spending hours cooking.

    Another reason this recipe stands out is its versatility. It can be adjusted to be mild or spicy, thick or soupy, depending on personal preference.

    It also works well for meal prep because the flavors deepen over time, making leftovers even more delicious. Many home cooks prepare a large batch and freeze portions for later use, turning it into a convenient ready-made meal.

    Whether served with cornbread, rice, tortilla chips, or baked potatoes, Instant Pot Chili adapts easily to different serving styles and dietary needs.

    Key Ingredients

    The foundation of Instant Pot Chili is built on simple but powerful ingredients that create maximum flavor.

    Ground beef is the primary protein, providing richness and a hearty texture.

    Vegetable oil helps sauté the meat and spices, creating a flavorful base.

    Onion and garlic add aromatic depth, forming the backbone of the chili’s savory profile.

    Spices like cumin and chili powder bring warmth, earthiness, and mild heat, making the dish unmistakably chili-like.

    Beans, such as black beans or kidney beans, contribute texture, fiber, and nutritional balance while absorbing the surrounding flavors.

    Beef stock adds depth and moisture, ensuring the chili remains rich and well-seasoned. Fire-roasted diced tomatoes introduce a smoky sweetness that elevates the entire dish.

    Tomato paste thickens the chili and intensifies the tomato flavor.

    A small amount of chipotle in adobo (optional but highly recommended) adds smoky heat and complexity, transforming the chili into a bold, restaurant-style dish.

    How Instant Pot Pressure Cooking Enhances Chili Flavor

    Pressure cooking plays a crucial role in developing the deep, slow-cooked taste of Instant Pot Chili. When the lid is sealed and pressure builds, heat forces liquid and seasoning into every ingredient.

    This allows beans to soak up spice-infused broth, while ground beef becomes tender and flavorful. The sealed environment prevents evaporation, ensuring that all flavors remain concentrated rather than diluted.

    Another advantage of the Instant Pot is flavor fusion. In traditional stovetop chili, ingredients gradually blend over hours of simmering. In contrast, pressure cooking accelerates this process, creating a fully developed taste in under 30 minutes of cooking time.

    The result is a chili that tastes like it has been slow-cooked for half a day. This makes it ideal for busy households that want authentic chili flavor without long preparation times.

    Step-by-Step Cooking Method

    The process begins with sautéing ground beef in the Instant Pot using vegetable oil. This step is essential because browning the meat develops a deep umami flavor that forms the base of the chili.

    During this stage, cumin, chili powder, and salt are added directly to the meat, allowing the spices to toast slightly and release their aromatic oils. This technique enhances the overall richness of the dish.

    Next, onions and garlic are added and cooked until softened, building another layer of flavor. Beef stock is then poured in to deglaze the pot, lifting any browned bits from the bottom. This step is important because it prevents burning while adding extra flavor. Beans, tomatoes, tomato paste, and chipotle are then stirred in before sealing the lid.

    The chili is pressure cooked until thick and fully developed. After a short natural rest and quick release, the chili is stirred and ready to serve.

    Toppings and Serving Ideas

    Instant Pot Chili is highly customizable and becomes even more enjoyable with the right toppings. Common choices include shredded cheddar cheese, sour cream, chopped green onions, and crispy corn chips.

    These toppings add contrast in texture and flavor, balancing the richness of the chili with freshness and crunch. Some people also enjoy adding avocado, jalapeños, or fresh cilantro for an extra layer of brightness.

    For serving, chili pairs perfectly with cornbread, rice, baked potatoes, or tortilla chips. It can also be used as a topping for nachos, hot dogs, or fries.

    Because of its thick and hearty texture, it works well as both a standalone meal and a versatile base for other dishes. This adaptability is one of the main reasons Instant Pot Chili remains a favorite across households.

    Notes and Cooking Tips for Best Results

    For the best Instant Pot Chili, always brown the beef thoroughly before pressure cooking. This step is essential for developing deep flavor.

    Make sure to scrape the bottom of the pot after adding broth to prevent burning and incorporate flavorful browned bits into the sauce. If you prefer thicker chili, reduce the liquid slightly or allow it to sit for a few minutes after cooking.

    To adjust spice levels, increase or decrease chipotle in adobo or chili powder depending on preference. For a milder version, omit chipotle entirely.

    If the chili becomes too thick after cooling, simply add a splash of broth when reheating. The recipe is flexible and forgiving, making it suitable for beginners and experienced cooks alike.

    Instant Pot Chili Recipe


    Instant Pot Chili is a rich, hearty pressure cooker beef chili made with ground beef, beans, tomatoes, and bold spices. It is a quick and easy one-pot meal perfect for weeknight dinners and meal prep.

    Preparation & Cooking Duration

    • Prep Time: 10 minutes
    • Cook Time: 35 minutes
    • Total Time: 45 minutes

    Serving

    • 6–8 servings

    Ingredients

    • 3 Tbsp vegetable oil
    • 1 1/4 lb lean ground beef
    • 2 tsp ground cumin
    • 2 tsp chili powder
    • 2 tsp salt, divided
    • 1/2 small yellow onion, chopped
    • 3 garlic cloves, finely chopped
    • 2 cups reduced-sodium beef stock
    • 2 (15 oz.) cans black or kidney beans, drained and rinsed
    • 1 (15 oz.) can diced fire-roasted tomatoes
    • 2 Tbsp tomato paste
    • 1 Tbsp pureed chipotles in adobo (optional)
    • Shredded cheddar cheese, sour cream, chopped green onion, and corn chips (for serving)

    Step-by-Step Instructions

    1. Set Instant Pot to sauté mode and add vegetable oil.
    2. Add ground beef and season with cumin, chili powder, and 1 tsp salt. Cook until browned.
    3. Stir in chopped onion and garlic and cook until softened.
    4. Pour in beef stock and scrape bottom to deglaze the pot.
    5. Add remaining salt, beans, fire-roasted tomatoes, tomato paste, and chipotle (if using).
    6. Cancel sauté mode and close the lid securely.
    7. Set to high pressure and cook for 14 minutes.
    8. Allow natural rest for 10 minutes, then release remaining pressure.
    9. Open lid carefully and stir well.
    10. Serve hot with desired toppings.

    Nutritional Information (Approximate per serving)

    • Calories: 410 kcal
    • Carbohydrates: 28g
    • Protein: 27g
    • Fat: 22g
    • Fiber: 8g
    • Sugar: 6g
    • Sodium: 780mg

  • Instant Pot Taco Soup

    Instant Pot Taco Soup

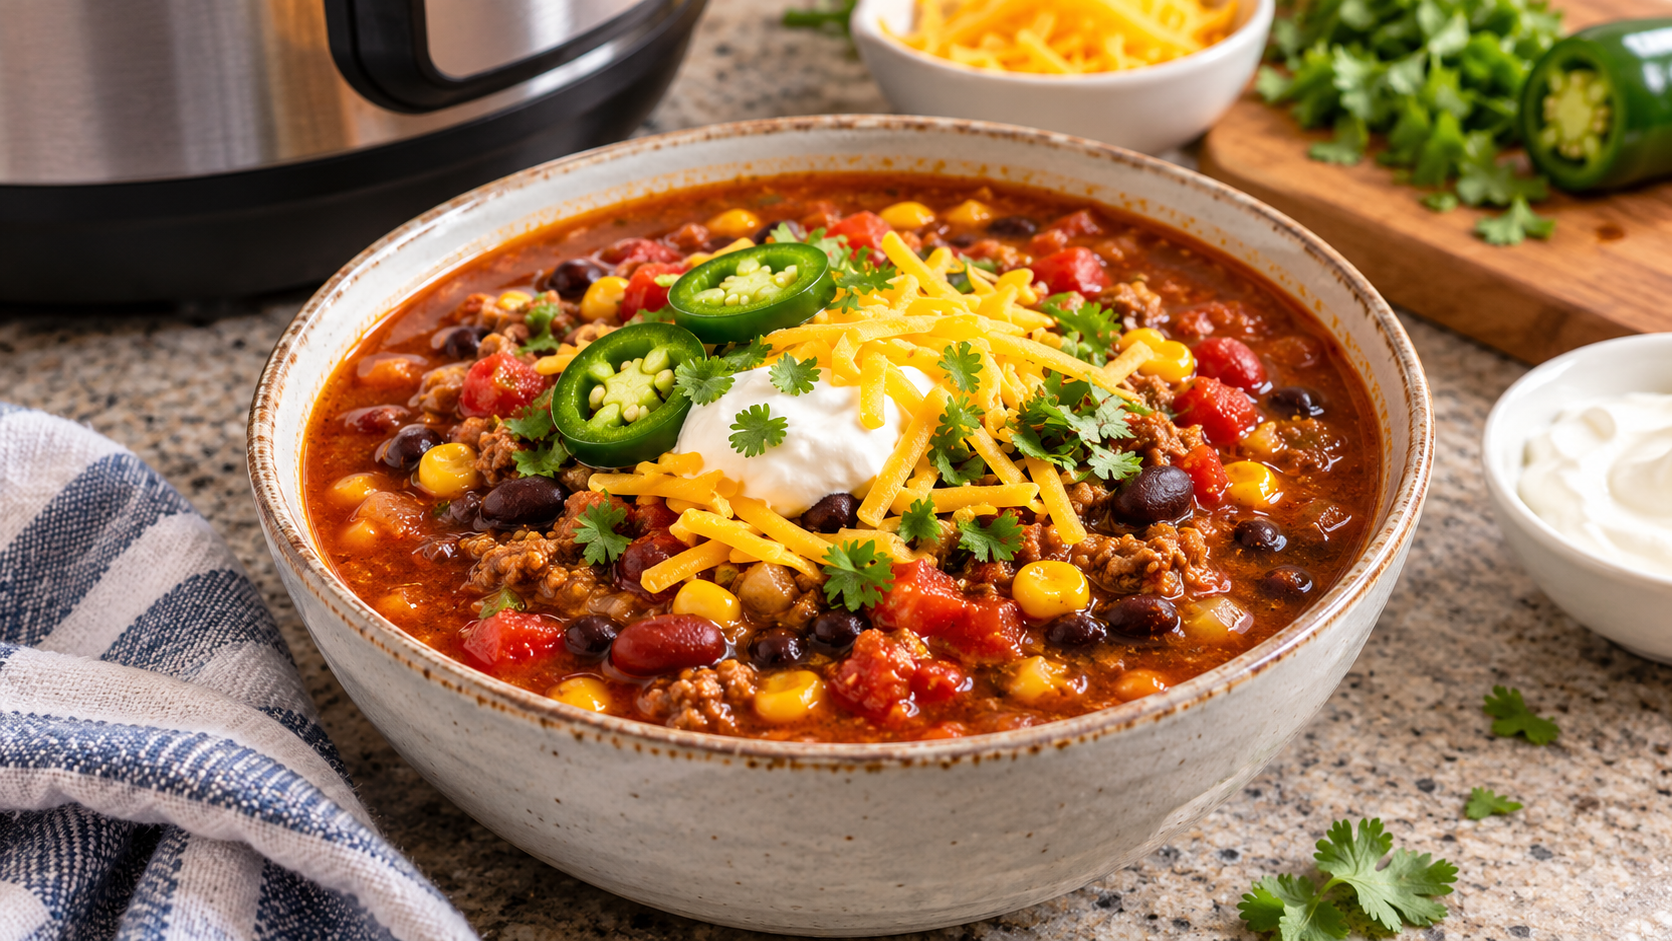
    Instant Pot Taco Soup has become one of the most popular pressure cooker recipes for home cooks looking for a fast, budget-friendly, and deeply flavorful dinner.

    This hearty Mexican-inspired soup combines pantry staples like beans, corn, tomatoes, and ground beef into a rich, savory broth that develops incredible depth in just minutes under pressure. The Instant Pot makes the process incredibly efficient, transforming simple canned ingredients into a restaurant-style taco soup without long simmering times.

    The result is a comforting, protein-rich meal that works perfectly for busy weeknights, meal prep sessions, or family dinners where everyone wants something warm, filling, and satisfying without spending hours in the kitchen.

    One of the biggest advantages of Instant Pot Taco Soup is how effortlessly it delivers bold flavor using everyday ingredients.

    The pressure cooking process intensifies the taste of taco seasoning, ranch mix, and vegetables, allowing the soup to taste like it has been simmering all day.

    This makes it ideal for people who want homemade food but do not have time for traditional slow cooking. It also fits well into modern meal planning because it is scalable, freezer-friendly, and customizable.

    Whether you prefer it mild or spicy, thick or brothy, this pressure cooker taco soup adapts easily to your taste preferences while maintaining its signature Tex-Mex comfort food character.

    Why Taco Soup Is One of the Best Easy Dinner Recipes

    Instant Pot Taco Soup stands out among easy dinner recipes because it delivers maximum flavor with minimal effort. Unlike stovetop soups that require constant monitoring, sautéing, and long simmer times, the Instant Pot allows you to build flavor in layers and then cook everything under pressure in a sealed environment.

    This not only saves time but also enhances the depth of flavor in every bite. The combination of seasoned ground beef, beans, corn, and tomatoes creates a balanced meal that includes protein, fiber, and carbohydrates in one bowl, making it a complete dinner solution.

    Another reason this recipe is so popular is its versatility for meal prep and family feeding. A single batch can serve a large group, and leftovers taste even better the next day as the flavors continue to blend.

    Many households rely on this recipe as a weekly staple because it is affordable and uses pantry ingredients that are easy to keep stocked. It is also a great option for beginners learning how to use a pressure cooker since the steps are straightforward and forgiving. The simplicity of Instant Pot Taco Soup makes it a dependable recipe that consistently delivers satisfying results.

    Key Ingredients

    The ingredients used in Instant Pot Taco Soup are designed for convenience and flavor efficiency. Ground beef forms the base of the soup, adding richness and protein while absorbing the seasoning blend.

    Beef broth provides a savory liquid foundation that enhances the overall depth of flavor. Beans such as kidney beans and black beans contribute texture, fiber, and nutritional balance, while corn adds natural sweetness that complements the savory spices.

    Diced tomatoes and Rotel bring acidity and mild heat, creating a well-rounded flavor profile that defines classic taco soup.

    Seasoning plays a crucial role in transforming simple ingredients into a bold and satisfying meal. A combination of taco seasoning, ranch dressing mix, onion powder, salt, and optional cayenne pepper creates a layered spice profile that is both tangy and savory.

    The ranch seasoning is especially important because it adds a creamy, herby undertone that makes this recipe unique compared to traditional chili or soup variations.

    These pantry staples make the dish highly accessible, ensuring that most home cooks can prepare it without needing specialty grocery items.

    How Instant Pot Pressure Cooking Enhances Taco Soup Flavor

    Pressure cooking is what elevates Instant Pot Taco Soup from a simple bean soup into a deeply flavorful Mexican-inspired dish. When ingredients are sealed inside the Instant Pot, the high-pressure environment forces liquid and seasoning into every component of the soup.

    This results in beans that are infused with spice, meat that is tender and juicy, and a broth that becomes rich and concentrated in a fraction of the time it would take on the stovetop.

    Another benefit of pressure cooking is consistency. Traditional simmered soups can vary depending on heat level and cooking time, but the Instant Pot provides controlled temperature and timing.

    This ensures that every batch of taco soup turns out reliably delicious. It also locks in moisture, preventing the ground beef from drying out and keeping the beans tender without becoming mushy. This efficiency is why Instant Pot Taco Soup has become a go-to recipe for busy families, working professionals, and meal preppers looking for dependable results.

    Cooking Method for Perfect Instant Pot Taco Soup

    The process of making Instant Pot Taco Soup begins with browning ground beef directly in the pressure cooker using the sauté function.

    This step builds a flavorful base and helps develop a deeper savory profile. Once the beef is fully cooked, excess grease is drained to keep the soup balanced and not overly heavy.

    At this stage, the seasoning blend is mixed separately to ensure even distribution of flavors before being added to the pot.

    After the seasoning is incorporated, beans, corn, beef broth, diced tomatoes, and Rotel are added in layers. This layering technique helps prevent burning and ensures proper pressure building.

    Once sealed, the Instant Pot is set to high pressure for a short cooking cycle, typically around 8 minutes.

    After cooking, a quick release is used to safely release steam.

    The final step involves stirring the soup and allowing it to rest briefly so the flavors can fully settle before serving.

    Topping Ideas and Serving Suggestions for Taco Soup

    Instant Pot Taco Soup becomes even more enjoyable when paired with a variety of toppings that add texture and freshness. Common choices include shredded cheddar cheese, sour cream, chopped green onions, and crispy tortilla chips.

    These toppings enhance the soup by adding creaminess, crunch, and extra flavor contrast. Some people also enjoy adding avocado slices or fresh cilantro for a brighter, more refreshing finish.

    For serving, this soup pairs well with simple side dishes like cornbread, dinner rolls, or rice. It can also be served as a base for taco bowls by adding extra rice, beans, and vegetables.

    Because the soup is already filling, it works well as a standalone meal, but the toppings and sides allow customization based on individual preferences. This flexibility is one of the main reasons it remains a favorite comfort food recipe.

    Notes and Cooking Tips for Best Results

    For the best Instant Pot Taco Soup, avoid overfilling the pot and always ensure ingredients are evenly distributed before sealing. This helps prevent burning and ensures even cooking.

    If you prefer a thicker soup, reduce the broth slightly or allow the soup to sit for a few minutes after cooking so it naturally thickens. For a spicier version, increase cayenne pepper or use hot Rotel.

    If the soup appears too thin, it can be simmered briefly using the sauté function after pressure cooking. If it becomes too thick, a small amount of broth can be added to adjust consistency.

    The recipe is forgiving and adapts well to small adjustments, making it ideal for home cooks of all skill levels.

    Instant Pot Taco Soup Recipe


    Instant Pot Taco Soup is a quick and flavorful Mexican-style pressure cooker soup made with ground beef, beans, corn, tomatoes, and bold taco-seasoned broth. It is perfect for busy weeknights, meal prep, and family dinners.

    Preparation & Cooking Duration

    • Prep Time: 15 minutes
    • Cook Time: 8 minutes
    • Total Time: 23 minutes

    Serving

    • 10 servings

    Ingredients

    • 1 pound ground beef
    • 14.5 ounces beef broth (1 can)
    • 15 ounces kidney beans (1 can), drained
    • 15 ounces black beans (1 can), rinsed and drained
    • 14.5 ounces petite diced tomatoes + liquid from can (1 can)
    • 15 ounces corn + liquid from can (1 can)
    • 10 ounces original Rotel – diced tomatoes & green chilies (1 can)
    • 1 ounce ranch seasoning mix packet (or 3 tablespoons homemade ranch seasoning)
    • 1 ounce taco seasoning mix packet (or 3 tablespoons taco seasoning blend)
    • 1.5 teaspoon onion powder
    • 1/2 teaspoon salt
    • 1/8 teaspoon cayenne pepper (optional)

    Step-by-Step Instructions

    1. Turn Instant Pot to sauté mode and brown ground beef for 5–7 minutes.
    2. Drain excess grease after cooking.
    3. In a small bowl, mix ranch seasoning, taco seasoning, onion powder, salt, and cayenne pepper.
    4. Add beef broth, kidney beans, black beans, and corn into the Instant Pot.
    5. Stir in the seasoning mixture evenly.
    6. Add diced tomatoes and Rotel in the center without disturbing the sides too much.
    7. Close lid and set valve to sealing position.
    8. Pressure cook on high for 8 minutes.
    9. Perform a quick release once cooking is complete.
    10. Let soup rest for 5 minutes, stir well, and serve hot.

    Nutritional Information (Approximate per serving)

    • Calories: 160 kcal
    • Carbohydrates: 18g
    • Protein: 10g
    • Fat: 7g
    • Sodium: 720mg
    • Fiber: 5g
    • Sugar: 3g
    • Cholesterol: 25mg
  • Instant Pot Chicken Noodle Soup

    Instant Pot Chicken Noodle Soup

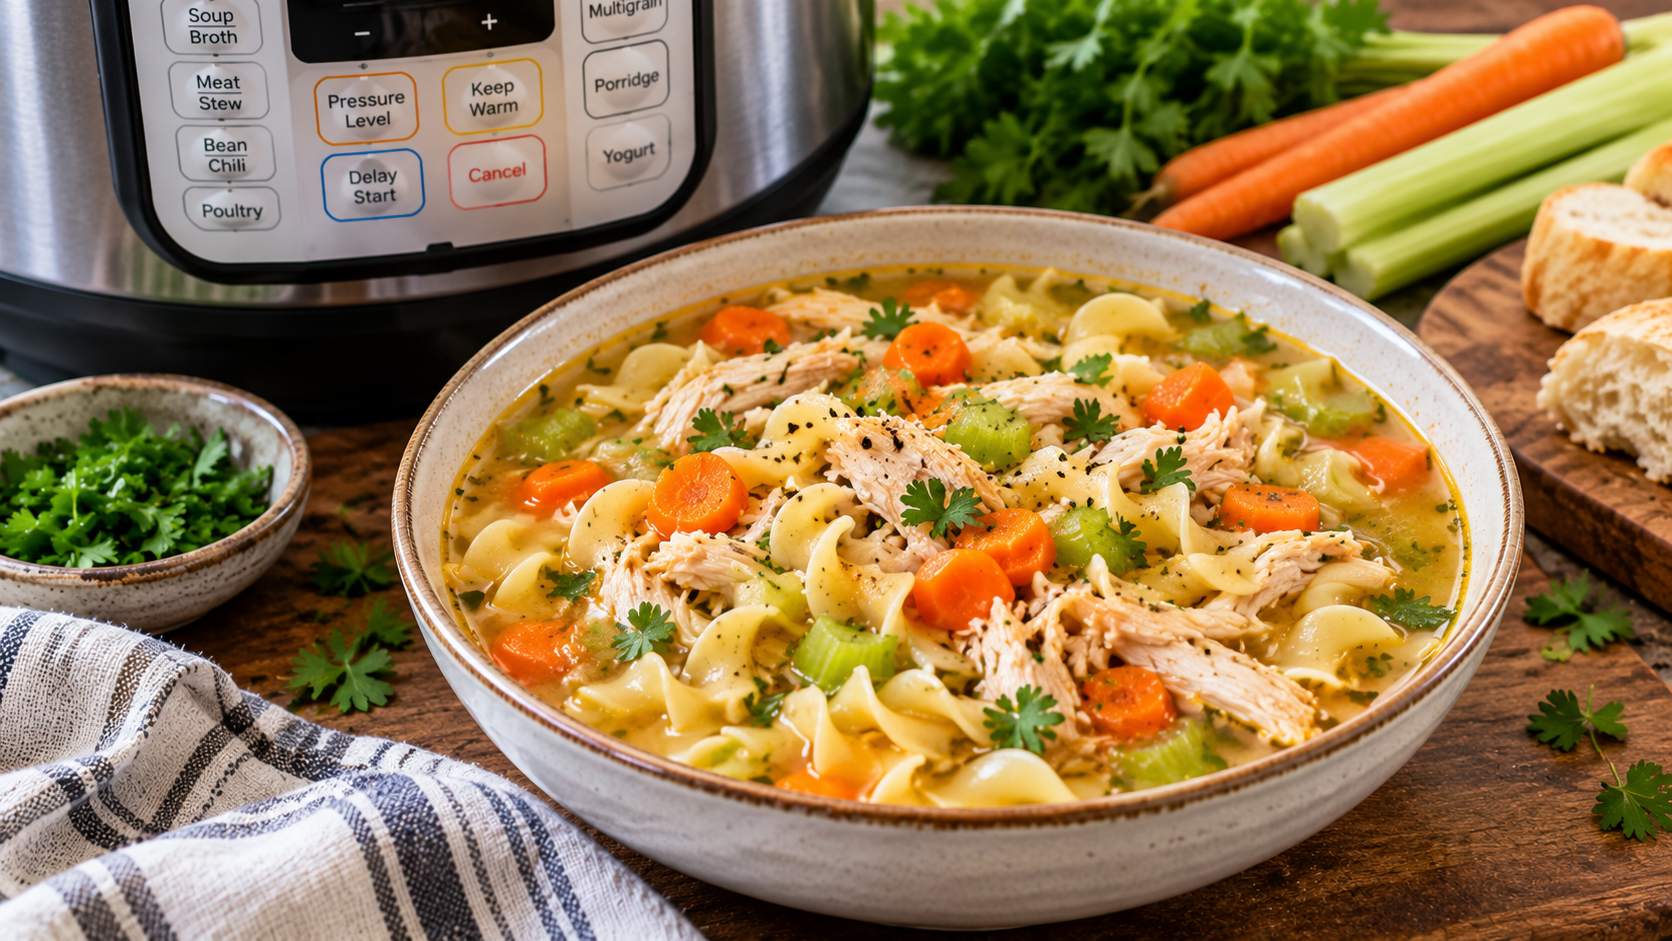
    Instant Pot Chicken Noodle Soup is one of the most comforting homemade soup recipes you can prepare for your family.

    Packed with tender shredded chicken, wholesome vegetables, flavorful herbs, egg noodles, and a rich savory broth, this easy pressure cooker soup delivers everything people love about classic chicken noodle soup while dramatically reducing cooking time.

    Whether you are looking for a cozy winter meal, a nourishing dish during cold and flu season, or a quick family dinner, this recipe offers the perfect solution. The Instant Pot transforms simple ingredients into a hearty, flavorful meal in less than an hour.

    Unlike traditional stovetop versions that often require long simmering times, this pressure cooker chicken noodle soup develops deep flavor quickly while keeping the chicken moist and tender. It is the ideal recipe for busy households seeking homemade comfort food without spending hours in the kitchen.

    Why Instant Pot Chicken Noodle Soup Is So Popular

    Few dishes are as universally loved as chicken noodle soup. It has earned its reputation as a timeless comfort food because it combines nourishing ingredients with rich flavors and satisfying textures.

    The Instant Pot version takes everything that people appreciate about traditional chicken noodle soup and makes it more convenient. The pressure-cooking process helps infuse the broth with flavor while reducing cooking time significantly.

    The vegetables become perfectly tender, the chicken remains juicy, and the noodles absorb the delicious broth. This recipe is especially popular among busy families because it requires minimal effort while delivering results that taste homemade and comforting. From weeknight dinners to meal-prep lunches,

    Instant Pot Chicken Noodle Soup remains one of the most reliable recipes for creating a warm and satisfying meal that appeals to both children and adults.

    The Secret Behind a Rich and Flavorful Broth

    A great chicken noodle soup always begins with an excellent broth. In this recipe, the combination of chicken, vegetables, herbs, and reduced-sodium chicken broth creates a flavorful foundation that develops beautifully under pressure.

    As the chicken cooks, it releases natural juices that enrich the broth even further. The carrots, celery, onions, garlic, oregano, basil, and bay leaves all contribute their unique flavors, creating a balanced and aromatic soup.

    Unlike quick soups that can sometimes taste flat, the Instant Pot concentrates these flavors during the cooking process. The result is a broth that tastes as though it has simmered for hours. Every spoonful delivers warmth, depth, and comfort, making this soup a perfect choice for chilly evenings or whenever a nourishing meal is needed.

    Why Fresh Vegetables Make a Difference

    Fresh vegetables are an essential part of classic chicken noodle soup. Carrots provide natural sweetness and vibrant color, celery contributes a subtle earthy flavor, and onions create an aromatic foundation that enhances the entire dish. Together, these vegetables form the traditional base that has made chicken soup a favorite for generations.

    Cooking the vegetables in butter before pressure cooking allows them to soften and release their flavors. This step helps build a richer and more balanced broth.

    Uniformly chopped vegetables also ensure consistent cooking and a pleasant texture throughout the soup. In addition to flavor, these vegetables provide important nutrients that make the soup both satisfying and nourishing. Their combination creates the familiar taste that people associate with homemade chicken noodle soup.

    The Importance of Using Both Chicken Breasts and Thighs

    One of the reasons this recipe delivers exceptional results is the use of both boneless skinless chicken breasts and boneless skinless chicken thighs.

    Chicken breasts provide lean protein and maintain their structure during cooking, while chicken thighs contribute additional richness and moisture. Combining the two cuts creates a balance that improves both flavor and texture.

    The dark meat remains tender and juicy, while the white meat shreds beautifully into the broth. As the chicken cooks under pressure, it absorbs the flavors of the herbs and vegetables while simultaneously enriching the broth.

    This combination produces a heartier and more flavorful soup than using only one type of chicken. The result is a bowl filled with tender shredded chicken that complements the noodles and vegetables perfectly.

    How Herbs and Seasonings Enhance Every Spoonful

    The carefully selected herbs and seasonings in this recipe help transform simple ingredients into an unforgettable meal. Oregano provides subtle earthy notes that complement the chicken and vegetables, while basil adds a gentle sweetness and herbal freshness.

    Black pepper contributes warmth without overpowering the broth, and salt helps bring all the flavors together. Bay leaves play an especially important role during pressure cooking by infusing the broth with a mild aromatic depth.

    These ingredients work together to create a balanced flavor profile that feels both comforting and sophisticated. Rather than relying on heavy seasonings, this soup allows the natural flavors of the ingredients to shine while using herbs to enhance the overall experience. The result is a well-rounded soup that tastes homemade and deeply satisfying.

    Why Egg Noodles Are the Classic Choice

    Egg noodles have long been associated with traditional chicken noodle soup because of their soft texture and ability to absorb flavor. When cooked directly in the broth, the noodles take on the savory characteristics of the soup while maintaining their tender bite.

    Their delicate texture pairs perfectly with the shredded chicken and vegetables, creating a balanced combination in every spoonful. Unlike some pasta varieties that may become overly heavy, egg noodles provide heartiness without overwhelming the soup.

    They help transform a simple broth into a complete and satisfying meal. Cooking the noodles in the soup also ensures they contribute starch, which slightly enriches the broth and creates an even more comforting texture. This classic ingredient remains one of the defining features of authentic chicken noodle soup.

    A Perfect Meal for Every Season

    Although chicken noodle soup is often associated with cold weather, it is a versatile dish that can be enjoyed throughout the year. During winter, it provides warmth and comfort after a long day. In autumn, it pairs beautifully with seasonal breads and salads.

    During spring and summer, its light yet satisfying nature makes it an excellent lunch or dinner option. Many people also turn to chicken noodle soup when feeling under the weather because it offers warmth, hydration, and nourishment.

    Its combination of protein, vegetables, and broth makes it easy to digest while remaining filling. This versatility has helped chicken noodle soup maintain its popularity for generations and continues to make it a favorite choice for home cooks.

    Storage, Freezing, and Meal Prep Benefits

    Instant Pot Chicken Noodle Soup is an excellent meal-prep recipe because it stores and reheats exceptionally well. Once cooled, leftovers can be placed in airtight containers and refrigerated for several days.

    The soup often develops even more flavor after resting overnight, making leftovers especially enjoyable. For long-term storage, the soup can be frozen successfully, although many cooks prefer freezing it without the noodles to preserve their texture.

    When reheating, adding a small amount of broth or water helps maintain the proper consistency. Having portions ready in the refrigerator or freezer provides a convenient solution for busy schedules and ensures that a wholesome homemade meal is always within reach.

    This practical advantage makes the recipe even more valuable for families and meal planners.

    Notes

    Make It Vegetarian

    Replace the chicken with chickpeas and use vegetable broth instead of chicken broth. Additional vegetables such as potatoes, green beans, or parsnips can be included for extra heartiness.

    Gluten-Free Option

    Substitute gluten-free noodles or cooked rice for the egg noodles. Zucchini noodles and cauliflower are also excellent alternatives.

    Dairy-Free Version

    Use olive oil instead of butter while maintaining the same cooking method and flavor balance.

    Storage Guidelines

    Store leftovers in an airtight container in the refrigerator for up to four days.

    Freezing Recommendations

    Freeze the soup without noodles for best results. Add freshly cooked noodles when reheating.

    Serving Suggestions

    Serve with crusty bread, garlic bread, crackers, grilled cheese sandwiches, or a fresh green salad for a complete meal.

    Instant Pot Chicken Noodle Soup Recipe

    A comforting and hearty pressure cooker chicken noodle soup made with tender chicken, fresh vegetables, egg noodles, aromatic herbs, and a rich savory broth. Perfect for family dinners, meal prep, and cozy comfort food cravings.

    Preparation & Cooking Duration

    • Preparation Time: 20 minutes
    • Cooking Time: 20 minutes
    • Total Time: 40 minutes

    Servings

    • 8 servings

    Ingredients

    Soup Base

    • 1 tablespoon butter
    • 3 medium carrots, chopped
    • 2 celery ribs, chopped
    • 1 small onion, chopped
    • 3 garlic cloves, minced

    Seasonings

    • 2 teaspoons salt
    • 1 teaspoon dried oregano
    • 1 teaspoon dried basil
    • 1/2 teaspoon pepper

    Protein & Broth

    • 1 pound boneless skinless chicken breasts
    • 1 pound boneless skinless chicken thighs
    • 8 cups reduced-sodium chicken broth
    • 3 bay leaves

    Noodles & Fresh Herbs

    • 2 cups uncooked egg noodles
    • 1/2 cup fresh parsley leaves, chopped

    Step-by-Step Instructions

    1. Set the Instant Pot to the sauté setting and add the butter.
    2. Add the chopped carrots, celery, and onion. Cook for 4–5 minutes until softened.
    3. Stir in the minced garlic, salt, oregano, basil, and pepper. Cook for 1 additional minute.
    4. Add the chicken breasts, chicken thighs, chicken broth, and bay leaves.
    5. Secure the lid and set the valve to the sealing position.
    6. Cook on Manual High Pressure for 7 minutes.
    7. Allow the pressure to release naturally before carefully venting any remaining pressure.
    8. Remove the lid and discard the bay leaves.
    9. Transfer the chicken to a cutting board and shred using two forks.
    10. Switch the Instant Pot back to sauté mode.
    11. Add the egg noodles and cook for 7–8 minutes until tender.
    12. Return the shredded chicken to the pot.
    13. Stir in the chopped parsley.
    14. Serve hot and enjoy.

    Nutritional Information

    Per Serving (Approximate)

    • Calories: 225
    • Total Fat: 7g
    • Saturated Fat: 3g
    • Cholesterol: 81mg
    • Sodium: 1259mg
    • Carbohydrates: 12g
    • Sugars: 3g
    • Fiber: 2g
    • Protein: 27g

  • Instant Pot Mac and Cheese Recipe

    Instant Pot Mac and Cheese Recipe

    Instant Pot Mac and Cheese is one of the most searched comfort food recipes because it combines convenience, rich flavor, and creamy texture in a single dish.

    This easy pressure cooker macaroni and cheese recipe transforms simple pantry ingredients into a satisfying meal in just minutes. Unlike traditional stovetop versions that require multiple pots and careful monitoring, the Instant Pot simplifies the entire process.

    The pasta cooks directly in the flavorful liquid, eliminating the need for draining and reducing cleanup. The result is a creamy, cheesy pasta dish that appeals to both children and adults.

    Whether you’re preparing a quick weeknight dinner, a side dish for a family gathering, or a comforting lunch, this recipe consistently delivers excellent results. The combination of tender pasta and melted cheese creates a homemade meal that tastes rich, comforting, and incredibly satisfying.

    Why Instant Pot Mac and Cheese Has Become So Popular

    The popularity of Instant Pot recipes continues to grow because they save time while producing consistent results. Mac and cheese is one of the best examples of how pressure cooking can simplify a classic recipe.

    Traditional macaroni and cheese often requires boiling pasta separately, preparing a cheese sauce, and combining everything at the end. The Instant Pot eliminates many of these steps by cooking the pasta directly in seasoned broth.

    This process allows the pasta to absorb flavor while creating the perfect texture. The recipe is ideal for busy households because it requires very little hands-on cooking time. In approximately ten minutes, you can serve a creamy, flavorful dish that feels homemade without spending excessive time in the kitchen.

    What Makes This Mac and Cheese Extra Creamy

    The secret to achieving a smooth and creamy texture lies in the combination of ingredients and technique. The pasta cooks in just enough liquid to absorb flavor while remaining tender.

    Once pressure cooking is complete, milk and shredded cheese are gradually added to create a silky cheese sauce. Adding the cheese in small portions allows it to melt evenly, preventing clumps and ensuring a smooth consistency.

    The combination of cheddar, mozzarella, and Parmesan creates multiple layers of flavor while contributing to the creamy texture. Each cheese brings unique characteristics that enhance the final dish. The result is a rich, velvety macaroni and cheese that rivals many restaurant versions.

    Why Chicken Broth Creates Better Flavor

    Many macaroni and cheese recipes use water as the cooking liquid, but chicken broth significantly improves the overall flavor. As the pasta cooks, it absorbs the seasoned broth, creating a more savory and flavorful base.

    This simple substitution enhances the taste without requiring additional ingredients or effort. Low-sodium chicken broth is particularly useful because it allows better control over the salt content of the dish.

    The broth adds depth and richness that complements the cheeses beautifully. Even though the broth flavor is subtle, it contributes significantly to the overall taste profile and helps create a more satisfying macaroni and cheese experience.

    The Role of Seasonings in Creating Depth

    While cheese is the star ingredient, seasonings play an important supporting role in building flavor. Garlic powder adds a subtle savory note that enhances the richness of the cheese.

    Black pepper provides mild warmth and balance. Salt helps highlight the flavors of the pasta, cheese, and broth. One unexpected ingredient is hot pepper sauce.

    Despite its name, it does not make the dish spicy when used in the recommended amount. Instead, it adds complexity and helps balance the richness of the cheese. These seasonings work together to create a macaroni and cheese recipe that tastes well-rounded rather than one-dimensional.

    Why a Blend of Cheeses Produces Superior Results

    Using multiple cheeses creates a more interesting and flavorful macaroni and cheese than relying on a single variety. Sharp cheddar contributes the classic cheesy flavor that most people expect.

    Mozzarella provides exceptional meltability and creates a smooth, creamy texture. Parmesan adds a slightly nutty and savory depth that enhances the overall flavor profile. Together, these cheeses create a balanced combination that delivers both richness and complexity.

    Each cheese complements the others, resulting in a dish that feels more sophisticated while remaining approachable and family-friendly. This cheese blend is one of the key reasons why this recipe stands out from simpler versions.

    Understanding the Importance of Gradual Cheese Addition

    One of the most important techniques for successful Instant Pot Mac and Cheese is adding the cheese gradually. Adding all the cheese at once can cause uneven melting and create clumps within the sauce.

    By incorporating the cheese in several small additions and stirring continuously between each addition, the cheese melts smoothly into the pasta.

    This process creates a silky texture and ensures that every bite is evenly coated. Taking a few extra moments during this step greatly improves the quality of the final dish. The result is a creamy, cohesive sauce that clings perfectly to the pasta.

    Why Milk Selection Matters

    Milk plays a crucial role in determining the texture of the finished macaroni and cheese. Regular milk, particularly 2% or whole milk, provides the ideal balance of creaminess and consistency.

    It blends easily with the melted cheese and helps create a smooth sauce without becoming overly heavy. Whole milk offers additional richness, while 2% milk provides a slightly lighter option that still delivers excellent results.

    Starting with a smaller amount of milk allows for better control over the consistency. Additional milk can be added if a thinner sauce is desired. This flexibility helps ensure the macaroni and cheese reaches the perfect texture every time.

    A Perfect Side Dish for Any Occasion

    Mac and cheese remains one of the most versatile side dishes because it pairs well with countless main courses. It complements grilled chicken, barbecue meats, roasted vegetables, burgers, and sandwiches.

    Its rich and creamy texture provides a comforting contrast to lighter dishes and fresh salads. Because it appeals to a wide range of tastes, it is often included at holiday gatherings, family celebrations, potlucks, and casual dinners.

    The ability to prepare it quickly in the Instant Pot makes it even more practical for entertaining and meal planning.

    Making Instant Pot Mac and Cheese a Main Course

    Although often served as a side dish, this recipe can easily become a complete meal. Its combination of pasta, cheese, and rich flavor creates a satisfying main course that requires little additional preparation.

    Pairing it with a simple green salad or steamed vegetables creates a balanced meal. Many families enjoy mac and cheese as a standalone dinner because it is filling, comforting, and easy to prepare.

    The generous yield also makes it ideal for feeding larger groups or ensuring leftovers for future meals.

    Why This Recipe Is Great for Leftovers

    One of the advantages of this macaroni and cheese recipe is how well it stores and reheats. Leftovers can be refrigerated and enjoyed for several days.

    When reheating, adding a small splash of milk helps restore the creamy texture and prevents dryness. Because the pasta continues absorbing moisture during storage, this simple step helps maintain the original consistency.

    The convenience of having ready-made comfort food available for lunches or quick dinners makes this recipe even more appealing for busy households.

    Meal Prep Benefits and Storage Suggestions

    Preparing meals in advance can save significant time during the week, and Instant Pot Mac and Cheese fits perfectly into a meal-prep routine.

    The recipe produces a generous quantity, making it ideal for storing in individual containers for future use. Properly stored leftovers maintain their flavor and texture remarkably well.

    Refrigerated portions can be reheated quickly, making them convenient for lunches, dinners, or snacks. This practical benefit allows families to enjoy homemade comfort food even on their busiest days.

    Why Families Love This Comfort Food Classic

    Macaroni and cheese continues to be a favorite comfort food because it combines familiar ingredients with satisfying flavors. Its creamy texture, rich cheese sauce, and tender pasta create a meal that feels comforting and indulgent.

    Children appreciate its mild flavor and familiar ingredients, while adults enjoy its versatility and nostalgic appeal. The Instant Pot version makes it easier than ever to prepare this beloved dish at home.

    By simplifying the cooking process without sacrificing quality, it allows families to enjoy homemade mac and cheese whenever the craving strikes.

    Notes

    Best Cheese Results

    For the smoothest texture, add the shredded cheeses gradually and stir thoroughly after each addition.

    Milk Adjustment

    Start with ½ cup milk and add more as needed until the desired consistency is reached.

    Cheese Variations

    The listed cheese combination creates the best balance of flavor and creaminess, but other cheeses may be substituted according to personal preference.

    Cooking Liquid

    Low-sodium chicken broth is recommended for the best flavor and better control of salt levels.

    Storage

    Store leftovers in an airtight container in the refrigerator for up to 4 days.

    Reheating

    Add a splash of milk before reheating to restore creaminess.

    Instant Pot Mac and Cheese Recipe

    A quick and creamy Instant Pot macaroni and cheese recipe featuring tender elbow macaroni, a rich blend of cheddar, mozzarella, and Parmesan cheeses, and a flavorful seasoned sauce. Perfect for busy weeknights, family dinners, and comfort food cravings.

    Preparation & Cooking Duration

    • Prep Time: 5 minutes
    • Cook Time: 5 minutes
    • Total Time: 10 minutes

    Servings

    • Approximately 8 servings

    Ingredients

    Pasta Base

    • 16 ounces uncooked elbow macaroni
    • 4 cups chicken broth
    • 2 tablespoons butter

    Seasonings

    • 1 teaspoon hot pepper sauce
    • 1 teaspoon garlic powder
    • ½ teaspoon black pepper
    • ½ teaspoon salt

    Cheese Blend

    • 2 cups shredded cheddar cheese
    • 1 cup shredded mozzarella cheese
    • ½ cup shredded Parmesan cheese

    Finishing Ingredient

    • ½ to 1 cup milk

    Step-by-Step Instructions

    1. Place the uncooked elbow macaroni into the Instant Pot.
    2. Add chicken broth, butter, hot pepper sauce, garlic powder, black pepper, and salt.
    3. Stir gently to combine the ingredients.
    4. Secure the lid and set the valve to the sealing position.
    5. Cook on High Pressure using the Manual setting for 5 minutes.
    6. Once cooking is complete, carefully perform a quick pressure release.
    7. Remove the lid and stir the pasta.
    8. Pour in ½ cup milk and mix well.
    9. Add the cheddar cheese in small portions, stirring after each addition until melted.
    10. Repeat with the mozzarella cheese, continuing to stir until smooth.
    11. Add the Parmesan cheese and stir until fully incorporated.
    12. If needed, add additional milk to reach the desired consistency.
    13. Taste and adjust seasoning as desired.
    14. Serve immediately while hot and creamy.

    Nutritional Information

    Per Serving (Approximate)

    • Calories: 206 kcal
    • Protein: 13g
    • Fat: 17g
    • Saturated Fat: 10g
    • Cholesterol: 52mg
    • Sodium: 966mg
    • Potassium: 145mg
    • Fiber: 1g
    • Sugar: 1g
    • Vitamin A: 519 IU
    • Vitamin C: 9mg
    • Calcium: 351mg
    • Iron: 1mg

  • Instant Pot Pulled Chicken (3 Delicious Flavors)

    Instant Pot Pulled Chicken (3 Delicious Flavors)

    Instant Pot Pulled Chicken is one of the most versatile, time-saving, and family-friendly recipes you can make at home. Whether you need shredded chicken for tacos, sandwiches, wraps, salads, rice bowls, casseroles, pizzas, or party appetizers, this easy pressure cooker chicken recipe delivers tender and juicy results every time.

    Using an Instant Pot significantly reduces cooking time while locking in moisture and flavor, making it ideal for busy weekdays, meal prep sessions, and large family gatherings.

    The beauty of this recipe lies in its flexibility. By simply changing a few seasonings and sauces, you can create completely different flavor profiles while following the same basic cooking method. This allows you to prepare multiple meals throughout the week without feeling like you’re eating the same dish repeatedly.

    The Benefits of Making Shredded Chicken in an Instant Pot

    Cooking chicken in an Instant Pot offers several advantages compared to traditional methods. The sealed pressure-cooking environment helps retain natural juices, resulting in exceptionally moist chicken that shreds effortlessly.

    Unlike oven-baked chicken, which can sometimes dry out, pressure-cooked chicken remains tender and flavorful. Another major advantage is consistency. Once you understand the cooking process, you can achieve reliable results every single time.

    This recipe is also perfect for beginners because the Instant Pot handles most of the work. Whether you’re preparing lunch, dinner, or meal-prep containers for the week, shredded chicken cooked under pressure becomes an excellent source of lean protein that can be incorporated into countless dishes.

    Three Flavor Variations for Every Occasion

    One of the greatest strengths of this recipe is its ability to transform into three completely different meals. The first variation is an all-purpose shredded chicken that works beautifully in soups, salads, sandwiches, wraps, pasta dishes, and casseroles.

    The second variation features bold buffalo flavors that are ideal for game-day snacks, sliders, dips, and loaded nachos.

    The third variation introduces rich tandoori-inspired spices that create a vibrant and aromatic chicken perfect for flatbreads, tacos, rice bowls, pizzas, and fusion dishes. Instead of learning multiple chicken recipes, you only need to master one cooking technique and adjust the seasonings according to your needs.

    Why Boneless Skinless Chicken Breasts Work Best

    Boneless skinless chicken breasts are commonly used for pulled chicken because they cook evenly and shred easily after pressure cooking.

    Their mild flavor makes them an ideal base for absorbing seasonings and sauces. If the chicken breasts are particularly large, slicing them horizontally into thinner portions can help ensure even cooking. However, chicken thighs can also be used if preferred.

    Thigh meat tends to be slightly richer and more flavorful due to its higher fat content. Regardless of which cut you choose, the Instant Pot’s pressure-cooking method helps maintain tenderness while producing chicken that pulls apart effortlessly with forks.

    The Secret to Flavorful Instant Pot Chicken

    Many people assume that pressure cooking alone creates flavor, but the real secret lies in building layers of taste before pressure cooking begins. Searing the chicken before sealing the Instant Pot develops a deeper flavor profile and improves the overall texture.

    Even a brief sear helps create subtle caramelization on the surface of the chicken. Once the seasonings, sauces, broth, and aromatics are added, the chicken continues absorbing flavor throughout the pressure-cooking process.

    This combination of searing and pressure cooking creates a result that is significantly more flavorful than simply boiling or steaming chicken.

    Tandoori Pulled Chicken

    Tandoori-style pulled chicken brings vibrant flavors and aromatic spices to the table. The combination of tandoori seasoning, sliced onions, chili garlic sauce, ginger garlic paste, and fresh lemon juice creates a rich and savory flavor profile with mild heat and bright citrus notes.

    During pressure cooking, the onions soften and blend into the cooking liquid, helping create an intensely flavorful environment for the chicken. Once shredded, the chicken absorbs even more of these seasonings.

    This variation pairs exceptionally well with rice, naan bread, wraps, grain bowls, and creative fusion dishes. The balance of spices and acidity makes it one of the most exciting ways to prepare shredded chicken.

    Buffalo Pulled Chicken

    Buffalo pulled chicken is a crowd-pleasing favorite known for its bold, tangy flavor and versatility.

    By combining chicken with buffalo sauce and a garlic-herb seasoning blend, you create a flavorful shredded chicken that can instantly elevate numerous dishes. Buffalo chicken works especially well in sandwiches, sliders, wraps, stuffed potatoes, quesadillas, and party dips.

    The pressure cooker helps infuse every strand of shredded chicken with the sauce, ensuring consistent flavor throughout. Because it requires minimal preparation and delivers maximum taste, buffalo pulled chicken is a popular option for entertaining guests, tailgate parties, and casual family meals.

    All-Purpose Pulled Chicken for Everyday Meals

    The all-purpose version may appear simple, but it is arguably the most practical variation. A blend of garlic powder, onion powder, smoked paprika, black pepper, and kosher salt creates a balanced seasoning profile that complements nearly any recipe.

    This versatile chicken can be added to soups, salads, pasta dishes, casseroles, burritos, tacos, sandwiches, and meal-prep bowls.

    Because the flavor is not overly specialized, it serves as a blank canvas that can easily adapt to different cuisines and meal ideas. Keeping a batch of all-purpose shredded chicken in the refrigerator or freezer can make weeknight cooking significantly easier.

    How the Pressure Cooking Process Creates Tender Chicken

    Pressure cooking works by trapping steam inside a sealed environment, raising both pressure and temperature. This process accelerates cooking while helping break down the proteins within the chicken.

    As a result, the meat becomes exceptionally tender without drying out. The cooking liquid, whether broth or sauce, continuously circulates around the chicken during cooking, enhancing both moisture retention and flavor distribution.

    The result is chicken that easily falls apart when shredded. This technique is especially useful for meal prep because it allows you to prepare large quantities of chicken quickly without sacrificing texture or quality.

    Importance of Natural Pressure Release

    Although a quick pressure release can be used when time is limited, a natural pressure release often produces the best texture. Allowing the pressure to decrease gradually gives the chicken additional time to rest in the flavorful cooking liquid.

    This extra resting period helps the meat retain moisture and tenderness. When the lid is finally removed, the chicken is easier to shred and remains juicy.

    For the best results, letting the pressure release naturally for several minutes can make a noticeable difference in both texture and overall flavor.

    Easy Ways to Shred Cooked Chicken

    Once the chicken has finished cooking, shredding becomes incredibly simple. Two forks are the traditional method and allow you to control the texture precisely.

    However, many home cooks prefer using a hand mixer or stand mixer with a paddle attachment because these tools can shred large batches in seconds.

    Regardless of the method used, shredding while the chicken is still warm usually produces the best results. After shredding, mixing the chicken back into some of the cooking juices helps maintain moisture and enhances flavor.

    Meal Prep Advantages of Instant Pot Pulled Chicken

    One of the biggest reasons this recipe has become so popular is its meal-prep potential. A single batch can provide protein for multiple meals throughout the week.

    Properly stored in airtight containers, shredded chicken remains fresh in the refrigerator for several days and freezes exceptionally well for longer storage.

    Having cooked chicken readily available reduces preparation time and makes healthy meals easier to assemble. Whether you’re building salads, wraps, grain bowls, or sandwiches, pre-cooked shredded chicken can save valuable time while helping maintain a balanced diet.

    Serving Ideas and Flavor Variations

    Beyond the three featured flavors, countless variations are possible. Taco seasoning can transform the all-purpose version into taco chicken perfect for burrito bowls and Mexican-inspired meals.

    Adding salsa creates a flavorful shredded chicken ideal for tacos and rice dishes. Pepperoncini peppers introduce a tangy twist that works well in sandwiches and bowls.

    Chicken carnitas-inspired seasoning can create a richer flavor profile, while smoky barbecue sauces produce delicious pulled chicken sandwiches. The recipe’s adaptability allows cooks to customize flavors according to personal preferences, making it a dependable staple in any kitchen.

    Storage and Reheating Tips for Best Results

    Proper storage helps preserve both flavor and texture. Once cooled, shredded chicken should be transferred to airtight containers and refrigerated promptly.

    Including a small amount of cooking liquid in the storage container helps prevent dryness. When reheating, adding a splash of broth or reserved cooking juices can restore moisture.

    Frozen portions should be thawed overnight in the refrigerator before reheating. These simple storage techniques help ensure that the chicken remains tender and flavorful even days after preparation.

    Why This Recipe Belongs in Every Home Kitchen

    Instant Pot Pulled Chicken is more than just a convenient recipe; it is a foundational cooking technique that can simplify meal planning and reduce kitchen stress.

    With minimal effort, you can prepare tender, protein-rich chicken that works in dozens of different recipes. The three flavor options—tandoori, buffalo, and all-purpose—provide incredible flexibility while maintaining a straightforward cooking process.

    Whether you’re preparing quick weeknight dinners, meal-prep lunches, party appetizers, or family meals, this recipe offers dependable results, excellent flavor, and endless possibilities. Once mastered, it becomes one of the most valuable recipes in any home cook’s collection.

    Instant Pot Pulled Chicken Recipe(3 Flavors!)

    A quick and versatile Instant Pot shredded chicken recipe featuring three delicious flavor options: Tandoori, Buffalo, and All-Purpose Seasoned Chicken. Perfect for meal prep, sandwiches, tacos, salads, wraps, bowls, dips, and countless other dishes.

    Preparation & Cooking Duration

    • Preparation Time: 5 minutes
    • Cooking Time: 10–12 minutes
    • Total Time: 15–17 minutes

    Servings

    • 4 to 6 servings

    Ingredients

    Base Ingredients (Required for All Versions)

    • 1 tablespoon oil or butter
    • 1½–2 pounds boneless, skinless chicken breasts or chicken thighs

    Tandoori Flavor

    • ½ teaspoon kosher salt
    • 2 tablespoons tandoori chicken seasoning
    • ½ cup thinly sliced onions
    • 1 teaspoon chili garlic sauce
    • 2 teaspoons ginger-garlic paste
    • ½ cup chicken broth
    • 2 tablespoons lemon juice

    Buffalo Flavor

    • ½ teaspoon garlic and herb seasoning
    • ⅓ cup buffalo sauce

    All-Purpose Flavor

    • ½ teaspoon kosher salt
    • ½ teaspoon garlic powder
    • ¼ teaspoon black pepper
    • ¼ teaspoon smoked paprika
    • ¼ teaspoon onion powder
    • ½ cup chicken broth

    Step-by-Step Instructions

    Step 1: Prepare the Instant Pot

    Select the sauté setting and allow the pot to heat thoroughly. Add the oil or butter and let it melt completely.

    Step 2: Sear the Chicken

    Place the seasoned chicken into the hot pot and sear for approximately 30–45 seconds per side until lightly browned.

    Step 3: Prepare Your Preferred Flavor

    For Tandoori Chicken

    • Coat the chicken with kosher salt and tandoori seasoning.
    • After searing, switch off the sauté mode.
    • Add onions, chili garlic sauce, ginger-garlic paste, chicken broth, and lemon juice.
    • Secure the lid and seal the valve.

    For Buffalo Chicken

    • Season the chicken with garlic and herb seasoning.
    • Sear lightly, then turn off sauté mode.
    • Pour part of the buffalo sauce into the pot.
    • Place chicken over the sauce and pour remaining sauce on top.
    • Secure the lid and seal the valve.

    For All-Purpose Chicken

    • Mix kosher salt, garlic powder, black pepper, smoked paprika, and onion powder.
    • Season the chicken evenly.
    • After searing, turn off sauté mode.
    • Pour chicken broth into the pot.
    • Secure the lid and seal the valve.

    Step 4: Pressure Cook

    Cook on High Pressure for 10–12 minutes.

    • 10 minutes for fully thawed chicken.
    • 12 minutes for partially frozen chicken.

    Step 5: Release Pressure

    Allow a natural pressure release whenever possible for maximum tenderness. If needed, use a quick release method.

    Step 6: Shred the Chicken

    Remove the chicken from the pot and shred using:

    • Two forks
    • A hand mixer
    • A stand mixer with paddle attachment

    Mix the shredded chicken with some cooking liquid before serving for extra moisture and flavor.

    Nutritional Information

    (Approximate values per serving, based on chicken breast and excluding optional serving ingredients)

    • Calories: 220–260
    • Protein: 35–40g
    • Fat: 6–9g
    • Carbohydrates: 1–4g
    • Fiber: 0–1g
    • Sugar: 0–2g
    • Sodium: Varies according to seasoning and sauce selection

    Notes

    • Chicken thighs may be substituted for chicken breasts.
    • Slice large chicken breasts horizontally for more even cooking.
    • Store leftovers in an airtight container in the refrigerator for up to 4 days.
    • Freeze portions for up to 3 months.
    • Add a little cooking liquid when reheating to maintain moisture.
    • For taco-style chicken, replace the all-purpose seasoning blend with taco seasoning.
    • Salsa can be added before pressure cooking for an easy Mexican-inspired variation.
    • Pepperoncini peppers can be added for a tangy flavor twist.
    • Shredded chicken works wonderfully in soups, wraps, enchiladas, pizzas, grain bowls, salads, sandwiches, sliders, and casseroles.