Blog

  • Air Fryer Asparagus Recipe – A Quick, Healthy Side Dish

    Air Fryer Asparagus Recipe – A Quick, Healthy Side Dish

    How to Make Perfect Roasted Asparagus

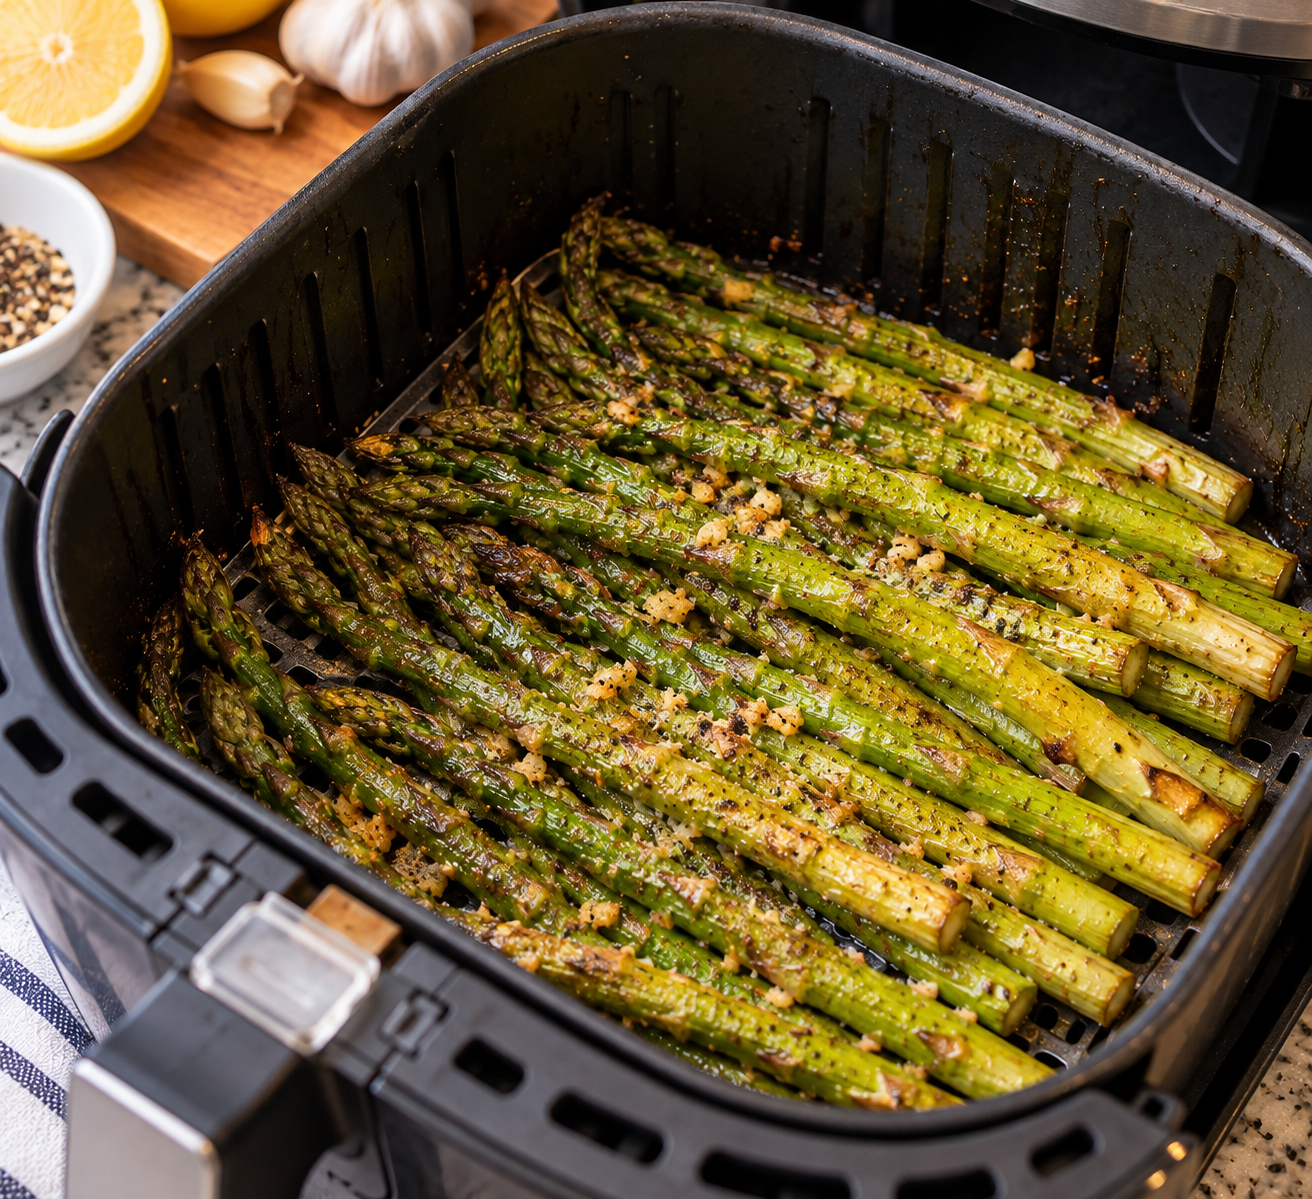
    Air fryer asparagus is popular healthy side dishes for home cooks who want delicious results without spending a lot of time in the kitchen. This simple vegetable recipe transforms fresh asparagus into a flavorful dish with a tender center and slightly crispy edges. Using an air fryer allows the asparagus to cook quickly while preserving its natural taste and texture. Unlike boiling or steaming, air frying creates a lightly roasted finish that enhances the vegetable’s rich flavor. Whether you are preparing a weeknight dinner, a holiday meal, or a healthy lunch, this easy air fryer asparagus recipe fits perfectly into almost any menu. With only a handful of ingredients and a short cooking time, it delivers restaurant-quality results with minimal effort. The combination of fresh lemon juice, garlic, olive oil, and salt creates a balanced flavor profile that highlights the asparagus rather than masking it. This makes it an excellent option for anyone looking for a nutritious, low-carb, and delicious vegetable side dish.

    Why Air Frying Is Ideal for Cooking Asparagus

    Cooking asparagus in an air fryer offers several advantages over traditional cooking methods. Many people enjoy roasted asparagus from the oven, but oven roasting often requires preheating and a longer cooking process. Air fryers eliminate much of that waiting time while still delivering the roasted texture that makes asparagus so enjoyable. The circulating hot air cooks the spears evenly and quickly, creating a tender bite with a slight crispness on the outside. This cooking method also uses very little oil, making it a healthier alternative to some other preparation techniques. Because the air fryer basket allows air to move around the vegetables freely, the asparagus develops a pleasant texture without becoming soggy. Another benefit is consistency. Once you learn the appropriate cooking time for your preferred asparagus thickness, you can achieve dependable results every time. This convenience makes air fryer asparagus one of the easiest vegetable recipes for busy families and individuals who want healthy meals without complicated preparation.

    Understanding Asparagus Sizes and Their Impact on Cooking Time

    One of the unique characteristics of asparagus is the variety of spear sizes available throughout the year. Some asparagus spears are very thin and delicate, while others are noticeably thicker and heartier. Fortunately, both types work exceptionally well in an air fryer. Thin asparagus tends to cook more quickly and may develop a slightly crisp texture, while thicker asparagus remains juicy and tender with a satisfying bite. The key to success is adjusting the cooking time according to the size of the spears. Thin asparagus generally requires only a few minutes in the air fryer, whereas thicker spears need additional time to become tender. Regardless of the thickness, the air fryer produces excellent results when the asparagus is arranged in a single layer. Understanding these differences allows cooks to customize the final texture according to personal preference. Whether you prefer delicate, lightly roasted asparagus or thicker spears with more substance, the air fryer provides an easy way to achieve your desired outcome.

    Fresh Ingredients That Create Lovely Flavor

    This easy asparagus recipe relies on a small selection of ingredients that work together to enhance the vegetable’s natural qualities. Fresh asparagus serves as the foundation of the dish, bringing earthy, slightly sweet flavors and valuable nutrients. Olive oil helps the seasonings adhere to the spears while promoting even browning during cooking. Lemon juice introduces a refreshing brightness that balances the richness of the olive oil and complements the asparagus beautifully. Garlic powder contributes an even layer of savory flavor across every spear, while minced garlic adds concentrated bursts of garlic taste throughout the dish. A moderate amount of kosher salt or sea salt enhances the overall flavor and helps bring out the natural characteristics of the ingredients. Because the ingredient list is simple, each component plays an important role in the final result. Together, these ingredients create a balanced and flavorful side dish that pairs well with a wide variety of main courses while maintaining a fresh and wholesome appeal.

    Preparing Asparagus for Air Frying

    Proper preparation is an important step in creating delicious air fryer asparagus. Fresh asparagus naturally develops woody ends near the bottom of the stalks, and these sections can be tough and unpleasant to eat. Trimming approximately two inches from the bottom removes these fibrous portions and leaves only the tender part of the spear. After trimming, the asparagus should be thoroughly coated with olive oil, lemon juice, garlic powder, minced garlic, and salt. This can be done in a large bowl or a zip-top bag, allowing the seasonings to distribute evenly over every spear. Ensuring complete coverage helps maximize flavor and promotes consistent cooking. The preparation process requires only a few minutes, making this recipe particularly attractive for busy schedules. Once seasoned, the asparagus is ready to be transferred directly to the air fryer basket. The simplicity of the preparation demonstrates why this recipe has become a favorite among home cooks looking for fast and reliable vegetable dishes.

    How to Achieve Perfect Air Fryer Asparagus Every Time

    The secret to outstanding air fryer asparagus lies in proper arrangement and cooking technique. The seasoned spears should be placed in a single layer inside the air fryer basket or tray. Avoid overcrowding because overlapping asparagus can prevent even airflow and lead to inconsistent cooking. Setting the air fryer to 400°F creates the ideal environment for roasting. Thin asparagus typically cooks within 5 to 6 minutes, while thicker spears may require 7 to 8 minutes. Turning the asparagus halfway through the cooking process encourages even browning and ensures all sides receive equal exposure to the circulating heat. The goal is to create asparagus that remains tender on the inside while developing a slightly crisp exterior. Monitoring the asparagus near the end of the cooking cycle helps prevent overcooking, especially when using thinner spears. Once finished, the asparagus should be served immediately to enjoy its best texture and flavor. This straightforward method consistently delivers excellent results.

    Serving Ideas for Air Fryer Asparagus

    One of the reasons air fryer asparagus is so popular is its versatility. This vegetable side dish complements a wide range of meals and can be customized with simple garnishes. Fresh lemon wedges provide additional brightness and allow diners to adjust the acidity to their liking. A light sprinkle of freshly ground black pepper adds a subtle kick and enhances the overall flavor profile. For those who enjoy a richer finish, grated Parmesan cheese can be scattered over the hot asparagus just before serving. The residual heat helps soften the cheese slightly, creating a delicious finishing touch. Air fryer asparagus also works beautifully as part of a larger vegetable platter or alongside grains and salads. Its attractive appearance and vibrant green color make it suitable for both casual family dinners and more formal occasions. Whether served as a standalone side dish or incorporated into a complete meal, it offers a nutritious and flavorful addition to the table.

    Best Main Dishes to Pair with Air Fryer Asparagus

    Asparagus pairs naturally with a variety of proteins, making it one of the most versatile vegetable side dishes available. Seafood enthusiasts often enjoy asparagus with salmon because the vegetable’s fresh, earthy flavor complements the richness of the fish. Chicken breast is another excellent choice, particularly when prepared with herbs, garlic, or citrus-based seasonings. Lean cuts of beef, pork tenderloin, and turkey also pair wonderfully with roasted asparagus. For vegetarian meals, asparagus can accompany quinoa, rice dishes, pasta, or grain bowls. The light flavor profile allows it to blend seamlessly with many cuisines while still contributing its own unique character. Because air fryer asparagus cooks quickly, it can be prepared while the main course rests, helping streamline meal preparation. This flexibility makes it a valuable addition to meal planning and supports a balanced approach to healthy eating. Regardless of the entrée selected, asparagus provides color, texture, nutrition, and flavor that elevate the entire dining experience.

    Storage, Reheating, and Meal Prep Notes

    Air fryer asparagus can be stored successfully for later use, making it a practical option for meal preparation. Once cooled, the cooked asparagus should be transferred to an airtight container and refrigerated. Properly stored asparagus generally remains fresh for three to four days. When reheating, a short time in the microwave under a damp paper towel can restore warmth without significantly affecting texture. Alternatively, the air fryer can be used again for a few minutes at 400°F to bring the asparagus back to serving temperature while maintaining some crispness. Because the recipe already contains olive oil, additional oil is usually unnecessary during reheating. Meal preppers often appreciate asparagus because it pairs easily with a variety of proteins and grains throughout the week. While freshly cooked asparagus provides the best texture, properly reheated leftovers remain flavorful and enjoyable. Following these storage and reheating practices helps reduce food waste and ensures the dish can be enjoyed beyond the day it is prepared.

    Notes for Success

    Selecting fresh asparagus is one of the most important factors in achieving excellent results. Look for firm stalks with tightly closed tips and a vibrant green color. If your asparagus spears vary significantly in thickness, consider grouping similar sizes together to ensure even cooking. Always arrange the spears in a single layer to maximize airflow and promote consistent roasting. Cooking times may vary slightly depending on the specific air fryer model used, so checking the asparagus during the final minutes is recommended. If you prefer softer asparagus, add an extra minute of cooking time. For a brighter flavor, serve with extra lemon wedges. Those who enjoy stronger garlic flavor can distribute the minced garlic evenly across the spears before cooking. Following these simple recommendations will help create consistently delicious air fryer asparagus that looks appealing and tastes exceptional every time.

    Best Damn Air Fryer Asparagus Recipe

    Description

    This quick and easy air fryer asparagus recipe transforms fresh asparagus into a tender, flavorful side dish with lightly crisp edges. Made with only six simple ingredients, it is a healthy and convenient addition to weeknight dinners, meal prep menus, and special occasions.

    Preparation & Cooking Duration

    • Preparation Time: 5 minutes
    • Cooking Time: 7 minutes
    • Total Time: 12 minutes

    Serving

    • Serves: 2–4 people

    Ingredients

    • 1 bunch fresh asparagus (approximately 1 pound)
    • 1 tablespoon olive oil
    • 1 tablespoon lemon juice
    • 1 teaspoon finely minced garlic
    • ½ teaspoon garlic powder
    • Salt, according to taste (approximately ½–1 teaspoon)

    Step-by-Step Instructions

    1. Rinse the asparagus thoroughly and trim about 2 inches from the woody ends.
    2. Place the asparagus in a large bowl or a zip-top bag.
    3. Add olive oil, lemon juice, minced garlic, garlic powder, and salt.
    4. Toss or shake until all asparagus spears are evenly coated with the seasoning mixture.
    5. Arrange the asparagus in a single layer inside the air fryer basket.
    6. Set the air fryer to 400°F (200°C).
    7. Cook thin asparagus for 5–6 minutes.
    8. Cook thick asparagus for 7–8 minutes.
    9. Turn the asparagus halfway through cooking for even roasting.
    10. Remove from the air fryer once tender and lightly crisp.
    11. Serve immediately with optional lemon wedges, black pepper, or Parmesan cheese.

    Nutritional Information (Approximate Per Serving)

    • Calories: 55
    • Protein: 2 g
    • Carbohydrates: 4 g
    • Dietary Fiber: 2 g
    • Sugars: 2 g
    • Total Fat: 4 g
    • Saturated Fat: 0.5 g
    • Sodium: Varies according to added salt
    • Vitamin A: 15% Daily Value
    • Vitamin C: 12% Daily Value
    • Calcium: 3% Daily Value
    • Iron: 6% Daily Value

  • Instant Pot Pasta Recipe – Creamy, Cheesy, Easy Dump-and-Go Pressure Cooker Pasta in Under 30 Minutes

    Instant Pot Pasta Recipe – Creamy, Cheesy, Easy Dump-and-Go Pressure Cooker Pasta in Under 30 Minutes

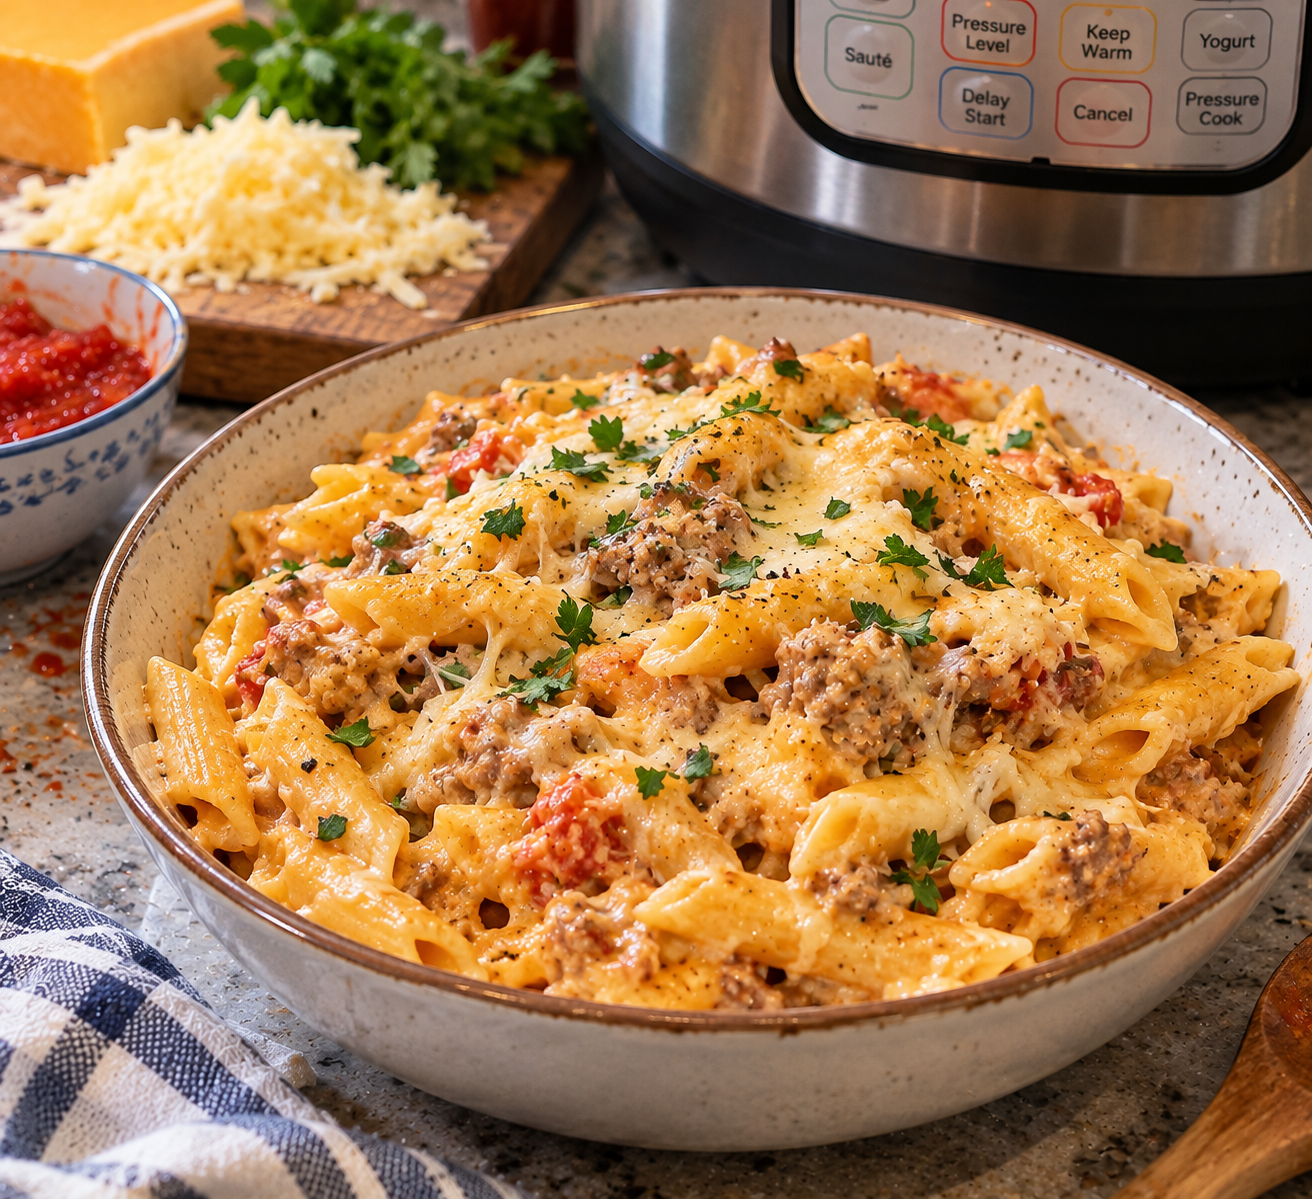
    Instant Pot pasta recipe is one of the most searched easy weeknight dinner ideas because it delivers creamy, restaurant-style pasta with minimal effort and maximum flavor. This easy Instant Pot pasta is a true dump-and-go meal that combines dry pasta, rich tomato sauce, broth, and cheese into a perfectly cooked one-pot dinner. Unlike traditional stovetop pasta recipes that require boiling water separately and preparing sauce in multiple pans, this pressure cooker pasta recipe simplifies everything into a single pot. The result is tender pasta coated in a creamy, cheesy tomato sauce that feels indulgent yet is incredibly easy to prepare. It is perfect for busy families, beginner cooks, meal prep lovers, and anyone searching for quick Instant Pot dinner recipes that are both comforting and satisfying.

    Why This Recipe So Popular?

    Instant Pot pasta has become a popular weeknight dinner solution because it eliminates multiple cooking steps while still delivering rich, flavorful results. Traditional pasta recipes often require boiling pasta separately, draining water, preparing sauce, and then combining everything together. With the Instant Pot method, all ingredients cook together under pressure, allowing the pasta to absorb flavor directly from broth, spices, and tomato sauce. This creates a deeply infused, restaurant-quality taste without extra effort. The pressure cooking environment ensures even cooking and reduces the risk of overboiling or burning. For busy households looking for quick pasta dinner ideas, this method is ideal because it saves time, reduces cleanup, and guarantees consistent results every time.

    Ingredients Required

    The success of Instant Pot pasta lies in the balance of simple yet flavorful ingredients. Low-sodium broth acts as the cooking liquid, adding depth compared to plain water. Dry red wine, although optional, enhances complexity and richness in the sauce. Garlic is essential for aromatic flavor, while oregano brings classic Italian seasoning notes. Pasta forms the base, and selecting ridged shapes like rotini, ziti, or rigatoni helps hold the sauce better. Diced tomatoes contribute acidity, texture, and moisture, while spaghetti sauce provides a rich tomato base. Ricotta cheese adds creaminess, mozzarella brings meltability, and parmesan delivers salty umami flavor. Each ingredient plays a key role in building the final creamy Instant Pot pasta texture and flavor profile.

    Best Pasta Types for Pressure Cooker Pasta

    Choosing the right pasta shape is essential for achieving perfect Instant Pot pasta results. Short pasta shapes such as rotini, penne, rigatoni, and ziti work best because they hold their structure under pressure cooking and capture sauce inside their ridges. These shapes ensure every bite is coated in creamy tomato sauce. Long pasta like spaghetti is generally not recommended because it can clump or cook unevenly under pressure. Cooking time also varies depending on pasta shape, and the rule of thumb is to use half the package cooking time. This ensures al dente texture instead of mushy pasta. Understanding pasta selection is one of the most important factors in mastering pressure cooker pasta recipes for consistent, restaurant-style results.

    Step-by-Step Instructions

    Making Instant Pot pasta begins with layering ingredients carefully to ensure even cooking and prevent burning. First, broth, wine (if used), garlic, oregano, salt, pepper, and red pepper flakes are added to the inner pot. Dry pasta is then spread evenly into the liquid without stirring. Next, diced tomatoes are poured over the pasta, followed by spaghetti sauce spread evenly on top. If using ricotta cheese, it is added in small dollops without mixing. The lid is then secured, and the Instant Pot is set to high pressure for 4 to 5 minutes depending on pasta type. After cooking, a 5-minute natural release is essential before quick releasing remaining pressure. This step ensures proper texture and prevents overcooking.

    Why Layering Technique Is Critical in Instant Pot Pasta Recipes

    Layering ingredients correctly is one of the most important techniques in making Instant Pot pasta successfully. Unlike traditional cooking methods, stirring ingredients before pressure cooking can cause uneven texture and trigger the burn warning. The correct order ensures liquid surrounds the pasta evenly while preventing sauce from sticking to the bottom of the pot. Broth and seasonings go first to create a flavorful base, followed by dry pasta, which should be fully submerged. Tomatoes and sauce are added on top to protect the pasta during cooking. This layering method allows steam and pressure to distribute heat evenly, resulting in perfectly cooked pasta coated in rich sauce without burning or clumping.

    How Cheese Transforms Instant Pot Pasta Into Creamy Comfort Food

    Cheese plays a major role in transforming Instant Pot pasta into a creamy, comforting dish. Ricotta cheese adds a soft, creamy texture that blends into the tomato sauce, making it richer and smoother. Mozzarella melts beautifully, creating stretchy, cheesy layers that enhance the overall mouthfeel. Parmesan adds a sharp, salty flavor that balances the richness of the sauce and cheese combination. After pressure cooking, adding cheese and allowing it to melt with residual heat creates a baked pasta-like texture without using an oven. This step is what turns simple pressure cooker pasta into a restaurant-style creamy pasta dish that feels indulgent and satisfying while remaining easy to prepare.

    Expert Tips for Perfect Pasta Every Time

    Achieving perfect Instant Pot pasta requires attention to timing and layering. The most important rule is to cook pasta for half the time listed on the package to avoid overcooking. Allowing exactly 5 minutes of natural pressure release is critical because it finishes the cooking process gently without making the pasta mushy. Avoid stirring before cooking, as this can cause sticking and uneven results. Using broth instead of water enhances flavor significantly, while adding wine creates deeper complexity. After cooking, stirring thoroughly helps combine sauce and pasta evenly. For extra creaminess, adding cheese at the end and allowing it to melt under residual heat improves texture and flavor dramatically.

    Common Mistakes to Avoid

    One of the most common issues with Instant Pot pasta is the burn warning, but it can be easily avoided with proper technique. The key is ensuring enough liquid is present at the bottom of the pot before sealing. Layering ingredients without stirring prevents thick sauce from sticking directly to the base. Using broth instead of water helps maintain proper liquid balance. Another mistake is skipping the natural release, which can cause pressure imbalance and uneven texture. Ensuring that tomatoes and sauce are spread evenly over the pasta also prevents hot spots. Following these precautions ensures smooth pressure cooking and consistent, perfectly cooked pasta every time.

    Serving Ideas

    Instant Pot pasta is a versatile dish that pairs well with many sides and toppings. It can be served with garlic bread, cheesy toast, or warm dinner rolls for a complete Italian-style meal. A fresh green salad with vinaigrette adds balance and freshness to the rich, creamy pasta. For extra protein, it can be served alongside grilled chicken, meatballs, or roasted vegetables. A sprinkle of fresh basil or parsley adds brightness before serving. This easy Instant Pot dinner recipe is also ideal for family gatherings, potlucks, and meal prep because it stays flavorful even after reheating. Its creamy texture and rich tomato base make it a crowd-pleasing comfort food.

    Storage, Freezing, and Reheating

    Instant Pot pasta stores very well, making it perfect for meal prep. Once cooled, it can be stored in an airtight container in the refrigerator for up to four days. For longer storage, it can be frozen in freezer-safe containers for up to one month. When reheating, adding a small splash of water or broth helps restore creaminess and prevents dryness. Microwave reheating works well when covered with a damp paper towel to retain moisture. Alternatively, stovetop reheating over low heat helps maintain texture. Stirring occasionally ensures even heating. This makes Instant Pot pasta a convenient make-ahead meal for busy weekdays and quick lunches.

    Notes, Variations, and Frequently Asked Questions

    Instant Pot pasta can be easily customized depending on taste preferences. Adding ground beef, sausage, or turkey enhances protein content and makes it a complete meal. Gluten-free pasta can be used, but only certain brands hold up well under pressure cooking. Ricotta is optional and can be replaced with cottage cheese for a lighter texture. For extra flavor, homemade sauce or additional herbs can be added. A common question is how to prevent mushy pasta, which is solved by precise timing and correct liquid ratios. Another frequent concern is sauce thickness, which can be adjusted after cooking by simmering or adding extra cheese. These adjustments make this recipe flexible and adaptable for different diets and preferences.

    Instant Pot Pasta Recipe


    This Instant Pot pasta recipe is a creamy, cheesy, and easy dump-and-go pressure cooker dinner made with pasta, tomato sauce, broth, and cheese for a rich and comforting one-pot meal ready in under 30 minutes.

    Servings: 8
    Prep Time: 5 minutes
    Cook Time: 25 minutes
    Total Time: 30 minutes
    Course: Dinner
    Cuisine: Italian-American
    Calories: 322 kcal per serving

    Ingredients

    • 2½ cups low-sodium broth (chicken, vegetable, or beef)
    • ½ cup dry red wine or additional broth
    • 2 teaspoons minced garlic
    • 1 teaspoon dried oregano
    • ¼ teaspoon kosher salt
    • ⅛ teaspoon black pepper
    • ⅛ teaspoon crushed red pepper flakes (optional)
    • 16 ounces dried pasta (ziti, rotini, corkscrew, rigatoni, etc.)
    • 1 (15-ounce) can diced tomatoes, not drained
    • 24 ounces spaghetti sauce
    • 8 ounces full-fat ricotta cheese (optional)
    • ¼ cup grated parmesan cheese
    • 1 cup shredded mozzarella cheese

    Step-by-step Instructions

    • Combine broth, wine (or additional broth), garlic, oregano, salt, pepper, and red pepper flakes in the Instant Pot.
    • Add dry pasta and spread evenly into the liquid without stirring.
    • Pour diced tomatoes and spaghetti sauce over the pasta, ensuring even coverage. Do not stir.
    • If using, add ricotta cheese in small dollops over the top.
    • Close lid, set valve to sealing, and cook on high pressure for 4–5 minutes depending on pasta type.
    • Allow a 5-minute natural pressure release, then quick release remaining pressure.
    • Open lid and stir everything until well combined.
    • Top with parmesan and mozzarella cheese, then cover for 2–5 minutes until melted.
    • Serve warm.

    Nutritional Information (per serving)

    Calories: 322 kcal
    Carbohydrates: 53 g
    Protein: 15 g
    Fat: 4 g
    Saturated Fat: 2 g
    Cholesterol: 16 mg
    Sodium: 720 mg
    Potassium: 571 mg
    Fiber: 4 g
    Sugar: 8 g
    Vitamin A: 598 IU
    Vitamin C: 12 mg
    Calcium: 161 mg
    Iron: 2 mg

  • Keto Creamy Lemon Cheesecake Mousse

    Keto Creamy Lemon Cheesecake Mousse

    Keto Creamy Lemon Cheesecake Mousse is a rich, smooth, and refreshing no-bake keto dessert that combines fresh lemon flavor with the creamy texture of cheesecake. Made with full-fat cream cheese, cold heavy whipping cream, fresh lemon juice, lemon zest, and keto-friendly sweetener, this easy dessert delivers the flavor of lemon cheesecake without using traditional granulated sugar or a graham cracker crust. A buttery almond flour base adds texture while keeping the dessert suitable for a low-carb eating plan.

    This keto lemon cheesecake mousse is especially useful when you want an impressive dessert without turning on the oven. The almond flour crust requires only three ingredients, while the filling comes together by combining a smooth lemon cream cheese mixture with freshly whipped heavy cream. After several hours in the refrigerator, the mousse becomes thick enough to spoon while maintaining the light, airy consistency expected from a well-made cheesecake mousse.

    Why You Make This Recipe

    The contrast between the different layers makes this dessert particularly satisfying. The almond flour base is buttery and slightly crumbly, while the cheesecake layer is creamy, airy, and bright with fresh lemon. Instead of creating a dense baked cheesecake, the recipe uses whipped cream to lighten the cream cheese mixture and produce a softer mousse-style consistency.

    It is also a practical make-ahead keto dessert. Most of the preparation takes approximately 25 minutes, after which refrigeration does the remaining work. The recipe makes eight servings, so it is suitable for family desserts, dinner gatherings, holidays, or preparing individual keto dessert cups ahead of time. The mousse can be assembled in glasses or in a larger serving dish.

    What Makes This Lemon Cheesecake Mousse Keto-Friendly?

    Traditional cheesecake desserts commonly contain substantial quantities of sugar, while the crust is often made from graham crackers mixed with sugar and butter. This recipe changes those major carbohydrate sources by using keto-friendly sweeteners and almond flour.

    The almond flour replaces traditional graham cracker crumbs, while granulated keto-friendly sweetener provides sweetness in the crust. Powdered keto-friendly sweetener is used in the filling because its finer consistency works more smoothly in a cold cream cheese mixture. According to the supplied nutrition information, each serving contains approximately 8 grams of carbohydrates.

    A No-Bake Keto Cheesecake Dessert

    One of the main advantages of this recipe is that no baking is required. The almond flour crust is mixed with melted butter and sweetener, pressed into serving glasses or a dish, and then refrigerated. Chilling firms the butter and helps the crust hold together beneath the mousse.

    The filling is also prepared entirely without heat. Cream cheese is beaten until smooth, heavy cream is whipped separately, and the two mixtures are gently combined. This approach makes the recipe particularly useful during warm weather or whenever you want cheesecake flavor without the longer process involved in baking and cooling a traditional cheesecake.

    Making the Keto Almond Flour Crust

    The crust begins with 1½ cups of almond flour. Almond flour has a naturally mild, nutty character that works particularly well with butter, cream cheese, and fresh lemon. Unlike a traditional crumb crust, it does not require cookies or graham crackers.

    Six tablespoons of melted unsalted butter moisten the almond flour and help bind it after refrigeration. Three tablespoons of granulated keto-friendly sweetener provide the necessary sweetness. Once these ingredients are thoroughly combined, the mixture should resemble moist crumbs that can be pressed firmly into the bottom of the serving containers.

    Why Almond Flour Works for Keto Cheesecake

    Almond flour is frequently used in low-carb desserts because it provides structure and texture without relying on wheat flour or traditional cookie crumbs. In this recipe, it creates a simple foundation underneath the creamy lemon cheesecake mousse.

    Because this is a no-bake crust, the almond flour will not develop the crispness associated with a baked pastry crust. Instead, melted butter binds the crumbs together as it cools. This produces a soft, buttery layer that provides textural contrast against the light mousse while remaining easy to eat with a spoon.

    Choosing Keto-Friendly Sweetener

    This recipe uses two forms of keto-friendly sweetener. The crust contains three tablespoons of granulated keto-friendly sweetener, while the cheesecake mousse contains ¾ cup of powdered keto-friendly sweetener.

    The different textures serve practical purposes. Granulated sweetener works well in the crumb-style almond flour base, while powdered sweetener dissolves more smoothly into softened cream cheese. A coarse sweetener could leave an unpleasant grainy texture in a cold mousse, which is why the powdered form is particularly useful for the filling.

    Why Full-Fat Cream Cheese Is Important

    The mousse requires 16 ounces, or 452 grams, of full-fat block cream cheese. This ingredient forms the foundation of the cheesecake filling and provides its characteristic rich, slightly tangy flavor.

    Use softened cream cheese rather than taking it directly from the refrigerator. Room-temperature cream cheese blends much more easily and is less likely to produce small lumps. Block-style cream cheese is also preferable for this recipe because its thick consistency gives the mousse more structure than a softer whipped cream cheese spread.

    How to Soften Cream Cheese Properly

    Allow the cream cheese enough time to soften naturally before beginning the filling. It should be soft enough for an electric mixer to beat smoothly but should not become hot or melted.

    Once softened, beat the cream cheese by itself before adding the remaining filling ingredients. Scrape the bowl as necessary so dense pieces do not remain along the sides or bottom. Creating a completely smooth cream cheese base at this stage is much easier than trying to remove lumps after the whipped cream has been incorporated.

    Heavy Whipping Cream Creates the Mousse Texture

    Two cups of very cold heavy whipping cream transform the dense cheesecake mixture into a light mousse. When heavy cream is whipped, it traps tiny air bubbles that increase its volume and create the fluffy texture required for this dessert.

    The temperature of the cream is important. Keep it refrigerated until you are ready to whip it. A cold mixing bowl and cold beaters can also make the process easier. Beat until stiff peaks form, meaning the whipped cream holds its shape when the beaters are lifted.

    Avoid Over-Whipping the Cream

    Although stiff peaks are necessary, whipping should stop once the cream reaches the correct consistency. Continuing to beat heavy cream for too long can cause it to become grainy and eventually begin separating.

    Properly whipped cream should look smooth, thick, and airy. Once it reaches stiff peaks, place it in the refrigerator briefly while preparing the lemon cream cheese mixture. Keeping the whipped cream cold helps maintain its structure until it is time to fold it into the filling.

    Fresh Lemon Gives the Mousse Its Bright Flavor

    The recipe uses two large fresh lemons along with ¼ cup of fresh lemon juice and two tablespoons of finely grated lemon zest. Using both juice and zest creates a more complete lemon flavor because each contributes something different.

    Lemon juice provides the tart acidity that balances the richness of cream cheese and heavy cream. Lemon zest contains fragrant citrus oils that give the dessert a stronger lemon aroma without adding much extra liquid. Together, they create the bright citrus flavor that defines this keto lemon cheesecake mousse.

    How to Zest Lemons Correctly

    Zest the lemons before squeezing them for juice. Use a fine grater and remove only the thin yellow outer layer. Avoid grating deeply into the white pith underneath because it can introduce unwanted bitterness.

    Measure two tablespoons of finely grated zest for the mousse. The zest should be distributed throughout the cream cheese mixture so every serving receives fresh lemon aroma. The optional garnish can include additional zest or thin lemon twists, but those are separate from the required two tablespoons in the filling.

    Preparing the Cream Cheese Filling

    Place the softened full-fat block cream cheese in a large mixing bowl and beat until completely smooth. Gradually add ¾ cup of powdered keto-friendly sweetener and continue mixing until it is evenly incorporated.

    Next, add ¼ cup of fresh lemon juice, two tablespoons of finely grated lemon zest, and two teaspoons of vanilla extract. Mix until the filling becomes smooth and uniform. Scrape the sides and bottom of the bowl so no unmixed cream cheese remains.

    Vanilla Balances the Lemon Flavor

    Two teaspoons of vanilla extract are included in the mousse. Vanilla does not compete with the lemon; instead, it rounds out the sharper citrus flavor and complements the richness of the cream cheese and heavy cream.

    The combination of vanilla, fresh lemon juice, and lemon zest gives the mousse a more balanced dessert flavor. Lemon remains the dominant note, but vanilla adds warmth in the background. Add it directly to the cream cheese mixture before folding in the whipped cream.

    How to Fold Whipped Cream into Cheesecake Mousse

    Folding is one of the most important techniques in this recipe. Vigorous mixing would knock much of the air out of the whipped cream and produce a denser cheesecake filling rather than a light mousse.

    Begin by folding approximately one-third of the whipped cream into the lemon cream cheese mixture. This loosens the dense base and makes the remaining whipped cream easier to incorporate. Add the rest and continue folding gently with a spatula until no obvious white streaks remain.

    Do Not Overmix the Mousse

    Stop folding as soon as the mixture becomes evenly combined. The goal is to maintain as much of the air trapped inside the whipped cream as possible.

    The finished mousse should look smooth, thick, and noticeably lighter than the cream cheese mixture was before the whipped cream was added. If the mixture is aggressively beaten after this point, some of that airy texture can be lost. Gentle handling creates a better final consistency after chilling.

    Assembling Keto Lemon Cheesecake Mousse

    Once the almond flour crust has chilled for approximately 30 minutes, it is ready for the filling. Divide the lemon cheesecake mousse evenly among the eight prepared serving glasses or spoon it over the crust in a larger dish.

    You can use a spoon for a simple presentation or pipe the mousse into individual glasses for a more decorative finish. Smooth the tops gently without pressing down heavily. The mousse should remain airy rather than being compacted against the crust.

    Why the Mousse Needs Several Hours to Chill

    Refrigerate the assembled dessert for at least four to six hours. During this time, the cream cheese and whipped cream mixture becomes firmer while the almond flour base also settles beneath it.

    The source lists a minimum chill time of 240 minutes, or four hours. Giving the dessert longer can make preparation easier when serving it for an event. It can be assembled ahead and kept chilled until needed rather than requiring last-minute preparation.

    Serving Keto Lemon Cheesecake Mousse

    Serve the mousse cold directly from the refrigerator. The chilled temperature helps maintain the thick cheesecake texture and keeps the whipped cream stable.

    The recipe provides several optional garnish ideas, including keto-sweetened or unsweetened whipped cream, lemon zest or thin lemon twists, fresh mint, a small amount of raspberries or blueberries, and almond flour crust crumbs. These garnishes are optional and should not be treated as required ingredients.

    Adding Berries as a Garnish

    A small amount of fresh raspberries or blueberries can add color and fruit flavor to the finished dessert. Because berries contain natural carbohydrates, the amount matters when preparing the recipe for a strict keto eating plan.

    The mousse does not require fruit to taste complete. Lemon zest or a thin lemon twist can provide an attractive finish without introducing another major flavor. Keep optional garnishes modest so the creamy lemon cheesecake remains the main feature.

    Can You Make Keto Lemon Cheesecake Mousse Without the Crust?

    The source allows the almond flour base to be omitted when you want a simpler mousse. Without the crust, the lemon cheesecake filling can be spooned directly into individual dessert glasses and chilled until set.

    However, removing the crust changes the recipe from the full version provided in the recipe card. The standard recipe below therefore retains all of the original almond flour crust ingredients. A crustless presentation should be considered an optional variation rather than the main preparation.

    Making the Dessert Ahead

    Keto Lemon Cheesecake Mousse is particularly well suited to advance preparation because several hours of refrigeration are already required. You can prepare and assemble the dessert before it is needed and keep it covered in the refrigerator.

    If using decorative garnishes, add them closer to serving time when possible. Fresh berries, mint, additional whipped cream, and lemon twists generally look fresher when they have not been sitting on the surface of the mousse throughout the entire chilling period.

    Storing Leftover Lemon Cheesecake Mousse

    According to the supplied source, leftover mousse can be kept covered in the refrigerator for approximately three days for best quality. Because the dessert contains cream cheese and heavy whipping cream, it should remain properly chilled.

    Individual dessert glasses are particularly convenient for storage because they can be covered separately and served directly from the refrigerator. Avoid stirring the mousse after it has fully set because doing so can reduce the light texture created by carefully folding in the whipped cream.

    Is This Keto Lemon Cheesecake Mousse Low Carb?

    The supplied nutritional information lists approximately 8 grams of carbohydrates per serving. Since the recipe uses keto-friendly sweeteners and almond flour instead of conventional sugar and graham crackers, it contains fewer carbohydrate-heavy ingredients than a traditional cheesecake dessert.

    However, exact carbohydrate and net-carbohydrate values can vary significantly depending on the keto sweetener, almond flour, cream cheese, and heavy cream brands used. The source does not provide a fiber value, so an exact net-carb figure should not be invented from the supplied information.

    Is This a High-Protein Dessert?

    The supplied nutritional information lists approximately 7 grams of protein per serving. Although cream cheese, heavy whipping cream, and almond flour contribute some protein, this amount does not make high protein the defining nutritional characteristic of the recipe.

    The dessert is much more clearly suited to a keto or low-carb category because of its ingredient design. It is also very high in fat according to the supplied nutrition information, at approximately 45 grams of fat per serving.

    Notes for the Best Keto Lemon Cheesecake Mousse

    Use Full-Fat Block Cream Cheese

    Full-fat block cream cheese provides the thickness required for the mousse. Allow it to soften before beating so the filling remains smooth.

    Keep Heavy Cream Very Cold

    Cold heavy whipping cream develops better peaks. Keep it refrigerated until immediately before whipping.

    Use Powdered Sweetener in the Mousse

    Powdered keto-friendly sweetener blends more easily into a cold cheesecake filling and helps prevent a gritty consistency.

    Zest Before Juicing

    Remove the lemon zest before cutting and squeezing the lemons. It is considerably easier to zest a whole lemon.

    Fold Gently

    Do not aggressively beat the whipped cream into the cream cheese. Gentle folding preserves the air needed for a mousse-like texture.

    Do Not Rush the Chilling Time

    Allow at least four hours in the refrigerator. The source recommends four to six hours for the assembled mousse to set properly.

    Serve Cold

    Keep the mousse refrigerated until serving so it maintains its thick, airy texture.

    Final Notes

    Keto Creamy Lemon Cheesecake Mousse combines the rich flavor of cheesecake with a fresh citrus finish and a light, fluffy texture. An almond flour, butter, and keto-sweetener crust replaces the traditional graham cracker base, while full-fat cream cheese, heavy whipping cream, fresh lemon, vanilla, and powdered keto sweetener create the smooth filling.

    The active preparation takes approximately 25 minutes, but sufficient chilling is essential. Refrigerate the assembled mousse for at least four hours and preferably four to six hours before serving. With approximately 8 grams of carbohydrates per serving according to the supplied nutritional information, this recipe is designed specifically as a keto-friendly alternative to conventional lemon cheesecake desserts.

    Keto Creamy Lemon Cheesecake Mousse Recipe

    Description

    A creamy, fluffy no-bake keto lemon cheesecake mousse made with full-fat cream cheese, heavy whipping cream, fresh lemon, keto-friendly sweetener, and a buttery almond flour crust. This refreshing low-carb dessert makes eight servings and requires no baking.

    Preparation & Cooking Duration

    Preparation Time: 25 minutes
    Cooking Time: 0 minutes
    Minimum Chill Time: 4 hours
    Recommended Chill Time: 4–6 hours
    Total Time Based on Minimum Chill: 4 hours 25 minutes

    Serving

    8 servings

    Course

    Dessert

    Cuisine

    American

    Difficulty

    Easy

    Ingredients

    Keto Almond Flour Base

    • 1½ cups almond flour
    • 6 tablespoons unsalted butter, melted
    • 3 tablespoons granulated keto-friendly sweetener

    Keto Lemon Cheesecake Mousse

    • 16 ounces (452 g) full-fat block cream cheese, softened
    • 2 cups (473 ml) heavy whipping cream, very cold
    • ¾ cup powdered keto-friendly sweetener
    • 2 large fresh lemons
    • ¼ cup fresh lemon juice
    • 2 tablespoons finely grated lemon zest
    • 2 teaspoons vanilla extract

    Optional Garnish

    • Keto-sweetened or unsweetened whipped cream
    • Lemon zest or thin lemon twists
    • Fresh mint
    • A small amount of raspberries or blueberries
    • Almond flour crust crumbs

    Step-by-Step Instructions

    1. Prepare the Almond Flour Base

    Combine the almond flour, melted unsalted butter, and granulated keto-friendly sweetener. Mix until evenly moistened.

    2. Fill the Serving Glasses

    Divide the crust mixture between 8 serving glasses or press it into the bottom of a larger serving dish.

    3. Chill the Crust

    Refrigerate for approximately 30 minutes.

    4. Whip the Heavy Cream

    Beat the very cold heavy whipping cream until stiff peaks form. Refrigerate while preparing the cream cheese mixture.

    5. Beat the Cream Cheese

    Place the softened full-fat cream cheese in a separate bowl and beat until completely smooth.

    6. Add the Lemon Ingredients

    Mix in the powdered keto-friendly sweetener, fresh lemon juice, finely grated lemon zest, and vanilla extract until smooth.

    7. Fold in the Whipped Cream

    Gently fold the whipped heavy cream into the lemon cream cheese mixture until evenly incorporated.

    8. Assemble

    Spoon or pipe the mousse over the chilled almond flour crust.

    9. Chill

    Refrigerate the assembled desserts for 4–6 hours, or until properly set.

    10. Garnish

    If desired, decorate with whipped cream, lemon zest, thin lemon twists, fresh mint, a small quantity of berries, or almond flour crust crumbs.

    11. Serve

    Serve cold directly from the refrigerator.

    Notes

    • Use full-fat block-style cream cheese for the intended texture.
    • Allow the cream cheese to soften before beating to reduce lumps.
    • Keep heavy whipping cream very cold until ready to whip.
    • Stop whipping the cream once stiff peaks form.
    • Powdered keto-friendly sweetener is preferable in the mousse because it produces a smoother consistency.
    • Zest the lemons before squeezing them.
    • Fold the whipped cream gently into the cream cheese mixture to preserve its airy texture.
    • Chill for at least 4 hours; 4–6 hours is recommended.
    • The almond flour crust may be omitted for a crustless variation, but doing so changes the complete recipe.
    • Optional berries should be kept modest when carbohydrate intake is being closely monitored.
    • The source recommends keeping leftovers covered and refrigerated for approximately 3 days.

    Nutritional Information

    Approximate nutrition per serving:

    Calories: 440 kcal
    Carbohydrates: 8 g
    Protein: 7 g
    Fat: 45 g

    The supplied recipe does not provide calculated values for fiber, sugar, saturated fat, sodium, cholesterol, or other micronutrients, so those values should not be invented. Exact nutrition can also vary depending on the brands of cream cheese, almond flour, heavy cream, and keto-friendly sweetener used.

  • Crispy Air Fryer Chicken Tenders

    Crispy Air Fryer Chicken Tenders

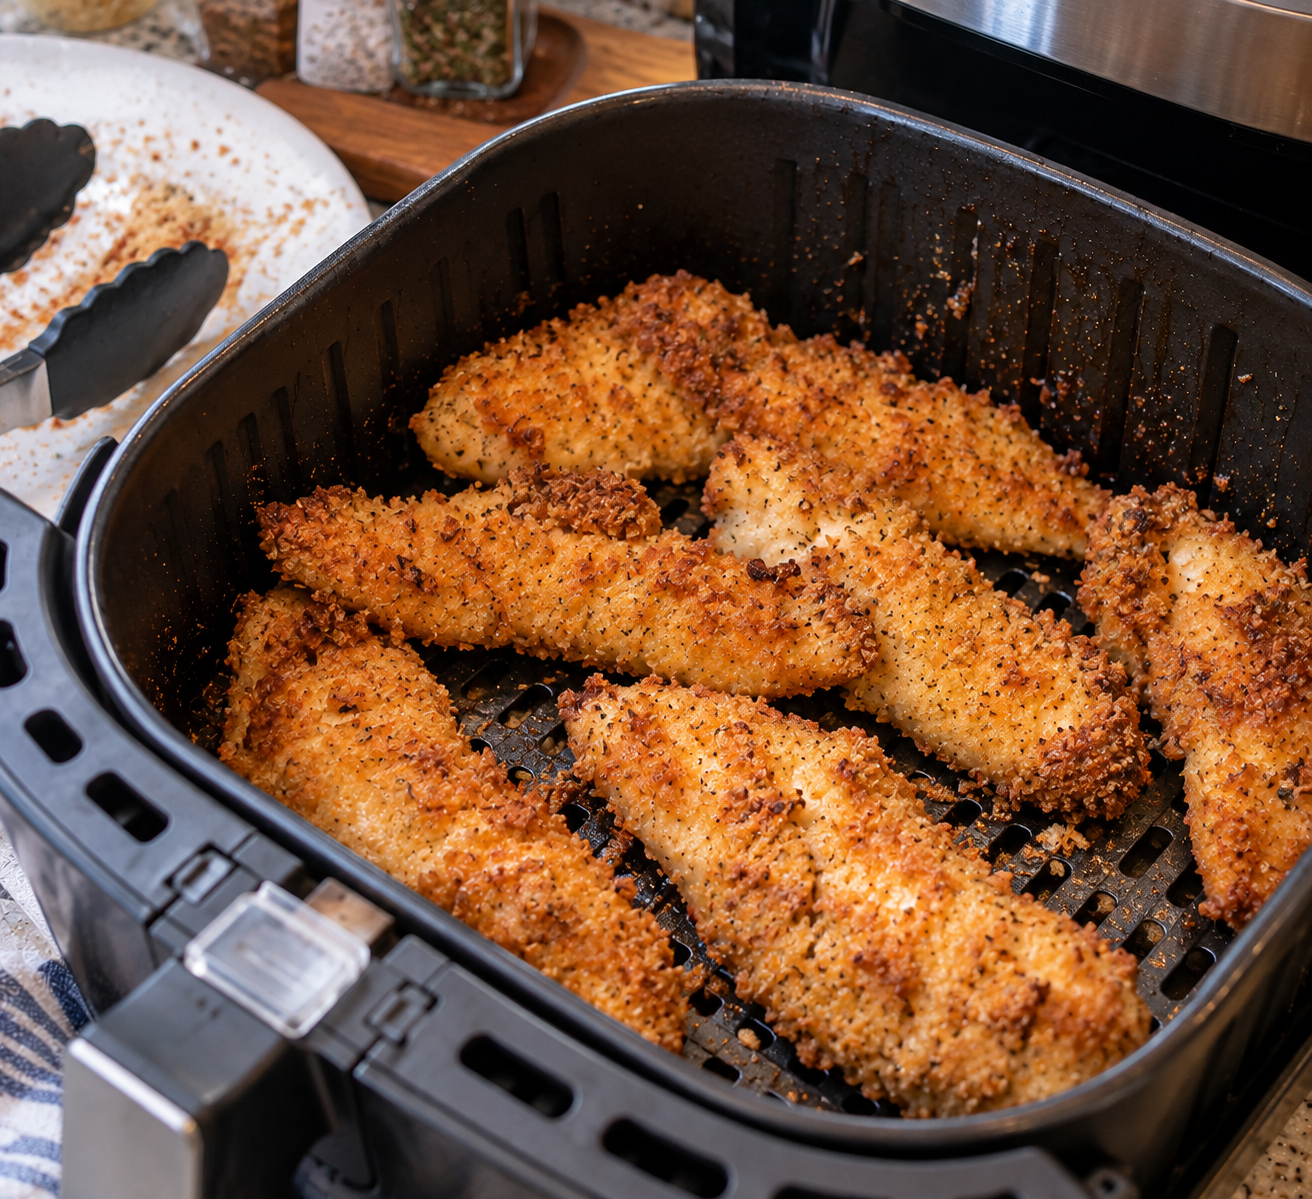
    Air Fryer Chicken Tenders have quickly become one of the most searched quick dinner recipes because they deliver restaurant-style crispiness with minimal effort and healthier cooking methods. When users search for “best air fryer chicken tenders recipe,” “crispy chicken strips air fryer method,” or “easy homemade chicken tenders air fryer,” this dish consistently ranks high due to its reliability and simplicity. The air fryer transforms ordinary chicken into golden, crunchy tenders with a juicy interior, making it perfect for weeknight dinners, lunch boxes, or party snacks. Unlike deep frying, the air fryer uses circulating hot air to create a crispy coating without excess oil. This makes Air Fryer Chicken Tenders a popular choice for families looking for fast, flavorful, and healthier comfort food options.

    Why Air Fryer Chicken Tenders Are Better Than Deep Fried Versions

    Air Fryer Chicken Tenders offer a healthier and more convenient alternative to traditional deep-fried chicken, which is why they are trending in searches like “healthy chicken tenders air fryer recipe” and “crispy air fryer chicken strips.” Deep frying often requires large amounts of oil, constant temperature monitoring, and longer cleanup time. In contrast, the air fryer simplifies the entire process by using hot air circulation to crisp the coating evenly. This method significantly reduces oil consumption while still producing a crunchy exterior and juicy interior. Another advantage is consistency, as air fryers maintain steady heat levels that prevent burning or undercooking. The result is golden, evenly cooked Air Fryer Chicken Tenders that taste indulgent but are lighter and easier to prepare at home.

    The Secret to Crispy Air Fryer Chicken Tenders Texture

    The crispiness of Air Fryer Chicken Tenders comes from a combination of coating technique, airflow, and temperature control. Many people searching for “how to make crispy chicken tenders in air fryer” often overlook the importance of layering flour, egg, and breadcrumbs correctly. This triple coating system creates a structured crust that becomes golden and crunchy when exposed to hot air. The flour helps the egg stick, the egg binds the breadcrumbs, and the breadcrumbs form the final crispy layer. Spraying a light mist of oil enhances browning through the Maillard reaction, which is responsible for the golden color and rich flavor. Proper spacing in the air fryer basket ensures that hot air circulates evenly, preventing sogginess and ensuring all sides become perfectly crispy.

    Choosing the Best Chicken for Air Fryer Chicken Tenders Recipe

    Selecting the right chicken is essential for making perfect Air Fryer Chicken Tenders. Chicken tenders, also known as chicken strips or chicken fillets, are naturally tender cuts taken from the underside of the chicken breast. Many users searching for “best chicken for air fryer tenders” prefer this cut because it cooks quickly and remains juicy. However, boneless chicken breasts can also be used as a substitute if sliced into even strips. This makes the recipe flexible for home cooks who may not always have pre-cut tenders available. Uniform size is important because it ensures even cooking and prevents some pieces from drying out while others remain undercooked. High-quality chicken enhances both flavor and texture, resulting in consistently delicious Air Fryer Chicken Tenders.

    Ingredients for Flavorful Chicken Tenders

    This Air Fryer Chicken Tenders recipe uses simple pantry staples that create bold flavor and a crispy coating. All-purpose flour forms the base layer, helping the egg mixture adhere to the chicken. Eggs and milk create a smooth binding mixture that ensures the breadcrumbs stick evenly. Plain breadcrumbs provide the final crunchy texture, while seasoning ingredients such as salt, garlic powder, black pepper, and paprika enhance flavor depth. Many people searching for “best seasoning for air fryer chicken tenders” prefer this classic blend because it balances savory, smoky, and mildly spicy notes. Each ingredient plays a crucial role in building texture and taste, making the final result crispy on the outside and juicy on the inside.

    How to Properly Prepare Chicken Tenders for Air Frying Success

    Proper preparation is key to achieving perfect Air Fryer Chicken Tenders. The process begins by trimming excess fat from the chicken and ensuring all pieces are evenly sized for consistent cooking. Setting up a three-step breading station—flour, egg mixture, and breadcrumb seasoning—is essential for building a strong coating. Many users searching for “how to bread chicken tenders for air fryer” find that pressing the breadcrumbs firmly onto the chicken helps create a thicker crust. Allowing the coated chicken to rest for a few minutes before cooking can also improve adhesion. Lightly spraying the coated tenders with oil ensures even browning and enhances crispiness during air frying.

    Step-by-Step Air Frying Method for Perfect Chicken Tenders

    Cooking Air Fryer Chicken Tenders is a simple process that delivers fast and consistent results. The air fryer is preheated to 400°F to ensure immediate crisping of the coating. The breaded chicken tenders are placed in a single layer in the basket, ensuring enough space for proper air circulation. Cooking is done in two stages, flipping halfway through to ensure even browning on both sides. Many users searching for “how long to cook chicken tenders in air fryer” find that total cooking time ranges between 10 to 12 minutes depending on thickness. The tenders are fully cooked when the internal temperature reaches 165°F. Once done, they should be served immediately to enjoy maximum crispiness and juiciness.

    Common Mistakes to Avoid When Making Air Fryer Chicken Tenders

    Several common mistakes can affect the quality of Air Fryer Chicken Tenders. One major error is overcrowding the basket, which prevents proper airflow and leads to uneven cooking. Another mistake is skipping oil spray, which can result in pale or dry coating instead of crispy golden texture. Many users searching for “why are my air fryer chicken tenders not crispy” often discover that improper coating layering is the cause. Not preheating the air fryer can also affect crispiness and cooking consistency. Additionally, flipping too early or too late can disrupt the coating structure. Avoiding these mistakes ensures consistently crispy, juicy, and flavorful Air Fryer Chicken Tenders every time.

    Serving Ideas and Dipping Sauces for Air Fryer Chicken Tenders

    Air Fryer Chicken Tenders are incredibly versatile and pair well with a wide range of dipping sauces and side dishes. Many people searching for “best sauces for chicken tenders air fryer” enjoy classics like honey mustard, barbecue sauce, ranch, or garlic mayo. For a healthier meal, they can be served with fresh salads, roasted vegetables, or steamed greens. They also work well in wraps, sandwiches, or grain bowls for quick lunches. Kids especially enjoy them with ketchup or mild cheese sauces. Their versatility makes Air Fryer Chicken Tenders suitable for both casual snacking and full meals, offering endless pairing possibilities.

    Storage and Reheating Tips for Air Fryer Chicken Tenders

    Proper storage helps maintain the quality of Air Fryer Chicken Tenders after cooking. Once cooled, they should be stored in an airtight container in the refrigerator for up to three days. Many users searching for “how to reheat chicken tenders in air fryer” prefer using the air fryer again because it restores crispiness better than microwaving. Reheating at a moderate temperature for a few minutes helps bring back the golden crust without drying out the chicken. Freezing cooked or uncooked tenders is also possible for longer storage. Proper reheating ensures that leftovers remain crispy, juicy, and enjoyable.

    Conclusion: Why Air Fryer Chicken Tenders Are a Must-Try Recipe

    Air Fryer Chicken Tenders are one of the most reliable and family-friendly recipes for quick meals, combining convenience, flavor, and healthier cooking. The air fryer ensures consistent crispiness while keeping the chicken tender and juicy inside. With simple ingredients and easy preparation, this recipe is perfect for beginners and experienced cooks alike. Its popularity in searches like “easy air fryer chicken recipes” continues to grow because it delivers restaurant-quality results at home without deep frying. Whether served as a snack, dinner, or meal prep option, Air Fryer Chicken Tenders remain a timeless comfort food that is both practical and delicious.

    Air Fryer Chicken Tenders

    Description

    Crispy, golden Air Fryer Chicken Tenders coated in seasoned breadcrumbs for a juicy, crunchy, and flavorful quick meal or snack.

    Preparation & Cooking Duration

    Prep Time: 10 minutes
    Cook Time: 12 minutes
    Total Time: 22 minutes

    Serving: 4

    Ingredients

    • 3–4 pounds chicken tenders, trimmed of fat
    • 3 cups all-purpose flour, divided
    • 2 large eggs
    • 4 tablespoons milk
    • 1 cup plain breadcrumbs
    • 2 teaspoons salt
    • 1 teaspoon garlic powder
    • 1 teaspoon black pepper
    • 1 teaspoon paprika
    • Cooking oil spray

    Step-by-step Instructions

    • Preheat air fryer to 400°F for at least 5 minutes.
    • Prepare chicken tenders by trimming excess fat.
    • Set up breading stations: flour in one bowl, egg and milk whisked in another, and breadcrumbs mixed with seasoning in a third.
    • Coat each chicken tender in flour, then egg mixture, then breadcrumb mixture, pressing to adhere well.
    • Place tenders in air fryer basket in a single layer and lightly spray with oil.
    • Cook for 5–6 minutes, flip, spray lightly again, and cook another 5–6 minutes until golden and internal temperature reaches 165°F.
    • Serve hot with your favorite dipping sauce.

    Nutritional Information (per serving)

    Calories: 699 kcal
    Carbohydrates: 46 g
    Protein: 93 g
    Fat: 13 g
    Saturated Fat: 3 g
    Trans Fat: 0.1 g
    Cholesterol: 296 mg
    Sodium: 1160 mg
    Potassium: 1585 mg
    Fiber: 2 g
    Sugar: 1 g
    Vitamin A: 315 IU
    Vitamin C: 5 mg
    Calcium: 69 mg
    Iron: 5 mg

  • Homemade Crispy Air Fryer Chicken Thighs

    Homemade Crispy Air Fryer Chicken Thighs

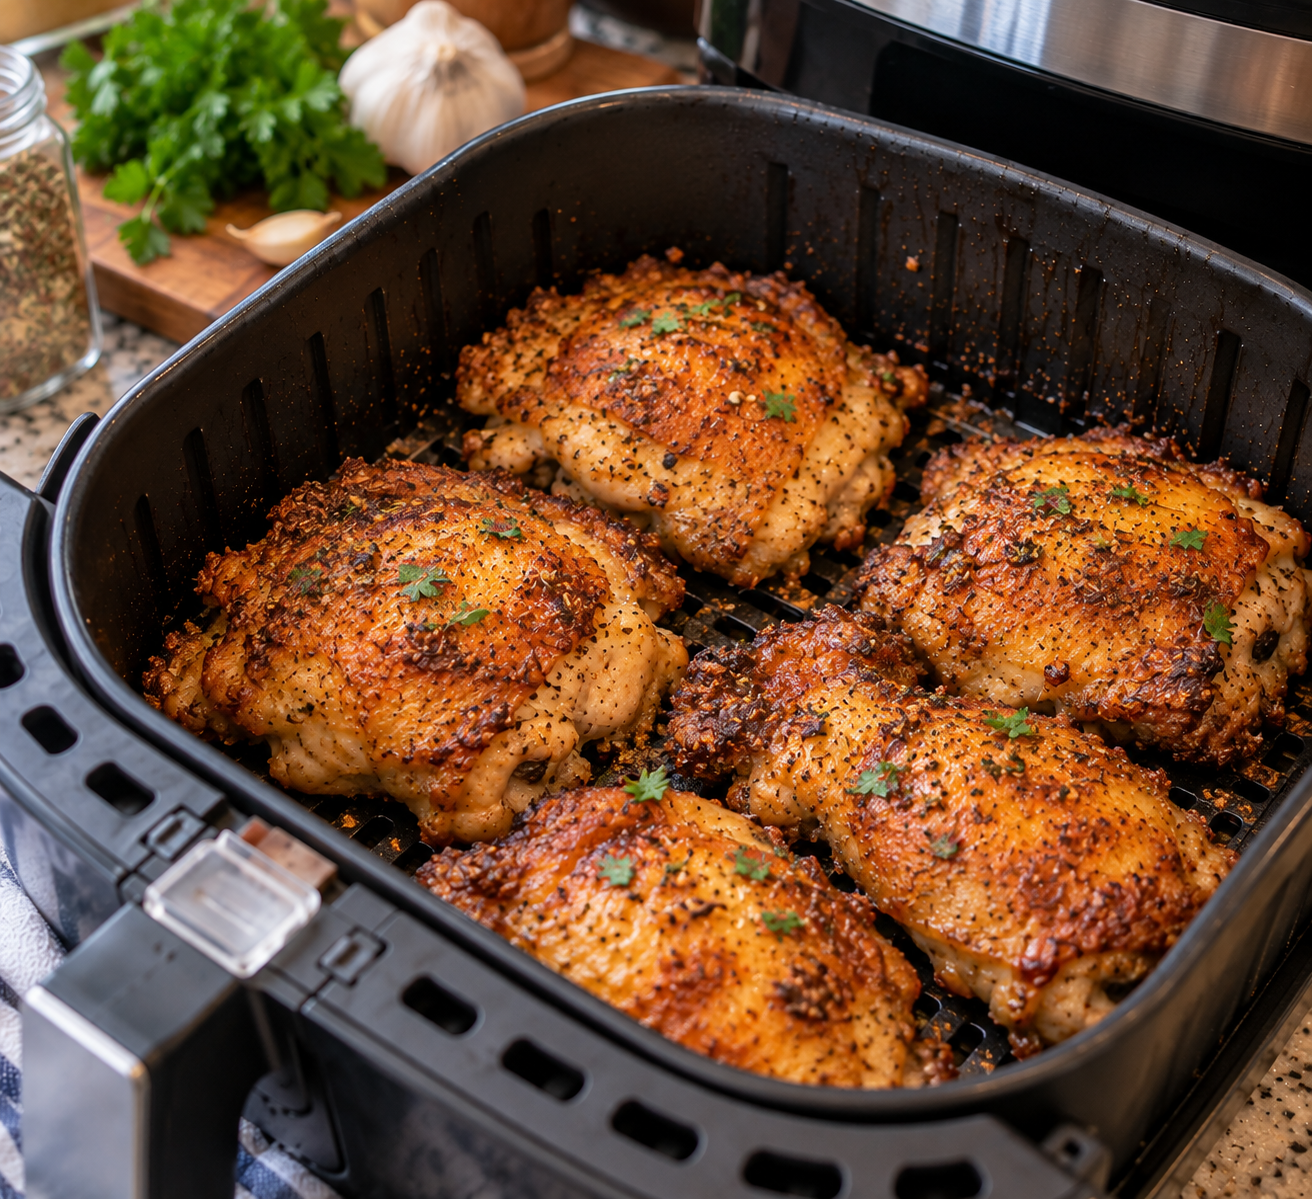
    Air Fryer Chicken Thighs have become one of the most searched easy dinner recipes because they deliver an unbeatable combination of crispy skin and juicy, tender meat in a short cooking time. When users search for “best air fryer chicken thighs recipe,” “crispy chicken thighs air fryer method,” or “juicy bone-in chicken thighs air fryer,” this dish consistently ranks high due to its simplicity and reliable results. The air fryer has transformed home cooking by making it possible to achieve restaurant-quality texture without deep frying or long oven roasting. Instead of waiting for an oven to preheat and cook for nearly an hour, the air fryer produces golden, crispy chicken thighs in about 25 minutes. This makes Air Fryer Chicken Thighs an ideal option for busy weeknights, family dinners, and meal prep plans that require both speed and flavor.

    Why Air Fryer Chicken Thighs Are Better Than Oven Roasted Chicken

    Air Fryer Chicken Thighs offer several advantages over traditional oven roasting, which is why they are trending in searches like “quick chicken thigh recipe air fryer” and “crispy skin chicken thighs easy recipe.” The biggest difference lies in how heat is distributed. In a conventional oven, heat surrounds the food more slowly, often resulting in uneven crisping or longer cooking times. In contrast, the air fryer uses rapid hot air circulation, which cooks the chicken evenly while crisping the skin more efficiently. This method also reduces the need for excess oil, making it a healthier alternative. Another advantage is consistency, as air fryers maintain steady heat levels that help prevent undercooked or dry chicken. The result is perfectly cooked Air Fryer Chicken Thighs with crispy skin on the outside and juicy meat on the inside every time.

    The Science Behind Crispy Skin and Juicy Air Fryer Chicken Thighs

    The success of Air Fryer Chicken Thighs depends on how heat interacts with fat, moisture, and seasoning. Chicken thighs are naturally higher in fat compared to chicken breasts, which makes them ideal for air frying because the fat renders during cooking and helps crisp the skin. Many users searching for “how to get crispy chicken skin in air fryer” find that the key lies in removing surface moisture before cooking. When the skin is dry and exposed to circulating hot air, it crisps up through the Maillard reaction, creating a golden, flavorful crust. The olive oil used in seasoning helps conduct heat and promotes even browning. Meanwhile, the internal meat remains moist because the bone helps regulate heat distribution. This balance of crispy exterior and juicy interior is what makes Air Fryer Chicken Thighs so popular and satisfying.

    Choosing the Best Chicken for Air Fryer Chicken Thighs Recipe

    Selecting the right cut of chicken is essential for perfect Air Fryer Chicken Thighs. Bone-in, skin-on chicken thighs are widely preferred because they offer more flavor, moisture, and better texture during cooking. Many people searching for “best chicken thighs for air fryer recipes” choose this cut because the bone helps retain juiciness while the skin crisps beautifully. Boneless thighs can also be used but require shorter cooking times and may not achieve the same level of crispiness. Fresh chicken is always ideal, but properly thawed frozen thighs also work well if prepared correctly. Size consistency is important because unevenly sized thighs can cook at different rates, leading to inconsistent results. Choosing high-quality chicken ensures better flavor, texture, and overall cooking performance in Air Fryer Chicken Thighs recipes.

    Essential Ingredients for Flavorful Air Fryer Chicken Thighs

    This Air Fryer Chicken Thighs recipe uses simple pantry ingredients that create bold flavor without complexity. Olive oil acts as the base, helping the seasoning stick while also promoting crisp skin formation. The seasoning blend includes white pepper, kosher salt, paprika, garlic powder, onion powder, and black pepper. Many users searching for “best seasoning for air fryer chicken thighs” prefer this combination because it balances smoky, savory, and slightly spicy notes. Paprika adds color and mild sweetness, while garlic and onion powders provide depth. White and black pepper enhance overall seasoning complexity without overpowering the dish. This simple yet powerful blend ensures that Air Fryer Chicken Thighs remain flavorful, juicy, and well-seasoned in every bite.

    How to Properly Prepare Chicken Thighs for Air Frying Success

    Proper preparation is a key step in achieving perfect Air Fryer Chicken Thighs. The process begins by bringing the chicken to room temperature, which allows for more even cooking and prevents cold spots in the meat. This step is often recommended in searches like “how to cook chicken thighs evenly in air fryer.” Next, the chicken should be patted dry thoroughly using paper towels to remove excess moisture from the skin. This is essential for achieving crispy skin, as moisture can prevent proper browning. The seasoning mixture is then combined with olive oil and rubbed evenly over the chicken, ensuring full coverage. Allowing the seasoned chicken to rest briefly before cooking helps the flavors absorb into the meat. These preparation steps ensure juicy, flavorful, and evenly cooked Air Fryer Chicken Thighs.

    Step-by-Step Air Frying Method for Perfect Chicken Thighs

    Cooking Air Fryer Chicken Thighs is a simple process that delivers consistent results when done correctly. The air fryer is preheated to 400°F to ensure immediate searing of the chicken skin. The seasoned thighs are placed skin-side up in a single layer inside the basket, ensuring proper airflow. Cooking begins for about 15 minutes, allowing the skin to crisp and the fat to render. The chicken is then flipped and cooked for an additional 3 to 4 minutes to ensure even doneness. Many users searching for “how long to cook chicken thighs in air fryer” find that the ideal internal temperature should reach 165°F or slightly higher for maximum juiciness. Once cooked, the chicken should rest for a few minutes to allow juices to redistribute, resulting in tender and flavorful Air Fryer Chicken Thighs.

    Common Mistakes to Avoid When Making Air Fryer Chicken Thighs

    Several common mistakes can affect the quality of Air Fryer Chicken Thighs. One of the biggest errors is skipping the step of drying the chicken skin, which prevents crispiness. Another mistake is overcrowding the air fryer basket, which restricts airflow and leads to uneven cooking. Many users searching for “why is my air fryer chicken skin not crispy” often discover that overcrowding is the main issue. Not preheating the air fryer can also lead to inconsistent results. Using too much oil may prevent proper crisping, while too little seasoning can result in bland flavor. Additionally, not allowing the chicken to rest after cooking can cause juices to escape too quickly. Avoiding these mistakes ensures consistently crispy, juicy, and flavorful Air Fryer Chicken Thighs.

    Serving Ideas and Meal Pairings for Air Fryer Chicken Thighs

    Air Fryer Chicken Thighs are extremely versatile and pair well with a wide range of side dishes. Many people searching for “easy dinner ideas with chicken thighs air fryer” enjoy serving them with roasted vegetables, mashed potatoes, or rice. They also pair well with green beans, Brussels sprouts, or air fryer asparagus for a balanced meal. For lighter options, they can be served over salads or grain bowls. The chicken can also be sliced and used in wraps, sandwiches, or tacos for quick meals. Their rich flavor makes them suitable for both casual dinners and meal prep plans, offering flexibility for multiple meal styles throughout the week.

    Storage and Reheating Tips for Air Fryer Chicken Thighs

    Proper storage helps maintain the quality of Air Fryer Chicken Thighs after cooking. Once cooled, they should be stored in an airtight container in the refrigerator for up to three days. Many users searching for “how to reheat chicken thighs in air fryer” prefer reheating them in the air fryer to restore crisp skin. Reheating at a moderate temperature for a few minutes ensures the chicken remains juicy inside while regaining its crispy texture outside. Freezing is also possible for longer storage, but refrigeration is preferred for best texture. Proper reheating techniques ensure leftovers remain flavorful and enjoyable.

    Conclusion: Why Air Fryer Chicken Thighs Are a Must-Try Recipe

    Air Fryer Chicken Thighs are one of the most reliable and flavorful recipes for home cooking, combining speed, simplicity, and excellent texture. The air fryer ensures crispy skin, juicy meat, and consistent results with minimal effort. This recipe is ideal for beginners and experienced cooks alike due to its straightforward preparation and versatile seasoning options. Its popularity in searches like “easy air fryer chicken recipes” continues to grow because it delivers restaurant-quality results in less time than traditional cooking methods. Whether served as a main dish or used in meal prep, Air Fryer Chicken Thighs remain a go-to comfort food that is both practical and delicious.

    Air Fryer Chicken Thighs Recipe

    Description

    Crispy skin Air Fryer Chicken Thighs with juicy, tender meat seasoned with paprika, garlic, onion, and pepper for a quick and flavorful meal.

    Preparation & Cooking Duration

    Prep Time: 5 minutes
    Cook Time: 20 minutes
    Total Time: 25 minutes

    Serving
    Serves: 4

    Ingredients

    • 4 bone-in, skin-on chicken thighs (room temperature)
    • 4 tablespoons olive oil
    • ½ teaspoon white pepper
    • ½ teaspoon kosher salt
    • 1 teaspoon paprika
    • 1 teaspoon garlic powder
    • 1 teaspoon onion powder
    • 1 teaspoon black pepper

    Step-by-step Instructions

    • Preheat air fryer to 400°F and lightly spray basket with cooking spray.
    • Pat chicken thighs dry and coat with olive oil on both sides.
    • Mix all seasonings in a bowl, then rub evenly over chicken thighs.
    • Place chicken skin-side up in air fryer basket in a single layer.
    • Cook for 15 minutes, then flip and cook another 3–4 minutes until internal temperature reaches 165°F.
    • Remove and rest for 5 minutes before serving.

    Nutritional Information (per serving)

    Calories: 483 kcal
    Fat: 41 g
    Saturated Fat: 9 g
    Carbohydrates: 2 g
    Protein: 26 g
    Cholesterol: 157 mg
    Sodium: 416 mg
    Potassium: 362 mg
    Fiber: 1 g
    Sugar: 0.1 g
    Vitamin A: 374 IU
    Vitamin C: 0.2 mg
    Calcium: 20 mg
    Iron: 1 mg

  • Juicy Air Fryer Chicken Breast – Quick, Healthy, and Perfectly Tender Every Time

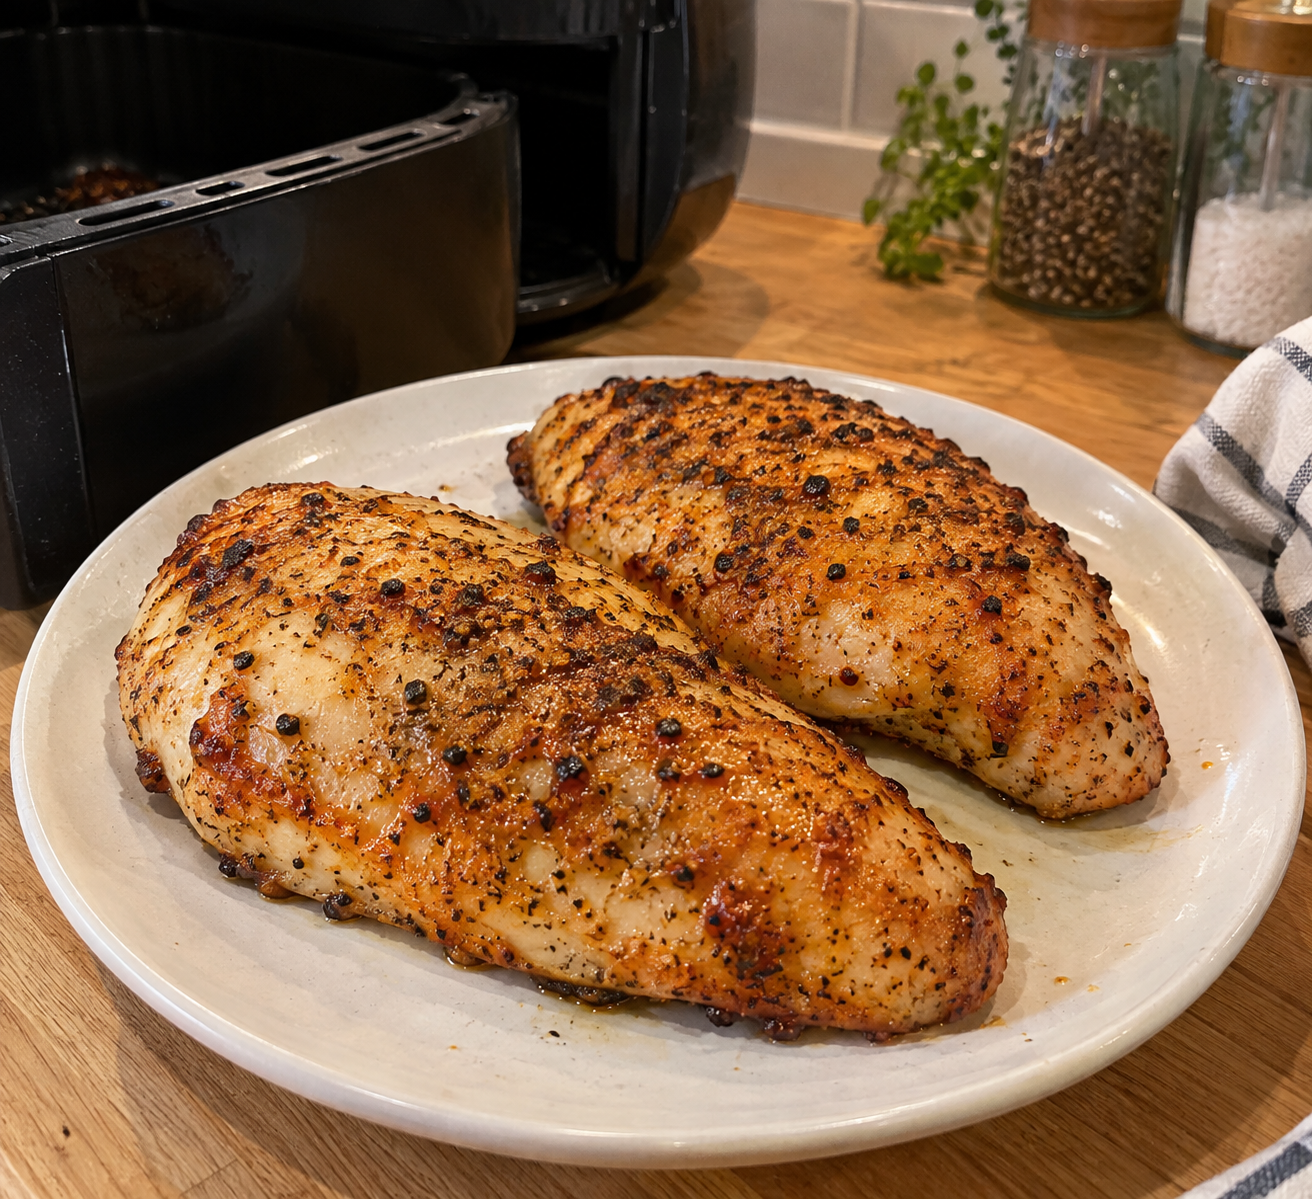
    Air Fryer Chicken Breast has become one of the most searched healthy dinner recipes because it delivers juicy, tender chicken in under 15 minutes with minimal effort. When users search for “best air fryer chicken breast recipe,” “juicy chicken breast air fryer method,” or “quick healthy chicken dinner ideas,” this recipe consistently ranks high due to its simplicity and reliable results. The air fryer has completely changed how chicken breast is cooked at home by solving the most common problem—dryness. Instead of pan-frying or oven baking, the air fryer locks in moisture while creating a lightly golden, flavorful exterior. This makes Air Fryer Chicken Breast an ideal option for busy weeknights, meal prep, fitness-focused meals, and quick family dinners that require both nutrition and taste.

    Why Air Fryer Chicken Breast Is Better Than Traditional Cooking Methods
    Air Fryer Chicken Breast offers significant advantages over stovetop or oven cooking, making it one of the most popular searches for “healthy air fryer chicken recipes” and “easy chicken breast dinner ideas.” Traditional methods often lead to uneven cooking or dryness, especially when chicken breasts are overcooked even slightly. The air fryer solves this by circulating hot air evenly around the meat, ensuring consistent heat distribution. This locks in natural juices while creating a lightly crisp outer layer. Another benefit is reduced cooking time, as air fryers preheat quickly and cook faster than ovens. It also requires less oil, making it a healthier alternative for those looking to reduce fat intake without compromising flavor. The result is tender, juicy chicken breast every single time with minimal effort.

    The Science Behind Juicy Air Fryer Chicken Breast
    The secret to perfectly cooked Air Fryer Chicken Breast lies in temperature control and moisture retention. Chicken breast is naturally lean, which makes it prone to drying out when exposed to high heat for too long. The air fryer’s rapid circulation of hot air cooks the exterior quickly while sealing in internal moisture. This is why users searching for “how to keep chicken breast juicy in air fryer” achieve better results compared to traditional baking. The olive oil coating helps conduct heat evenly while also enhancing browning through the Maillard reaction, which improves flavor and texture. Lemon juice adds slight acidity, which helps tenderize the meat and brighten the flavor profile. When combined with proper timing and resting, the result is a juicy, flavorful chicken breast with a golden exterior and tender interior.

    Choosing the Best Chicken for Air Fryer Chicken Breast Recipe
    Selecting the right chicken is essential for achieving perfect Air Fryer Chicken Breast results. Boneless, skinless chicken breasts are the most commonly used cut because they cook quickly and evenly. Many people searching for “best chicken for air fryer recipes” prefer medium-sized breasts because they provide balanced cooking time and consistent texture. Extremely large chicken breasts may require additional cooking time, while very small ones may cook too quickly and risk drying out. Fresh chicken is generally preferred over frozen because it allows better seasoning absorption and more even cooking. However, frozen chicken can still be used if properly thawed before cooking. Choosing high-quality chicken ensures better texture, flavor, and juiciness in the final dish.

    Essential Ingredients for Flavorful Air Fryer Chicken Breast
    This Air Fryer Chicken Breast recipe uses a simple but powerful combination of ingredients designed to enhance natural chicken flavor. Olive oil is used as the base because it helps the seasoning stick and promotes even browning. Lemon juice adds brightness and helps tenderize the meat slightly, improving overall texture. The seasoning blend includes chicken seasoning, garlic powder, dried oregano, smoked paprika, salt, and black pepper. Many users searching for “best seasoning for air fryer chicken breast” prefer this combination because it balances savory, smoky, and herbal flavors. Each ingredient plays a role in building depth without overpowering the chicken. This simple ingredient list ensures the recipe remains healthy, quick, and highly flavorful.

    How to Properly Prepare Chicken Breast for Air Frying Success
    Proper preparation is essential for achieving juicy Air Fryer Chicken Breast. The process begins by patting the chicken dry with paper towels, which helps remove excess moisture and allows the seasoning to adhere properly. This step is often overlooked by people searching for “why is my air fryer chicken dry,” but it is critical for texture. The seasoning mixture is then combined with olive oil and lemon juice to create a marinade-like coating. Brushing this mixture evenly over the chicken ensures full flavor coverage. Letting the chicken sit for a few minutes before cooking allows the spices to absorb into the surface. Proper preparation ensures even cooking, enhanced flavor, and a juicy final result.

    Step-by-Step Air Frying Method for Perfect Chicken Breast
    Cooking Air Fryer Chicken Breast is simple and efficient when following the correct method. The air fryer is preheated to 375°F to ensure immediate searing of the chicken surface. The seasoned chicken is placed in a single layer in the basket to allow proper air circulation. Cooking begins at 7 minutes per side, with a flip halfway through to ensure even browning. Many people searching for “how long to cook chicken breast in air fryer” find that total cooking time ranges between 9 to 12 minutes depending on thickness. The chicken is fully cooked when the internal temperature reaches 165°F. After cooking, allowing the chicken to rest for a few minutes helps redistribute juices inside the meat, ensuring maximum tenderness.

    Common Mistakes to Avoid When Making Air Fryer Chicken Breast
    Several common mistakes can affect the quality of Air Fryer Chicken Breast. One of the most frequent errors is overcooking, which leads to dry and tough meat. Another mistake is skipping preheating, which can result in uneven cooking. Many users searching for “why is my air fryer chicken dry” also discover that not using enough oil or seasoning reduces flavor and moisture retention. Overcrowding the air fryer basket can block air circulation, leading to inconsistent results. Not allowing the chicken to rest after cooking can also cause juices to escape too quickly. Avoiding these mistakes ensures consistently juicy, flavorful chicken breast every time.

    Serving Ideas and Meal Pairings for Air Fryer Chicken Breast
    Air Fryer Chicken Breast is extremely versatile and pairs well with a wide variety of side dishes and meal styles. Many people searching for “healthy chicken dinner ideas air fryer” enjoy pairing it with mashed potatoes, roasted vegetables, or fresh salads. It also works well with green beans, Brussels sprouts, or air fryer asparagus for a balanced meal. For a low-carb option, it can be served with arugula salad or grilled vegetables. The chicken can also be sliced and used in wraps, sandwiches, pasta dishes, or grain bowls. This versatility makes Air Fryer Chicken Breast ideal for meal prep, allowing it to be reused in multiple recipes throughout the week.

    Meal Prep and Storage Tips for Air Fryer Chicken Breast
    Air Fryer Chicken Breast is excellent for meal prep because it stores and reheats well when handled correctly. Once cooled, it should be placed in an airtight container and stored in the refrigerator for up to three days. Many users searching for “how to store cooked chicken breast air fryer” prefer slicing or shredding it before storing for easier use in salads, wraps, or pasta dishes. Reheating should be done gently in the air fryer or microwave to maintain moisture. Adding a small splash of water or broth during reheating can help prevent dryness. Proper storage ensures the chicken remains juicy and flavorful even after refrigeration.

    Creative Ways to Use Leftover Air Fryer Chicken Breast
    Leftover Air Fryer Chicken Breast can be transformed into a variety of new meals, making it a highly practical recipe. Many people searching for “leftover chicken breast recipes” use it in salads such as Caesar or Greek salad for added protein. It can also be shredded and added to sandwiches, wraps, or pitas with sauces like tzatziki or mayonnaise-based dressings. Pasta dishes, casseroles, and noodle bowls are also popular uses. For a quick snack, it can be added to flatbreads or used as a topping for nachos. These creative options help reduce food waste while maximizing the value of each cooked batch.

    Conclusion: Why Air Fryer Chicken Breast Is a Must-Try Healthy Recipe
    Air Fryer Chicken Breast is one of the most reliable and efficient recipes for anyone seeking a quick, healthy, and flavorful meal. Its ability to produce juicy, tender chicken with minimal ingredients and effort makes it a staple in modern home cooking. The air fryer ensures even cooking, reduced oil usage, and consistent results, making it ideal for beginners and experienced cooks alike. With its versatility, it can be used in salads, wraps, main dishes, or meal prep plans. Its popularity in searches like “easy air fryer chicken recipes” continues to grow because it delivers consistent, restaurant-quality results at home. Air Fryer Chicken Breast remains a go-to solution for fast, healthy, and delicious meals.

    Air Fryer Chicken Breast Recipe

    Description
    Juicy, tender Air Fryer Chicken Breast seasoned with herbs, garlic, paprika, and lemon for a quick and healthy high-protein meal.

    Preparation & Cooking Duration
    Prep Time: 5 minutes
    Cook Time: 10 minutes
    Total Time: 15 minutes

    Serving
    Serves: 4

    Ingredients
    1 lb (500g) boneless skinless chicken breasts
    2 tbsp olive oil
    2 tbsp lemon juice
    1 tbsp chicken seasoning
    1 tsp garlic powder
    1 tsp dried oregano
    1 tsp smoked paprika
    1 tsp salt
    ½ tsp black pepper

    Step-by-step Instructions
    Pat chicken breasts dry with paper towels to remove excess moisture.

    In a bowl, mix olive oil, lemon juice, and all spices until well combined.

    Brush seasoning mixture evenly over chicken breasts on all sides.

    Preheat air fryer to 375°F. Place chicken in a single layer in the basket.

    Cook for 7 minutes, flip, then cook another 2–3 minutes until golden and internal temperature reaches 165°F.

    Remove and let rest for a few minutes before slicing and serving.

    Nutritional Information (per serving)
    Calories: 215 kcal
    Carbohydrates: 2 g
    Protein: 27 g
    Fat: 10 g
    Saturated Fat: 2 g
    Polyunsaturated Fat: 1 g
    Monounsaturated Fat: 6 g
    Trans Fat: 0.01 g
    Cholesterol: 80 mg
    Sodium: 728 mg
    Potassium: 507 mg
    Fiber: 1 g
    Sugar: 0.3 g
    Vitamin A: 320 IU
    Vitamin C: 5 mg
    Calcium: 28 mg
    Iron: 1 mg

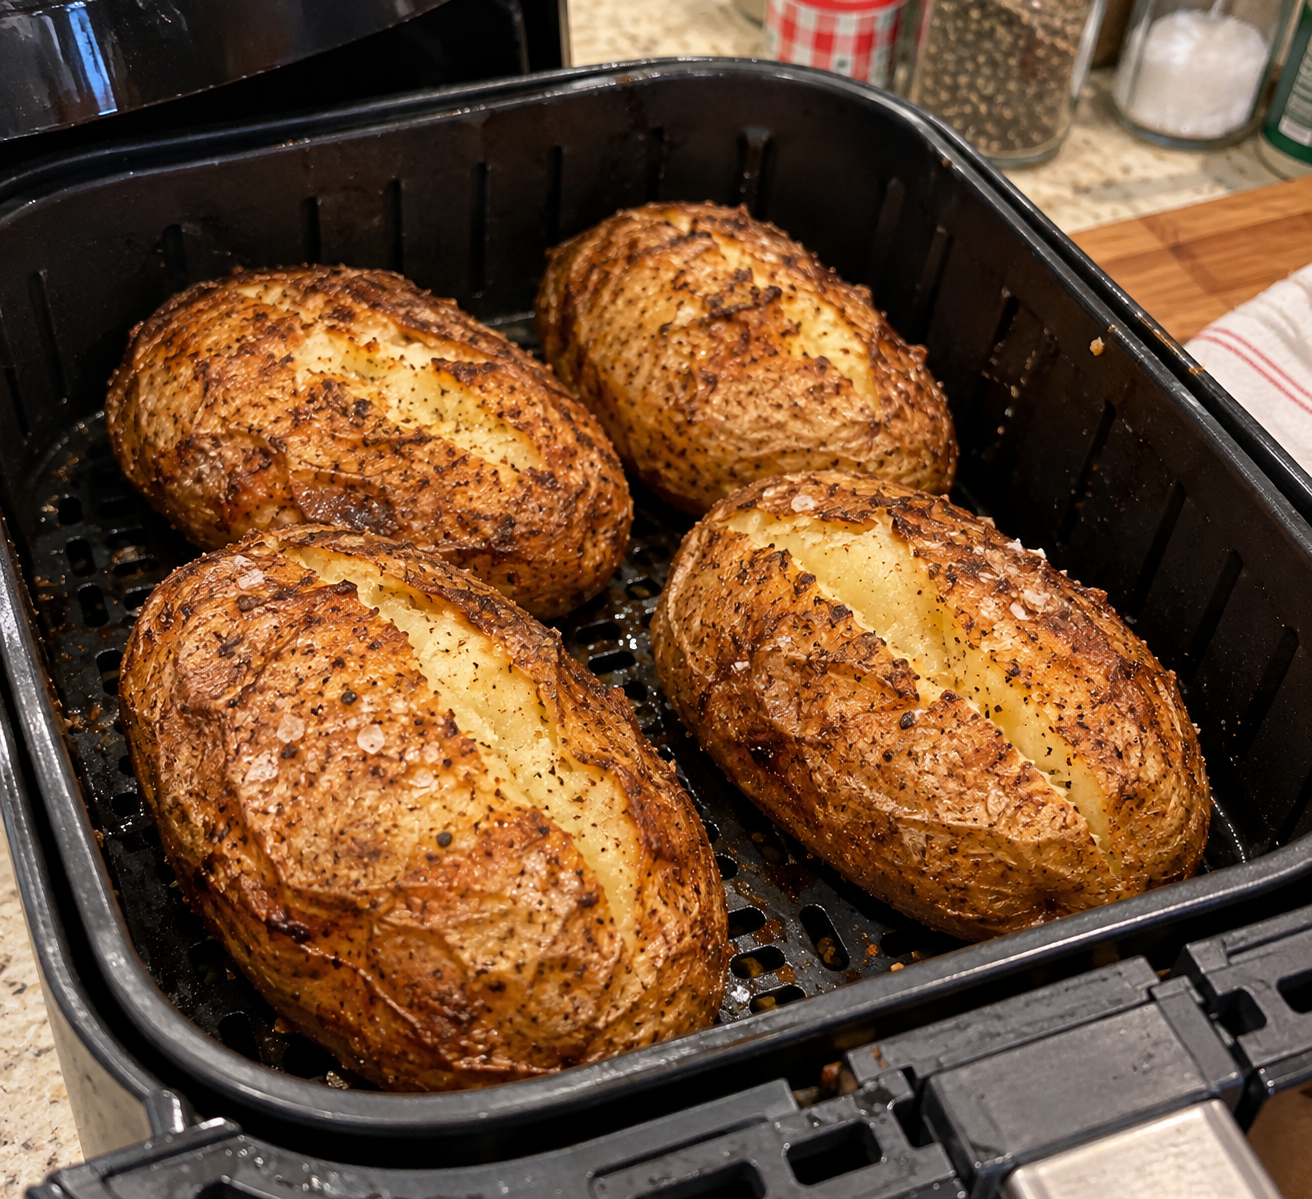
  • Air Fryer Baked Potato – Crispy Skin, Fluffy Center Perfect Every Time

    Air Fryer Baked Potatoes have become one of the most searched side dish recipes online because they deliver a perfect combination of crispy skin and fluffy interior with minimal effort. When users search for “best air fryer baked potato recipe,” “crispy baked potato air fryer method,” or “easy air fryer potato side dish,” this recipe consistently ranks high due to its simplicity and reliable results. The air fryer has revolutionized how baked potatoes are prepared by reducing cooking time while improving texture. Instead of waiting for a long oven bake, the air fryer creates a crispy, golden skin while keeping the inside soft and fluffy. This makes Air Fryer Baked Potatoes an ideal side dish for busy weeknight dinners, meal prep, or even a standalone loaded meal with toppings.

    Why Air Fryer Baked Potatoes Are Better Than Oven Baked Potatoes
    Air Fryer Baked Potatoes offer several advantages over traditional oven baking, which is why they are trending in searches like “quick baked potato air fryer recipe” and “crispy potato skin air fryer method.” The main difference is cooking efficiency and texture improvement. The air fryer circulates hot air around the potato, cooking it evenly from all sides while creating a crisp exterior without needing foil or long baking times. In a conventional oven, potatoes can take up to an hour or more, but the air fryer significantly reduces this time while still delivering a fluffy interior. Another benefit is energy efficiency, as air fryers heat up quickly and use less electricity. The result is a perfectly cooked potato with a restaurant-style texture that is both convenient and consistent every time.

    The Science Behind Crispy Skin and Fluffy Interior in Air Fryer Baked Potatoes
    The texture of Air Fryer Baked Potatoes comes from the way heat interacts with moisture inside the potato. Russet potatoes are ideal because they have a high starch content, which creates a fluffy interior when cooked. When exposed to circulating hot air, the outer skin dehydrates slightly, forming a crisp layer while the inside steams gently. This dual cooking effect is why people searching for “how to get crispy baked potato skin in air fryer” achieve better results compared to oven baking. Piercing the potato allows steam to escape, preventing bursting and ensuring even cooking. The olive oil coating enhances browning through the Maillard reaction, which is responsible for that golden, crispy skin. Together, these elements create the perfect contrast of crunchy exterior and soft, fluffy interior.

    Choosing the Best Potatoes for Air Fryer Baked Potato Recipe
    Selecting the right potatoes is essential for achieving perfect Air Fryer Baked Potatoes. Russet potatoes are the most recommended choice because of their thick skin and starchy texture, which produces a fluffy interior when cooked. Many users searching for “best potatoes for air fryer baked potatoes” prefer medium-sized russets because they cook evenly and fit well inside most air fryer baskets. Avoid waxy potatoes like red or baby potatoes, as they tend to remain firm and do not develop the same fluffy texture. Uniform size is also important because it ensures consistent cooking time. Larger potatoes may require additional minutes, while smaller ones may cook faster. Choosing high-quality potatoes ensures better texture, flavor, and overall cooking results in Air Fryer Baked Potato recipes.

    Ingredients Breakdown for Air Fryer Baked Potatoes Recipe
    This Air Fryer Baked Potatoes recipe uses simple, everyday ingredients that enhance natural potato flavor without overpowering it. Medium russet potatoes serve as the base ingredient, providing a starchy interior and crispable skin. Olive oil is used to coat the skin lightly, helping it crisp up during air frying while adding subtle richness. Salt enhances the natural flavor of the potato and helps create a seasoned crust. Black pepper adds a mild spicy note that balances the earthy flavor of the potato. Many people searching for “easy air fryer potato recipe ingredients” appreciate how minimal and accessible these ingredients are. Despite their simplicity, they combine to create a perfectly balanced side dish that is both flavorful and satisfying.

    How to Properly Prepare Potatoes for Air Frying Success
    Proper preparation is essential for making perfect Air Fryer Baked Potatoes. The process begins by thoroughly washing and scrubbing the potatoes to remove dirt from the skin, as the skin plays a key role in texture. After washing, the potatoes should be completely dried to ensure crisping during cooking. Piercing the potatoes with a fork is a crucial step because it allows steam to escape while cooking, preventing the potato from bursting. Many people searching for “how to prepare baked potatoes for air fryer” overlook this step, but it directly affects the final result. Once pierced, the potatoes are lightly coated with olive oil and seasoned with salt and pepper. This preparation ensures even cooking, crispy skin formation, and a fluffy interior once fully cooked.

    Step-by-Step Air Frying Method for Perfect Baked Potatoes
    Cooking Air Fryer Baked Potatoes is a straightforward process that delivers consistent results when done correctly. The air fryer is preheated to 400°F, which helps begin crisping the skin immediately upon cooking. The prepared potatoes are placed in a single layer in the basket to ensure proper air circulation. Cooking time typically ranges from 40 to 45 minutes, depending on potato size. Many users searching for “how long to cook baked potatoes in air fryer” find that flipping the potatoes halfway through ensures even cooking and consistent texture. The potatoes are ready when a fork easily pierces through the center. Once cooked, they should be carefully removed using oven mitts due to their high heat. This method guarantees crispy skin and a soft, fluffy interior every time.

    Expert Tips for Best Air Fryer Baked Potatoes Results
    Several expert tips can improve the outcome of Air Fryer Baked Potatoes significantly. Preheating the air fryer is important because it helps create immediate crisping on the potato skin. Choosing medium-sized russet potatoes ensures even cooking and consistent texture. Avoid overcrowding the air fryer basket, as proper airflow is essential for achieving crispy skin. Many people searching for “how to make crispy baked potatoes air fryer” also find that flipping halfway through cooking prevents soft or uneven spots. Lightly coating the skin with olive oil enhances browning and improves texture. Allowing the potatoes to rest for a few minutes after cooking helps redistribute heat and moisture inside. These simple techniques ensure that Air Fryer Baked Potatoes turn out perfectly every time.

    Creative Topping Ideas for Air Fryer Baked Potatoes
    Air Fryer Baked Potatoes are highly versatile and can be customized with a wide range of toppings to suit different tastes. Classic options include butter, sour cream, shredded cheese, and chopped chives, which enhance the creamy texture of the potato. Many users searching for “loaded baked potato air fryer ideas” enjoy adding bacon bits, steamed broccoli with cheese, or leftover chili for a more filling meal. For a spicy twist, toppings like jalapeños, hot sauce, or Cajun seasoning work well. Avocado, salsa, or guacamole can give a Tex-Mex style variation. These topping combinations make Air Fryer Baked Potatoes suitable for both simple side dishes and fully loaded main meals, offering endless customization options.

    Leftover Ideas and Meal Transformations Using Air Fryer Baked Potatoes
    Leftover Air Fryer Baked Potatoes can easily be transformed into new meals, making them a practical ingredient for meal planning. Many people searching for “leftover baked potato recipes” use them to create twice-baked potatoes by scooping out the inside, mixing it with cheese and seasonings, and baking again. They can also be diced for breakfast hash with eggs and vegetables or turned into crispy potato skins with toppings like bacon and cheese. Mashed potato cakes are another popular option, where leftover potatoes are shaped and pan-fried for a crunchy snack. They can also be added to soups for extra texture and thickness. These ideas help reduce food waste while creating new flavorful dishes from Air Fryer Baked Potatoes.

    Storage and Reheating Tips for Air Fryer Baked Potatoes
    Proper storage ensures Air Fryer Baked Potatoes maintain their quality after cooking. Once cooled, they should be wrapped or stored in an airtight container and kept in the refrigerator for up to three to four days. Many users searching for “how to reheat baked potatoes in air fryer” prefer using the air fryer again because it restores the crispy skin better than a microwave. Reheating at a moderate temperature for a few minutes helps bring back the original texture without drying out the inside. While freezing is possible, it may slightly affect texture, so refrigeration is preferred. Reheating in the air fryer ensures the potato regains its crisp exterior and fluffy interior, making leftovers almost as enjoyable as freshly cooked ones.

    Conclusion: Why Air Fryer Baked Potatoes Are a Must-Try Side Dish
    Air Fryer Baked Potatoes are one of the most reliable and satisfying side dishes because they combine simplicity, speed, and perfect texture. The air fryer method delivers consistently crispy skin and fluffy interiors without the long wait time of traditional oven baking. This recipe is ideal for beginners and experienced cooks alike due to its minimal ingredients and easy preparation. With endless topping options and creative variations, it can easily be turned into a complete meal or a simple side dish. Its popularity in searches like “easy air fryer potato recipes” and “crispy baked potato methods” continues to grow because it delivers consistent, restaurant-quality results at home. Air Fryer Baked Potatoes remain a timeless comfort food that fits any meal or occasion.

    Air Fryer Baked Potato Recipe

    Description
    Crispy skin Air Fryer Baked Potatoes with soft, fluffy interiors made using simple ingredients for a perfect side dish or loaded meal base.

    Preparation & Cooking Duration
    Prep Time: 3 minutes
    Cook Time: 40 minutes
    Total Time: 43 minutes

    Serving
    Serves: 4

    Ingredients
    4 medium russet potatoes
    1 tablespoon olive oil
    ½ teaspoon salt
    ¼ teaspoon black pepper

    Step-by-step Instructions
    Wash and scrub potatoes thoroughly, then pat dry completely.

    Pierce each potato 8–10 times with a fork to allow steam to escape.

    Rub potatoes with olive oil and season with salt and black pepper.

    Preheat air fryer to 400°F. Place potatoes in a single layer in the basket.

    Cook for 40–45 minutes, flipping halfway through, until skin is crispy and inside is soft.

    Remove carefully, let cool slightly, then slice open and serve with desired toppings.

    Nutritional Information (per serving)
    Calories: 200 kcal
    Carbohydrates: 39 g
    Protein: 5 g
    Fat: 4 g
    Saturated Fat: 1 g
    Polyunsaturated Fat: 0.5 g
    Monounsaturated Fat: 3 g
    Sodium: 301 mg
    Potassium: 890 mg
    Fiber: 3 g
    Sugar: 1 g
    Vitamin A: 3 IU
    Vitamin C: 12 mg
    Calcium: 28 mg
    Iron: 2 mg

  • Air Fryer Grilled Cheese Sandwich – The Ultimate Crispy, Gooey Comfort Food Recipe


    Air Fryer Grilled Cheese Sandwiches have become one of the most searched comfort food recipes online because they combine simplicity, speed, and rich flavor in a way that appeals to all age groups. When people look for terms like “best air fryer grilled cheese,” “crispy grilled cheese sandwich air fryer,” or “easy lunch air fryer recipes,” this dish consistently ranks high due to its perfect balance of crunchy golden bread and melted cheesy center. The air fryer method has transformed the traditional grilled cheese experience by removing the need for constant stovetop attention while still delivering an evenly toasted exterior. Instead of standing over a pan, you can now prepare a restaurant-quality sandwich with minimal effort. This makes Air Fryer Grilled Cheese Sandwiches an ideal option for quick lunches, easy dinners, and comforting snacks that fit modern busy lifestyles.

    Why Air Fryer Grilled Cheese Sandwiches Are Better Than Stovetop Versions
    Air Fryer Grilled Cheese Sandwiches offer several advantages over the traditional stovetop method, making them a popular choice among home cooks searching for “easy grilled cheese air fryer recipe” or “crispy sandwich without pan frying.” On the stovetop, grilled cheese requires constant monitoring to avoid burning or uneven browning. In contrast, the air fryer uses circulating hot air to cook both sides evenly, reducing the need for flipping and supervision. This makes it especially convenient for beginners or kids learning to cook safely. The air fryer also produces a more consistent crisp texture because heat surrounds the sandwich from all angles. Additionally, it reduces the risk of using excessive butter, which can sometimes make sandwiches greasy or soggy. The result is a perfectly golden, crunchy exterior with a warm, melty interior that delivers comfort food satisfaction with less effort.

    The Secret to Perfect Texture in Air Fryer Grilled Cheese Sandwiches
    The key to achieving the ideal Air Fryer Grilled Cheese Sandwich lies in understanding how heat, butter, and cheese interact during cooking. The air fryer works by circulating hot air rapidly around the sandwich, creating even browning without the need for excess oil. Many people searching for “how to make grilled cheese crispy in air fryer” often overlook the importance of butter distribution and bread thickness. A thin, even layer of butter helps the bread toast properly while preventing dryness. The circulating heat crisps the outer surface while allowing the cheese inside to slowly melt into a smooth, gooey consistency. The timing is also crucial because overcooking can cause dryness, while undercooking may leave the cheese unmelted. When balanced correctly, the result is a perfectly golden crust with stretchy melted cheese inside, making Air Fryer Grilled Cheese Sandwiches one of the most satisfying quick meals.

    Choosing the Best Bread for Air Fryer Grilled Cheese Sandwiches
    Selecting the right bread plays a major role in the success of Air Fryer Grilled Cheese Sandwiches. Many people searching for “best bread for grilled cheese air fryer” prefer sturdy options like sourdough or rustic Italian bread because they hold their structure during air frying. Thin or soft bread may become too delicate under circulating heat and fail to crisp properly. A thickness of at least half an inch is ideal for achieving a balance between crunch and softness. Bread shape also matters depending on air fryer basket size, as round artisan loaves often fit better than square slices when cooking multiple sandwiches at once. The structure of the bread determines how well it absorbs butter and supports melted cheese, making it an essential factor in achieving the perfect Air Fryer Grilled Cheese Sandwich texture.

    Best Cheese Combinations for Air Fryer Grilled Cheese Sandwiches
    Cheese selection is one of the most important aspects of creating flavorful Air Fryer Grilled Cheese Sandwiches. Many users searching for “best cheese for grilled cheese air fryer recipe” prefer a combination of sharp cheddar and smoked gouda because it balances bold flavor with creamy meltability. Cheddar provides a rich, tangy taste, while gouda adds a smooth, smoky depth that enhances the overall sandwich profile. Havarti or Monterey Jack can also be used for extra creaminess. Freshly grated cheese melts more evenly compared to pre-packaged slices, which sometimes contain anti-caking agents that affect texture. However, sliced cheese can still work well if layered properly. Using a blend of cheeses ensures a more complex flavor and better melt consistency, making Air Fryer Grilled Cheese Sandwiches more enjoyable and restaurant-quality in taste.

    How Mayo and Mustard Elevate Air Fryer Grilled Cheese Sandwich Flavor
    Adding mayo and Dijon mustard to Air Fryer Grilled Cheese Sandwiches is a simple yet powerful way to enhance flavor and texture. Many people searching for “grilled cheese sandwich flavor upgrade” or “best air fryer sandwich recipe ideas” discover that these spreads add both moisture and depth. Mayonnaise contributes a creamy richness that helps the bread crisp evenly during air frying, while Dijon mustard introduces a slight tangy sharpness that cuts through the richness of the cheese. This combination creates a more balanced and flavorful bite compared to using butter alone inside the sandwich. The spreads also help the cheese adhere better, ensuring even distribution when melted. This small adjustment elevates Air Fryer Grilled Cheese Sandwiches from simple comfort food to a more gourmet-style experience without adding complexity to the preparation.

    Step-by-Step Air Frying Method for Perfect Grilled Cheese Sandwiches
    Cooking Air Fryer Grilled Cheese Sandwiches is a straightforward process that delivers consistent results when followed correctly. The sandwich is assembled with cheese and spreads, then buttered lightly on the outside before being placed in a preheated air fryer. Cooking at 390°F allows the bread to crisp quickly while the cheese melts evenly inside. Many users searching for “how long to cook grilled cheese in air fryer” find that four minutes per side is the ideal timing range. Flipping the sandwich halfway ensures both sides achieve a golden-brown crust. The key is maintaining enough space between sandwiches for proper air circulation. Once cooked, allowing the sandwich to rest for a minute or two helps the cheese set slightly, preventing it from spilling out when sliced. This method guarantees a crispy exterior and perfectly melted interior every time.

    Common Mistakes to Avoid When Making Air Fryer Grilled Cheese Sandwiches
    Several common mistakes can affect the quality of Air Fryer Grilled Cheese Sandwiches. One frequent error is using too much butter, which can make the bread greasy instead of crispy. Another mistake is skipping preheating, which can result in uneven browning. Overstuffing the sandwich with cheese or fillings may also prevent proper melting and cause spillage. Many people searching for “why is my air fryer grilled cheese soggy” often discover that excess moisture or thick spreads are the cause. Not flipping the sandwich during cooking can lead to uneven crispiness. Additionally, using very soft bread may result in collapse or lack of structure. Avoiding these mistakes ensures that Air Fryer Grilled Cheese Sandwiches come out perfectly golden, crispy, and evenly melted every time.

    Creative Add-Ins and Variations for Air Fryer Grilled Cheese Sandwiches
    Air Fryer Grilled Cheese Sandwiches are highly versatile and can be customized with a variety of ingredients to suit different tastes. Many people searching for “grilled cheese sandwich variations air fryer” enjoy adding sliced pickles, sautéed mushrooms, caramelized onions, or crispy bacon for extra flavor. Spicy variations can include jalapeños or hot sauce, while sweet-savory versions may use jam or honey. These additions enhance the sandwich without compromising its crispy texture. Sauerkraut and ham can create a Reuben-style twist, while candied jalapeños add a sweet heat contrast. The flexibility of this recipe makes it suitable for both simple snacks and gourmet-style creations. These variations ensure that Air Fryer Grilled Cheese Sandwiches never feel repetitive and can be adapted to any craving or occasion.

    Storage and Reheating Tips for Air Fryer Grilled Cheese Sandwiches
    Proper storage helps maintain the quality of Air Fryer Grilled Cheese Sandwiches after cooking. Once cooled, they should be stored in an airtight container in the refrigerator for up to two days. Many people searching for “how to reheat grilled cheese in air fryer” prefer using the air fryer again because it restores crispiness better than a microwave. Reheating at a lower temperature for a few minutes helps bring back the golden texture without drying out the cheese. While freezing is possible, it may slightly affect texture, so fresh consumption is recommended. Reheating in the air fryer ensures the sandwich regains its original crunch while keeping the cheese soft and melty inside, making leftovers almost as enjoyable as freshly made ones.

    Conclusion: Why Air Fryer Grilled Cheese Sandwiches Are the Perfect Comfort Food
    Air Fryer Grilled Cheese Sandwiches are the ultimate combination of simplicity, flavor, and convenience. They deliver everything people love about comfort food—crispy bread, melted cheese, and rich buttery taste—without the hassle of stovetop cooking. The air fryer ensures even cooking, consistent texture, and minimal effort, making this recipe ideal for busy individuals, beginners, and families alike. With endless customization options and reliable results, it is easy to see why this dish ranks highly in searches like “easy air fryer lunch recipes” and “best grilled cheese sandwich ideas.” Whether enjoyed plain or upgraded with creative fillings, Air Fryer Grilled Cheese Sandwiches remain one of the most satisfying and dependable recipes in modern home cooking.

    Air Fryer Grilled Cheese Sandwich Recipe

    Description
    Crispy golden Air Fryer Grilled Cheese Sandwich filled with melted smoked gouda and sharp cheddar, enhanced with mayo and Dijon mustard for extra flavor.

    Preparation & Cooking Duration
    Prep Time: 5 minutes
    Cook Time: 10 minutes
    Total Time: 15 minutes

    Serving
    Serves: 2

    Ingredients
    4 slices sourdough bread
    2 tablespoons mayonnaise
    1 tablespoon Dijon mustard
    ½ cup grated smoked gouda
    ½ cup grated sharp cheddar
    1½ tablespoons softened butter

    Step-by-step Instructions
    Spread mayonnaise and Dijon mustard evenly on one side of each bread slice.

    Divide smoked gouda and sharp cheddar evenly over two slices of bread, then top with remaining slices (spread side facing in).

    Butter the outside of each sandwich lightly.

    Preheat air fryer to 390°F. Place sandwiches in basket and cook for 4 minutes.

    Flip sandwiches and cook another 4 to 6 minutes until golden brown and cheese is fully melted.

    Let rest for 1–2 minutes, slice, and serve warm.

    Nutritional Information (per serving)
    Calories: 348 kcal
    Carbohydrates: 26 g
    Protein: 19 g
    Fat: 19 g
    Saturated Fat: 11 g
    Trans Fat: 1 g
    Cholesterol: 112 mg
    Sodium: 727 mg
    Potassium: 95 mg
    Fiber: 1 g
    Sugar: 1 g
    Vitamin A: 156 IU
    Vitamin C: 1 mg
    Calcium: 95 mg
    Iron: 2 mg

  • Air Fryer Mozzarella Sticks

    Introduction to Air Fryer Mozzarella Sticks and Why They Are a Viral Appetizer Trend
    Air Fryer Mozzarella Sticks have become one of the most searched snack and appetizer recipes on Google because they combine simplicity, speed, and indulgent flavor in a way that appeals to almost everyone. When people look for terms like “easy air fryer appetizers,” “crispy mozzarella sticks at home,” or “air fryer cheese snacks,” this recipe consistently appears because it delivers restaurant-style results without deep frying. The air fryer method has changed home cooking by allowing users to achieve a golden crunchy crust with minimal oil while keeping the inside perfectly melted and stretchy. This combination of texture contrast is what makes mozzarella sticks so addictive. Instead of buying frozen packaged versions, more home cooks are now turning to homemade Air Fryer Mozzarella Sticks because they offer better taste, fresher ingredients, and full control over seasoning and quality.

    Why Air Fryer Mozzarella Sticks Are Better Than Deep Fried or Frozen Versions
    Air Fryer Mozzarella Sticks stand out compared to traditional deep-fried or store-bought frozen versions because they are lighter, fresher, and more customizable. Many users searching for “homemade mozzarella sticks recipe” or “healthy air fryer snacks” prefer making them at home because they can avoid preservatives and excess oil found in packaged foods. Deep frying often results in greasy coating and inconsistent melting, while frozen options lack freshness and texture. The air fryer solves both problems by circulating hot air evenly around the cheese sticks, creating a crisp golden shell without submerging them in oil. This makes the snack feel indulgent but less heavy. Homemade versions also allow you to adjust seasoning, choose better cheese quality, and control portion size, making Air Fryer Mozzarella Sticks a smarter and more satisfying choice for everyday snacking.

    The Science Behind Crispy Outside and Gooey Inside Mozzarella Sticks
    The success of Air Fryer Mozzarella Sticks depends on achieving a precise balance between heat, coating, and freezing. The air fryer works by circulating hot air rapidly around the food, creating a convection effect that mimics deep frying but with far less oil. This is why searches like “how to keep cheese from leaking in air fryer” are so common. The key is freezing the coated sticks before cooking, which solidifies the cheese and prevents it from melting too quickly. The breadcrumb coating forms a protective layer that crisps first while the cheese slowly softens inside. This timing difference is essential for the signature stretchy cheese pull. Without this balance, the cheese would either leak out or not melt properly. When done correctly, Air Fryer Mozzarella Sticks deliver a perfect contrast of crunchy exterior and molten interior in every bite.

    Choosing the Best Cheese for Air Fryer Mozzarella Sticks
    Selecting the right cheese is one of the most important steps in making perfect Air Fryer Mozzarella Sticks. Mozzarella string cheese is the most commonly used option because it melts evenly, holds structure well, and is easy to coat. Many people searching for “best cheese for mozzarella sticks air fryer recipe” prefer string cheese because it comes in uniform sizes, making preparation simple and consistent. Mozzarella has a mild flavor that pairs beautifully with seasoned breadcrumbs and spices, allowing the coating to shine without overpowering the dish. While variations like cheddar or flavored cheese sticks exist, mozzarella remains the classic choice due to its stretchiness and smooth melting behavior. Choosing high-quality cheese ensures better texture, fewer leaks, and that iconic gooey cheese pull that defines Air Fryer Mozzarella Sticks.

    Ingredients Breakdown for Air Fryer Mozzarella Sticks Recipe
    This Air Fryer Mozzarella Sticks recipe uses simple, everyday ingredients that come together to create a crunchy exterior and creamy interior. Mozzarella cheese strings are the core ingredient, providing the melty center that makes this snack so popular. Eggs are used to bind the coating layers together, helping breadcrumbs stick evenly. All-purpose flour creates the first dry layer that improves adhesion. Seasoned breadcrumbs provide flavor, while Panko breadcrumbs add extra crunch for a crispy bite. Vegetable oil helps enhance browning during air frying, giving a golden finish. Garlic powder adds savory depth, while salt and black pepper balance the overall taste. These basic ingredients are commonly searched under “easy air fryer cheese sticks recipe” and “crispy mozzarella snack ideas,” making this recipe both accessible and highly appealing.

    How to Properly Coat Mozzarella Sticks for Maximum Crispiness
    Proper coating technique is essential for successful Air Fryer Mozzarella Sticks that hold their shape during cooking. The process begins by dipping each cheese stick into flour, which creates a dry base layer. Next, it is dipped into beaten eggs, which act as a glue for the breadcrumbs. The stick is then coated in a mixture of seasoned breadcrumbs and Panko for crunch. Many people searching for “how to bread mozzarella sticks properly” or “air fryer cheese sticks not leaking” find that repeating the egg and breadcrumb layers is the secret to success. A double coating forms a stronger shell that prevents cheese from escaping during cooking. Once coated, freezing is required to lock the structure in place. This preparation step is what ensures Air Fryer Mozzarella Sticks come out crispy, intact, and perfectly melted inside.

    Freezing Technique for Perfect Air Fryer Mozzarella Sticks Every Time
    Freezing is one of the most critical steps in making Air Fryer Mozzarella Sticks successfully. After coating, the sticks must be placed in the freezer for at least 30 to 40 minutes to firm up the cheese and set the coating. This step is widely searched under phrases like “why freeze mozzarella sticks before air frying” because it directly affects the final result. Without freezing, the cheese melts too quickly and escapes the coating before it has time to crisp. Freezing ensures that the outer layer becomes firm while the inside remains solid until cooking begins. This controlled melting process is what creates the perfect gooey center. It also helps the coating stay intact during air frying, preventing mess and ensuring consistent results. Proper freezing transforms simple ingredients into restaurant-quality Air Fryer Mozzarella Sticks.

    Step-by-Step Air Frying Method for Crispy Mozzarella Sticks
    Cooking Air Fryer Mozzarella Sticks requires precise timing to achieve the ideal texture. Once frozen, the sticks are placed in a preheated air fryer set at 390°F. They should be arranged in a single layer to allow proper airflow. The cooking time is usually 5 to 7 minutes, depending on the air fryer model. Many people searching for “how long to cook mozzarella sticks in air fryer” prefer checking them early to avoid cheese leakage. As the coating turns golden brown and slightly crisp, the cheese inside begins to melt perfectly. It is important not to overcook them, as this may cause bursting. The air fryer’s rapid heat ensures that the crust becomes crispy quickly while the interior stays soft and stretchy, delivering the signature texture of Air Fryer Mozzarella Sticks.

    Dipping Sauces and Serving Ideas for Air Fryer Mozzarella Sticks
    Air Fryer Mozzarella Sticks are incredibly versatile when it comes to serving options and dipping sauces. Marinara sauce is the most classic pairing, offering a tangy tomato flavor that balances the richness of melted cheese. Many users searching for “best dips for mozzarella sticks” also enjoy garlic aioli, ranch dressing, or spicy mayo for added variety. Buffalo sauce and sriracha mayo provide a spicy kick for those who prefer bold flavors. These mozzarella sticks are commonly served at parties, game nights, and family gatherings because they are easy to share and always popular. Their crispy exterior and gooey center make them suitable for both casual snacking and festive occasions. The flexibility of dipping options makes Air Fryer Mozzarella Sticks a universal favorite across different taste preferences.

    Common Mistakes to Avoid When Making Air Fryer Mozzarella Sticks
    Several mistakes can affect the outcome of Air Fryer Mozzarella Sticks, especially for beginners. One of the most common errors is skipping the freezing step, which causes cheese to leak during cooking. Another mistake is not using a double coating, which weakens the crust and increases the risk of bursting. Overcrowding the air fryer basket is also a frequent issue, as it prevents proper airflow and leads to uneven cooking. Some users also fail to preheat the air fryer, which affects crispiness. Cooking at incorrect temperatures can result in either burnt coating or under-melted cheese. Searches like “why do mozzarella sticks explode in air fryer” often relate to these issues. Avoiding these mistakes ensures consistent results with crispy coating and perfectly melted cheese inside every time.

    Storage and Reheating Tips for Air Fryer Mozzarella Sticks
    Proper storage helps maintain the quality of Air Fryer Mozzarella Sticks after cooking. Once cooled, they should be stored in an airtight container in the refrigerator for up to three to four days. When reheating, the air fryer is the best method because it restores crispiness without making them soggy. Reheating at 350°F for a few minutes is usually enough to bring them back to life. Many people searching for “how to reheat mozzarella sticks in air fryer” prefer this method over microwaving because it maintains texture. Uncooked, breaded mozzarella sticks can also be frozen for up to six months and cooked directly from frozen without thawing. This makes them a convenient make-ahead snack option for busy days or unexpected guests.

    Conclusion: Why Air Fryer Mozzarella Sticks Are a Must-Try Snack
    Air Fryer Mozzarella Sticks are one of the most satisfying and reliable air fryer snacks because they combine crispy texture, gooey cheese, and quick preparation in a single recipe. They are easy to make, customizable, and perfect for a wide range of occasions, from parties to casual snacking. The air fryer ensures consistent results with minimal effort, making this recipe ideal for beginners and experienced cooks alike. With simple ingredients and proper technique, anyone can achieve restaurant-quality mozzarella sticks at home. Their growing popularity in searches like “easy air fryer appetizers” and “homemade cheese sticks recipe” shows how loved this snack has become. Whether paired with marinara or creative dips, Air Fryer Mozzarella Sticks remain a timeless favorite.

    Air Fryer Mozzarella Sticks Recipe

    Description
    Crispy Air Fryer Mozzarella Sticks with a golden crunchy coating and a warm, gooey melted cheese center. A quick homemade appetizer perfect for snacks, parties, and game nights.

    Preparation & Cooking Duration
    Prep Time: 10 minutes
    Freeze Time: 40 minutes
    Cook Time: 10 minutes
    Total Time: 1 hour

    Serving
    Serves: 4

    Ingredients
    8 mozzarella cheese strings
    2 eggs
    ½ cup seasoned bread crumbs
    ½ cup Panko bread crumbs
    1 tablespoon vegetable oil
    ½ teaspoon garlic powder
    ⅓ cup all-purpose flour
    salt and black pepper to taste

    Step-by-step Instructions
    Cut mozzarella cheese strings in half.

    Whisk eggs with 1 tablespoon water. In separate bowls, prepare flour with salt and pepper, and mix breadcrumbs, Panko, vegetable oil, and garlic powder.

    Dip each cheese piece into flour, then egg mixture, then breadcrumb mixture. Repeat egg and breadcrumb coating for extra crispness.

    Place coated sticks on a tray and freeze for at least 30 minutes.

    Preheat air fryer to 390°F. Arrange frozen sticks in a single layer.

    Cook for 5 to 7 minutes until golden and crispy.

    Serve immediately with marinara or preferred dipping sauce.

    Nutritional Information (per serving)
    Calories: 348 kcal
    Carbohydrates: 26 g
    Protein: 19 g
    Fat: 19 g
    Saturated Fat: 11 g
    Trans Fat: 1 g
    Cholesterol: 112 mg
    Sodium: 727 mg
    Potassium: 95 mg
    Fiber: 1 g
    Sugar: 1 g
    Vitamin A: 156 IU
    Vitamin C: 1 mg
    Calcium: 95 mg
    Iron: 2 mg

  • Air Fryer Corn Ribs Recipe

    Introduction to Air Fryer Corn Ribs and Why This Viral Recipe Is So Popular
    Air Fryer Corn Ribs have quickly become one of the most searched viral food trends because they transform ordinary corn on the cob into a fun, restaurant-style snack with bold flavor and crispy edges. This Air Fryer Corn Ribs recipe is especially popular among people searching for “easy air fryer snacks,” “corn ribs recipe air fryer,” and “healthy corn appetizer ideas.” The unique cutting style, where corn is sliced into rib-like strips, allows the kernels to curl slightly during cooking, creating a juicy yet crispy texture that is both visually appealing and delicious. The air fryer method makes this recipe faster and less messy than grilling or deep frying, while still delivering that smoky, charred flavor people love. With simple seasoning and quick cooking time, Air Fryer Corn Ribs are becoming a favorite side dish and party snack across home kitchens worldwide.

    What Makes Air Fryer Corn Ribs a Game-Changer in Modern Cooking
    Air Fryer Corn Ribs stand out because they completely reinvent the way corn is served and enjoyed. Instead of eating corn on the cob in the traditional way, this recipe transforms it into bite-sized rib-style pieces that are easier to eat and more flavorful in every bite. Many people searching for “creative corn recipes” or “air fryer vegetable snacks” are drawn to this dish because it offers both novelty and convenience. The air fryer enhances the natural sweetness of corn by caramelizing its sugars, creating a slightly smoky flavor without the need for a grill. The hot circulating air ensures even cooking and crisp edges, which makes each rib tender inside and lightly charred outside. This modern cooking technique turns a simple vegetable into a visually striking appetizer that fits perfectly into casual meals, BBQ parties, or game-day snack spreads.

    Health Benefits of Corn and Why Air Fryer Corn Ribs Are a Better Choice
    Corn is a naturally nutritious ingredient, making Air Fryer Corn Ribs not only delicious but also a smart food choice when prepared with minimal oil. Corn is rich in fiber, which supports digestion and helps maintain gut health. It also contains essential nutrients like vitamin C, magnesium, and antioxidants that contribute to overall wellness. Many people searching for “healthy air fryer snacks” or “low-fat vegetable recipes” prefer corn ribs because they offer satisfying flavor without heavy frying. The air fryer method significantly reduces the amount of oil needed compared to traditional frying, making this dish lighter while still crispy. Additionally, corn provides natural energy through carbohydrates, making it a great option for quick snacks or side dishes. When paired with balanced seasoning, Air Fryer Corn Ribs become a wholesome and enjoyable way to include vegetables in your diet without sacrificing taste.

    Why the Air Fryer Method Works Best for Corn Ribs
    The air fryer is the ideal cooking method for Corn Ribs because it combines speed, crispiness, and even heat distribution. Unlike boiling, which softens corn too much, or grilling, which requires outdoor setup and longer cooking time, the air fryer delivers consistent results in minutes. Many users searching for “best way to cook corn in air fryer” or “crispy corn ribs recipe” prefer this method because it creates a perfect balance between tenderness and char. The circulating hot air caramelizes the natural sugars in the corn, enhancing its sweetness while forming a slightly crisp outer layer. This cooking environment also helps the seasoning stick better to each kernel, ensuring maximum flavor in every bite. The compact size of the air fryer allows efficient heat circulation, meaning every corn rib gets evenly cooked without the need for constant supervision or flipping.

    Choosing the Best Corn for Air Fryer Corn Ribs Recipe
    Selecting the right corn is an important step for achieving the best Air Fryer Corn Ribs. Fresh corn on the cob is highly recommended because it offers juicy kernels and natural sweetness that enhance the final flavor. When browsing for corn, it is best to choose ears with bright green husks and plump kernels that are tightly packed. Many people searching for “best corn for air fryer recipes” or “how to pick fresh corn” often overlook freshness, but it directly impacts texture and taste. Avoid corn with dry or shriveled kernels, as they may not caramelize properly in the air fryer. Uniform-sized cobs are also helpful because they cook more evenly when cut into rib sections. Fresh corn ensures that each rib becomes tender on the inside while developing a lightly crisp exterior, which is essential for achieving the signature Air Fryer Corn Ribs texture.

    Ingredients Breakdown for Air Fryer Corn Ribs Recipe
    This Air Fryer Corn Ribs recipe uses simple pantry ingredients that work together to enhance the natural sweetness of corn while adding smoky, savory depth. Fresh corn on the cob serves as the main ingredient and forms the base of this dish. Vegetable oil helps coat the corn evenly, allowing spices to stick and promoting golden browning during air frying. Paprika, whether sweet or smoked, adds color and a mild smoky flavor that enhances the corn’s natural taste. Garlic powder provides a savory aroma that complements the sweetness of corn, while salt and black pepper balance the overall flavor profile. Butter is used to create a rich finishing glaze, and minced garlic adds a bold, aromatic touch. This combination of ingredients makes the recipe highly searchable under keywords like “easy air fryer corn recipe,” “garlic butter corn ribs,” and “crispy seasoned corn snacks.”

    How to Properly Cut Corn into Rib-Style Pieces Safely and Correctly
    Cutting corn into rib-shaped pieces is the most important step in preparing Air Fryer Corn Ribs, and it requires careful handling to ensure safety and consistency. The process begins by removing the husk and silk completely from each ear of corn. The cob is then cut in half to create shorter sections, making it easier to handle. Each half is placed upright on a stable surface, and a sharp knife is used to carefully slice it down the center. Each resulting piece is then cut again to create four long rib-like sections. Many people searching for “how to cut corn ribs safely” or “corn ribs air fryer preparation” emphasize the importance of using a strong cutting board and stable grip. Wearing a protective glove can also help reduce risk. Once cut properly, the corn pieces resemble ribs, which allows them to curl slightly during cooking and achieve their signature crispy texture.

    Seasoning Techniques to Enhance Flavor in Air Fryer Corn Ribs
    Seasoning plays a crucial role in transforming Air Fryer Corn Ribs from simple corn pieces into a flavorful snack. The combination of paprika, garlic powder, salt, and black pepper creates a balanced seasoning mix that enhances both sweetness and smokiness. Coating the corn evenly with vegetable oil helps the spices adhere to every surface, ensuring consistent flavor in every bite. Many people searching for “best seasoning for corn ribs” or “air fryer corn flavor ideas” experiment with different spice levels, but the basic blend remains the most reliable. Allowing the seasoned corn to rest for a few minutes before cooking helps the flavors absorb more deeply into the kernels. This step ensures that the seasoning is not just on the surface but infused throughout the corn, resulting in a more intense and satisfying taste after air frying.

    Step-by-Step Air Frying Process for Perfect Corn Ribs
    Cooking Air Fryer Corn Ribs is a simple process that delivers impressive results when done correctly. After seasoning, the corn ribs are placed in a preheated air fryer set at 375°F. It is important to arrange them in a single layer to ensure proper air circulation. The first stage of cooking typically takes around 8 to 10 minutes, during which the corn begins to turn golden and slightly crispy. Halfway through cooking, the corn should be turned or shaken to ensure even browning on all sides. While the corn is cooking, garlic butter is prepared by melting butter and mixing it with minced garlic. Once the corn ribs are fully cooked and lightly charred, they are brushed or tossed in the garlic butter mixture. This final step enhances flavor and adds a rich, glossy finish that makes Air Fryer Corn Ribs even more irresistible.

    Flavor Variations and Serving Ideas for Air Fryer Corn Ribs
    Air Fryer Corn Ribs can be customized in many ways, making them suitable for different taste preferences and occasions. For a smoky BBQ flavor, additional smoked paprika or chili powder can be added. For a creamy twist, garlic aioli is a popular dipping sauce among those searching for “corn ribs dipping sauce ideas.” Sweet versions can be created by drizzling honey or maple syrup over the cooked ribs, adding a contrast between sweet and savory flavors. Cheese lovers often add Parmesan for a salty umami finish, while spicy variations can include chili flakes or hot sauce. These variations make the dish highly versatile for parties, barbecues, or casual family meals. Because of their unique shape and flavor, Air Fryer Corn Ribs are often served as appetizers, side dishes, or even as a fun snack option during gatherings.

    Storage and Reheating Tips for Air Fryer Corn Ribs
    Proper storage helps maintain the flavor and texture of Air Fryer Corn Ribs after cooking. Once cooled, they should be stored in an airtight container and kept in the refrigerator for up to two to three days. When reheating, the air fryer is again the best method, as it restores crispiness without making the corn soggy. Heating at 375°F for a few minutes helps bring back the original texture. Many people searching for “how to reheat corn ribs” prefer air frying over microwaving because it maintains better quality. Freezing is generally not recommended, as corn tends to lose its texture after thawing. Following proper storage methods ensures that leftover corn ribs remain enjoyable and flavorful even after the initial serving.

    Conclusion: Why Air Fryer Corn Ribs Are a Must-Try Recipe
    Air Fryer Corn Ribs are more than just a trendy recipe; they represent a creative and flavorful way to enjoy a classic vegetable. Their crispy edges, juicy kernels, and bold seasoning make them a standout dish for any occasion. This recipe is easy to prepare, quick to cook, and highly customizable, making it suitable for beginners and experienced cooks alike. The air fryer method ensures consistent results with minimal effort, which is why this dish continues to gain popularity in search trends related to “easy air fryer recipes” and “creative corn dishes.” Whether served as a snack, appetizer, or side dish, Air Fryer Corn Ribs deliver a satisfying combination of texture and flavor that keeps people coming back for more.

    Air Fryer Corn Ribs Recipe

    Description
    Crispy, buttery, and flavor-packed Air Fryer Corn Ribs made from fresh corn on the cob, seasoned with smoky spices and finished with garlic butter for a delicious snack or appetizer.

    Preparation & Cooking Duration
    Preparation Time: 10 minutes
    Cooking Time: 10 minutes
    Total Time: 20 minutes

    Serving
    Servings: 4

    Ingredients
    4 ears corn (husks removed)
    vegetable oil (as needed for coating)
    2 teaspoons sweet or smoked paprika
    2 teaspoons garlic powder
    1/2 teaspoon salt
    1/2 teaspoon ground black pepper
    3 ounces butter
    1 teaspoon minced garlic

    Step-by-step Instructions
    Remove husks and silk from corn. Cut each cob in half, then carefully slice each half lengthwise to create rib-shaped pieces using a sharp knife.

    Coat corn pieces with vegetable oil in a large bowl.

    In a separate bowl, mix paprika, garlic powder, salt, and black pepper. Sprinkle evenly over corn and toss to coat thoroughly.

    Preheat air fryer to 375°F. Arrange corn ribs in a single layer in the basket. Cook for 8 to 10 minutes until golden and slightly charred, shaking halfway through for even cooking.

    While corn cooks, melt butter and mix with minced garlic to create garlic butter sauce.

    Once cooked, brush or drizzle garlic butter over corn ribs and serve immediately.

    Nutritional Information (per serving)
    Calories: 193 kcal
    Carbohydrates: 2 g
    Protein: 1 g
    Fat: 21 g
    Saturated Fat: 11 g
    Polyunsaturated Fat: 3 g
    Monounsaturated Fat: 5 g
    Trans Fat: 1 g
    Cholesterol: 46 mg
    Sodium: 429 mg
    Potassium: 54 mg
    Fiber: 1 g
    Sugar: 0.2 g
    Vitamin A: 1028 IU
    Vitamin C: 0.3 mg
    Calcium: 11 mg
    Iron: 0.3 mghttps://chatgpt.com/backend-api/sentinel/frame.html?sv=20260423af3cRs0